Blog
The solution is reusable and can be used to solve similar problems. In this article we are going to focus on design patterns focused on video game programming.
Some history
Design patterns emerge from the world of architecture when in 1979 architect and mathematician, Christopher Alexander publishes the book ‘The Timeless Way of Building’. In the author’s words:
Each pattern describes a problem that occurs an infinite number of times in our environment, as well as the solution to it, so that we can use this solution a million times later without having to rethink it again.
Inspired by the ancient medieval cities, he published with other colleagues his next book ‘A Pattern Language’, where he formalizes the idea of a design pattern as a solution to a problem within a given context.
It describes methods for creating practical, safe and attractive designs regardless of the scale at which one works.
Its principles are still used as building code in many cities.
The leap into the programming world occurred in 1987 when Ward Cunningham and Kent Beck found parallels in Alexander’s work and what a good architecture based on object-oriented should be. They developed five patterns and published a paper at the OOPSLA conference in the same year under the name ‘Using Pattern Languages for OO Programs’.
But it was not until 1994 with the publication of the famous ‘Design Patterns: Elements of Reusable Object-Oriented Software’ by the group called ‘Gang of Four’ (or simply ‘GoF’) that the term and its use became popular. It sold over 500,000 copies in English and was translated into 13 other languages.
In the book the authors lay the foundations of what we understand today as a design pattern and compile the first 23 patterns. Since then their number has continued to grow.
The game development community has both adopted and expanded the concept. Many GoF patterns translate naturally to games, while others like Game Loop, Update Method, Component or Spatial Partition were born from the specific challenges of real-time simulations. In 2014, Robert Nystrom published ‘Game Programming Patterns’, the definitive book that bridges classic design patterns with the realities of game engines, and it is available for free on his website.
If you look at Unity itself, you will see patterns everywhere. The entire engine is built on the Component pattern: GameObjects are containers for MonoBehaviour components. Update, FixedUpdate and LateUpdate implement the Game Loop pattern. ScriptableObjects enable the Type Object pattern. The Input System uses the Observer and Bridge patterns. Once you start recognizing them, you cannot unsee them.
Why use them?
Because they can help us create robust software that is easy to understand and modify. In addition, it can provide you with a common vocabulary for planning or solving problems with other programmers.
Let’s imagine you want to make toys out of plastic parts. You could make a mold for each new toy you need, but these toys could not be easily modified and you would not take advantage of any of the old molds.
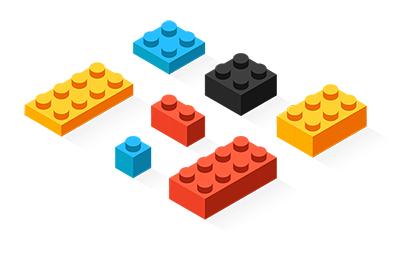
Instead of building molds of complete toys, we could make molds of smaller pieces and build the toys with these blocks. In addition to being able to reuse them for other toys, owners could modify them and use blocks from other toys to build their own.
But toys built with only basic blocks would look very crude and unoriginal. The same goes for software, not everything can be made from patterns, but you can use them as a solid and reliable base.
From them you can add the blocks you need to make your game a true work of art of software architecture ;).
Types of patterns
In this article we are going to analyze some design patterns specially useful for game development, specifically we will use C# as language and Unity as 3D engine.
The patterns we will see can be classified according to their purpose or level of abstraction in five groups:
- Builders, patterns that create instances.
- Singleton, guarantees that only a single instance of the class exists and provides global access to that instance.
- Builder, constructs complex objects step by step, separating construction from representation.
- Factory, centralizes object creation, decoupling the client from concrete classes.
- Prototype, creates new objects by cloning an existing instance.
- Structural, composition of classes and objects.
- Adapter, allows incompatible interfaces to work together.
- Composite, composes objects into tree structures and treats them uniformly.
- Decorator, dynamically adds responsibilities to objects without modifying their code.
- Facade, provides a simplified interface to a complex subsystem.
- Proxy, controls access to an object through a placeholder or surrogate.
- Flyweight, shares common state across many objects to reduce memory usage.
- Bridge, separates an abstraction from its implementation so both can vary independently.
- Behavior, define interactions and responsibilities between classes and objects.
- Command, encapsulates a request as an object, allowing parameterization, queueing, logging and undo of requests.
- Mediator, centralizes communication between objects, preventing direct coupling between them.
- Memento, captures and restores an object’s internal state without violating encapsulation.
- Observer, defines a one-to-many dependency so that when one object changes, all dependents are notified.
- State, allows an object to alter its behavior when its internal state changes.
- Strategy, defines a family of interchangeable algorithms and lets them vary independently.
- Chain of Responsibility, passes a request through a chain of handlers until one processes it.
- Visitor, separates an algorithm from the object structure it operates on.
- Architectural, patterns that improve project structure and maintainability.
- Dependency Injection, provides dependencies from the outside instead of creating them internally.
- MVP, separates UI into Model, View and Presenter for cleaner and more testable interfaces.
- Service Locator, manages and provides services from a central registry.
- ECS, structures code around data-oriented entities, components and systems.
- Game Loop, decouples the passage of game time from user input and rendering.
- Optimization, patterns focused on performance and efficiency.
- Dirty Flag, avoids redundant calculations by tracking when data has changed.
- Object Pooling, reuses objects instead of constantly creating and destroying them.
- Spatial Partition, divides the world into regions to optimize proximity and collision queries.
Builders
Singleton
graph TD
    Client1[Client 1] -->|requests| Instance[Singleton Instance]
    Client2[Client 2] -->|requests| Instance
    Client3[Client 3] -->|requests| Instance
    Instance -.->|creates if null| Instance
The first design pattern we are going to see is possibly the most controversial and most/misused of all. Its simplicity when implementing it and its ease of use make it the design pattern that is usually learned first and, in some cases, the only pattern that many programmers know.
The Singleton pattern can be summarized as:
Only have one instance and provide a single global access to it.
Ensuring that only one instance of a class exists means that only one copy of a class type will exist at a time, it would not allow us to create a second copy of that class. In addition, anyone will be able to access it. This last characteristic is what gives it its bad reputation, since it is not usually recommended to have objects with global access.
In the development of video games they are usually used mainly in the so-called managers, objects with a well-defined and limited purpose that records and/or modifies information or states of the same type.
For example, a class that is in charge of playing audio and modifying the volume can be an audio manager. Unity is literally riddled with these managers, such as Input, Debug, etc.
A simple example of a singleton can be:
public class LazySingleton
{
  // Static variable that references the only instance of Singleton.
  private static LazySingleton instance = null;

  // Requests the single instance.
  public static LazySingleton Instance
  {
    get
    {
      // If it does not exist, it is created.
      if (instance == null)
        instance = new LazySingleton();

      return instance;
    }
  }

  public void DoSomething() { }

  // Private constructor so no one external to this class will be able to create one, and without parameters.
  private LazySingleton() { }
}
If someone wants to execute the DoSomething function of Singleton just do:
Singleton.Instance.DoSomething();The single instance of Singleton will be created the first time Instance is called. This is called ‘lazy initialization’ and can generate several instances if different threads call Instance at the same time. To avoid this you can use a lock block, sacrificing some performance, like this:
public class ThreadSafeSingleton
{
  // Static variable that references the single instance of ThreadSafeSingleton.
  private static ThreadSafeSingleton instance = null;

  // Object used in the lock.
  private static object @lock = new object();

  // Requests the single instance.
  public static ThreadSafeSingleton Instance
  {
    get
    {
      lock (@lock)
      {
        // This code block is Thread-safe.

        // If it does not exist, it is created.
        if (instance == null)
          instance = new ThreadSafeSingleton();

        return instance;
      }
    }
  }

  public void DoSomething() { }

  // Private constructor so no one external to this class will be able to create one, and without parameters.
  private ThreadSafeSingleton() { }
}
Another option may be to leave the task of creation to the CLR in this way:
public class Singleton
{
  // It is executed once per app-domain, the CLR ensures that it is thread-safe.
  private static readonly Singleton instance = new Singleton();

  // Requests the single instance.
  public static Singleton Instance => instance;

  public void DoSomething() { }

  // Explicit static constructor to tell the compiler not to mark the type as beforefieldinit.
  static Singleton() { }

  // Private constructor so no one external to this class will be able to create one, and without parameters.
  private Singleton() { }
}
When to use it
The Singleton is useful when a system should logically exist only once during the lifetime of the application. Typical examples in Unity are managers: GameManager (controls the overall game flow), AudioManager (handles sounds and music), SceneLoader (manages scene transitions) or SaveSystem (manages save and load operations).
In Unity this often goes hand in hand with DontDestroyOnLoad, since managers usually need to survive between scene changes to maintain state.
However, Singleton should not be used for everything. Objects that can have multiple copies (players, enemies, bullets, pickups, UI elements) should never be Singletons.
Singleton in Unity
In Unity, the pattern needs to work with the component lifecycle. A common generic implementation that automatically creates a GameObject if none exists in the scene, persists across scenes, and destroys duplicates on Awake:
public abstract class Singleton<T> : MonoBehaviour where T : MonoBehaviour
{
    private static T instance;

    public static T Instance
    {
        get
        {
            if (instance == null)
            {
                instance = FindObjectOfType<T>();

                if (instance == null)
                {
                    GameObject obj = new GameObject(typeof(T).Name);
                    instance = obj.AddComponent<T>();
                }
            }

            return instance;
        }
    }

    protected virtual void Awake()
    {
        if (instance == null)
        {
            instance = this as T;
            DontDestroyOnLoad(gameObject);
        }
        else if (instance != this)
        {
            Destroy(gameObject);
        }
    }
}
To use it, simply inherit from Singleton<T>:
public class AudioManager : Singleton<AudioManager>
{
    public void PlaySound(string soundName) { /* ... */ }
}

// Any other script can then call:
AudioManager.Instance.PlaySound("explosion");
Advantages and disadvantages
Advantages:
- Provides easy access through a shared global instance.
- Prevents duplicate manager objects in the scene.
- Speeds up development in small and medium projects.
Disadvantages:
- Creates hidden dependencies, making the code harder to understand.
- Can lead to too much global state, increasing complexity.
- Overusing it makes systems tightly coupled and harder to test.
Tips for Unity
- The Singleton setup is usually done inside
Awake, becauseAwakeruns beforeStart. Always check whetherInstanceis null before doing any setup. - For managers that need to stay alive between scenes, use
DontDestroyOnLoad(gameObject). But always check for duplicates first, otherwise each scene load will create a new persistent instance. - The execution order of
Awakecan cause problems. If another script tries to access the Singleton inside its ownAwake, the Singleton may not be ready yet. Consider using the Script Execution Order settings to ensure the Singleton initializes first. - Use Singleton only for systems that are truly global. For smaller or more local dependencies, prefer Inspector references, events,
ScriptableObject, or dependency injection. These are often cleaner and more testable solutions.
Builder
graph LR
    Director[Director] -->|constructs| Builder[Builder]
    Builder -->|step 1| Product[Product]
    Builder -->|step 2| Product
    Builder -->|step 3| Product
The Builder pattern is a design pattern used to create complex objects step by step instead of passing many values into a long constructor. It separates the object creation process from the object itself, making the code easier to read and manage.
The Builder pattern can be summarized as:
Construct complex objects step by step, separating the construction process from the final representation.
Instead of writing a constructor with many parameters, you can build the object with a fluent interface:
new EnemyBuilder()
    .SetName("Goblin")
    .SetHealth(100)
    .SetSpeed(2.5f)
    .Build();
This makes it clear what each value represents. In most Unity projects, a simple fluent builder is usually enough, without needing the full GoF structure with Director and ConcreteBuilder.
When to use it
Builder is useful when an object has many parameters or when some of its fields are optional. If a constructor starts getting too long, the code becomes harder to understand and easier to misuse.
It is commonly used when:
- An object has many properties.
- Some values are optional.
- Different variations of the same object are needed.
- The creation process must happen step by step.
- Validation is needed before the object is created.
In Unity, Builder can be useful for enemy creation, character customization, procedural level generation, quest setup, dialogue systems or dynamic UI creation. However, if an object is simple and only has a few parameters, a normal constructor is enough.
Builder in Unity
A fluent builder returns this from each setter, allowing chained calls:
public class EnemyBuilder
{
    private readonly GameObject prefab;
    private readonly Vector3 position;

    private string name = "Enemy";
    private int health = 100;
    private float speed = 2f;
    private int damage = 10;
    private Color color = Color.white;

    public EnemyBuilder(GameObject prefab, Vector3 position)
    {
        this.prefab = prefab;
        this.position = position;
    }

    public EnemyBuilder SetName(string name)
    {
        this.name = name;
        return this;
    }

    public EnemyBuilder SetHealth(int health)
    {
        this.health = health;
        return this;
    }

    public EnemyBuilder SetSpeed(float speed)
    {
        this.speed = speed;
        return this;
    }

    public EnemyBuilder SetDamage(int damage)
    {
        this.damage = damage;
        return this;
    }

    public EnemyBuilder SetColor(Color color)
    {
        this.color = color;
        return this;
    }

    public Enemy Build()
    {
        GameObject obj = Object.Instantiate(prefab, position, Quaternion.identity);
        Enemy enemy = obj.GetComponent<Enemy>();
        enemy.Init(name, health, speed, damage, color);
        return enemy;
    }
}
Using the builder to spawn different enemy variations:
public class EnemySpawner : MonoBehaviour
{
    [SerializeField] private GameObject enemyPrefab;

    private void Start()
    {
        var goblin = new EnemyBuilder(enemyPrefab, new Vector3(0, 0, 0))
            .SetName("Goblin Scout")
            .SetHealth(50)
            .SetSpeed(3f)
            .SetDamage(5)
            .Build();

        var boss = new EnemyBuilder(enemyPrefab, new Vector3(5, 0, 0))
            .SetName("Orc Warlord")
            .SetHealth(300)
            .SetSpeed(1.5f)
            .SetDamage(30)
            .SetColor(Color.red)
            .Build();
    }
}
Advantages and disadvantages
Advantages:
- Makes code easier to read by avoiding long and confusing constructors.
- Handles optional fields cleanly, setting only what you need.
- Keeps object creation logic in one place and allows validation before creating.
- Makes it easy to create different variations of the same type.
Disadvantages:
- Adds extra code for simple objects that do not need it.
- The builder may need updates when new fields are added to the product.
- Does not fit
MonoBehaviourobjects as naturally as plain C# classes.
Tips for Unity
- Keep the structure simple. A fluent builder where each method returns
thisis often enough without adding a Director class. - Use Builder with plain C# classes such as
EnemyData,LevelConfigorQuestData. After the data object is built, pass it into aMonoBehaviouror another system. - Builder works well with
ScriptableObjects. Store default values inScriptableObjects and pass them into the Builder as starting data. - For procedural systems like dungeon generation or quest generation, Builder can be very useful.
- If you reuse the same Builder instance multiple times, add a
Reset()method to clear its state.
Factory
graph TD
    Client[Client] -->|requests| Factory[Factory]
    Factory -->|creates| ProductA[Product A]
    Factory -->|creates| ProductB[Product B]
    Factory -->|creates| ProductC[Product C]
The Factory pattern is a creational design pattern that moves the responsibility of creating objects away from the main code and into a separate factory class or method. Instead of scattering new Goblin() or Instantiate(zombiePrefab) across the codebase, the code simply asks the factory for the object it needs.
The Factory pattern can be summarized as:
Define an interface for creating objects, letting subclasses decide which concrete class to instantiate.
In Unity, imagine an enemy spawning system. The GameManager does not need to know how a Goblin, Orc or Dragon is created. It only asks the EnemyFactory for an enemy. The factory handles prefab selection, instantiation, initialization and returns the result through a common interface.
When to use it
Factory is useful when a project needs to create different types of objects from the same family and the correct one must be chosen at runtime. It is commonly used when:
- Object creation logic starts becoming repetitive or complex.
- The object type is decided at runtime.
- Prefab selection, spawn position, stats or setup logic should be handled in one place.
- The rest of the code should not depend directly on concrete classes.
- The creation system needs to work together with Object Pooling.
In Unity, common use cases include enemy spawning, weapon creation, bullet or projectile systems, UI window management and visual effect pools. However, if the project only creates one simple object type, a factory may add extra structure without much benefit.
Factory in Unity
The factory returns objects through a common interface, keeping the client decoupled:
public interface IEnemy
{
    void Initialize(Vector3 position);
}
Concrete enemy types implement the interface:
public class Goblin : MonoBehaviour, IEnemy
{
    public void Initialize(Vector3 position) { /* setup */ }
}

public class Orc : MonoBehaviour, IEnemy
{
    public void Initialize(Vector3 position) { /* setup */ }
}
The factory centralizes creation logic:
public enum EnemyType { Goblin, Orc, Dragon }

public class EnemyFactory : MonoBehaviour
{
    [SerializeField] private GameObject goblinPrefab;
    [SerializeField] private GameObject orcPrefab;
    [SerializeField] private GameObject dragonPrefab;

    public IEnemy CreateEnemy(EnemyType type, Vector3 position)
    {
        GameObject prefab = type switch
        {
            EnemyType.Goblin => goblinPrefab,
            EnemyType.Orc => orcPrefab,
            EnemyType.Dragon => dragonPrefab,
            _ => throw new System.ArgumentException($"Unknown type: {type}")
        };

        var instance = Instantiate(prefab, position, Quaternion.identity);
        return instance.GetComponent<IEnemy>();
    }
}
The client only depends on the interface and the factory:
public class GameManager : MonoBehaviour
{
    [SerializeField] private EnemyFactory factory;

    private void Start()
    {
        factory.CreateEnemy(EnemyType.Goblin, new Vector3(-5, 0, 0));
        factory.CreateEnemy(EnemyType.Orc, new Vector3(0, 0, 0));
        factory.CreateEnemy(EnemyType.Dragon, new Vector3(5, 0, 0));
    }
}
Advantages and disadvantages
Advantages:
- Keeps creation logic in one central place.
- Makes the code easier to extend with new types.
- Reduces dependency on concrete classes, improving testability.
- Works well with Object Pooling for frequently spawned objects.
Disadvantages:
- Can add unnecessary complexity to simple systems.
- May increase the number of classes and files.
- Large
switchstructures can become hard to maintain as types grow.
Tips for Unity
- Return an interface or abstract type instead of a concrete class. This keeps the client code decoupled.
- Use
[SerializeField]orScriptableObjects to manage prefab references instead of hardcoding them. - For objects created frequently (bullets, hit effects, enemies), combine Factory with Object Pooling for better performance.
- In larger projects, a dictionary-based factory can be cleaner than a long
switchblock. - Do not make one factory responsible for everything. Related object groups should have separate factories.
Prototype
graph TD
    Prototype[Prototype] -->|Clone| Copy1[Copy 1]
    Prototype -->|Clone| Copy2[Copy 2]
    Prototype -->|Clone| Copy3[Copy 3]
The Prototype pattern lets you create new objects by cloning an existing template instead of building everything from scratch. Prepare one well-configured object, then clone it whenever you need a new version.
The Prototype pattern can be summarized as:
Create new objects by copying an existing prototype instance, avoiding the cost of building from scratch.
The most important detail is how the copy is made. A shallow copy still shares some references with the original, while a deep copy creates independent copies of all internal data. Choose carefully based on your needs.
When to use it
Prototype is useful when creating an object from zero is expensive or repetitive. If an object needs many values, references or setup steps before it is ready, cloning an already prepared version is usually cleaner.
It also works well when many variations come from the same base. For example, create a basic enemy data object, clone it, then slightly change its health, speed or damage for different waves.
In Unity, it is especially useful with ScriptableObjects. Instead of modifying an editor asset directly during runtime, you clone it and apply changes to the copy.
However, if an object is simple and cheap to create with new, adding a clone system may only add unnecessary complexity.
Prototype in Unity
In Unity, Instantiate(prefab) already works very similarly to the Prototype pattern, the prefab is the prototype, and Unity creates a copy.
For plain C# data objects, a Clone() method provides the same capability:
public class WeaponData
{
    public string Name;
    public int Damage;
    public float Range;
    public List<string> Abilities;

    public WeaponData ShallowClone()
    {
        return (WeaponData)MemberwiseClone();
    }

    public WeaponData DeepClone()
    {
        var clone = (WeaponData)MemberwiseClone();
        clone.Abilities = new List<string>(Abilities);
        return clone;
    }
}
Using the prototype to create enemy variations:
public class EnemySpawner : MonoBehaviour
{
    [SerializeField] private WeaponData baseWeapon;

    private void Start()
    {
        var goblinWeapon = baseWeapon.DeepClone();
        goblinWeapon.Name = "Rusty Dagger";
        goblinWeapon.Damage = 5;

        var bossWeapon = baseWeapon.DeepClone();
        bossWeapon.Name = "Flaming Greatsword";
        bossWeapon.Damage = 40;
        bossWeapon.Abilities.Add("Fire Aura");
    }
}
Advantages and disadvantages
Advantages:
- Makes object creation faster and cleaner when setup is complex.
- Reduces repetitive setup code across the project.
- Calling code does not always need to know the exact concrete type.
Disadvantages:
- Incorrect clone depth can cause shared internal data and subtle bugs.
- Deep cloning can become difficult with complex nested references.
- Scene object references in Unity can make cloning more sensitive.
Tips for Unity
- Prefabs in Unity already implement the Prototype idea: the prefab is the template,
Instantiatecreates the copy. ScriptableObjects are excellent for prototype-style data: enemy stats, weapon settings, item data and level configurations can be stored asScriptableObjects and cloned at runtime.- Be careful with reference-type fields. In many cases, you need to write a custom
DeepClone()method that creates new instances of internal collections. - Prototype works especially well together with Object Pooling for frequently spawned objects like bullets, enemies or effects.
- Prefab Variants follow a similar idea, but changes to the base prefab can affect its variants, so be aware of the relationship.
Structural
Adapter
graph LR
    Client[Client] -->|Target Interface| Adapter[Adapter]
    Adapter -->|Adaptee Interface| Adaptee[Adaptee]
The Adapter pattern is a structural design pattern that allows two incompatible interfaces to work together. Like a power adapter that lets a foreign plug fit a local socket, the software adapter sits between your code and an incompatible API, translating calls so neither side needs to change.
The Adapter pattern can be summarized as:
Convert the interface of a class into another interface that clients expect, letting incompatible systems work together.
The Adapter implements the interface your system already knows. Inside, it holds the incompatible object and translates calls into a format that object understands. The rest of your code keeps working with the same clean interface, unaware of what happens behind the scenes.
When to use it
Adapter is useful when you want to connect a new or incompatible system without rewriting existing code. It is especially helpful when you do not own the source code or when changing the original class would create more problems.
In Unity projects, common use cases include:
- Third-party SDKs: ads, analytics, social login, in-app purchases or audio systems. Hide SDK-specific code behind your own interface.
- Legacy systems: an old save system that does not support your new
IDataPersistenceinterface. - Platform-specific code: iOS and Android plugins may have different APIs, but your game communicates with both through a shared interface like
IAdsService. - Testing: replace the real SDK with a mock adapter during tests without depending on real services.
Adapter in Unity
Consider a third-party logger that only exposes WriteLine(string) but your project expects an ILogger interface with a Log(string) method:
public interface ILogger
{
    void Log(string message);
}
The incompatible third-party class:
public class ThirdPartyLogger
{
    public void WriteLine(string message)
    {
        Debug.Log($"[ThirdParty] {message}");
    }
}
The Adapter bridges the gap:
public class LoggerAdapter : ILogger
{
    private ThirdPartyLogger adaptee;

    public LoggerAdapter(ThirdPartyLogger adaptee)
    {
        this.adaptee = adaptee;
    }

    public void Log(string message)
    {
        adaptee.WriteLine(message);
    }
}
Now the client works against the interface, not the concrete SDK:
public class GameManager : MonoBehaviour
{
    private ILogger logger;

    private void Awake()
    {
        logger = new LoggerAdapter(new ThirdPartyLogger());
    }

    private void Start()
    {
        logger.Log("Game started!");
    }
}
Advantages and disadvantages
Advantages:
- Adds new systems without breaking existing code.
- Reduces direct dependencies on third-party or legacy code.
- Keeps translation logic isolated in one place.
- Improves testability by allowing mock adapters.
Disadvantages:
- Increases the number of classes in the project.
- Can add overhead in performance-critical loops.
- Overuse can hide weak architecture behind too many wrappers.
Tips for Unity
- Keep adapters as plain C# classes instead of
MonoBehaviour. This keeps them independent from the scene and easier to test. - Combine Adapter with Dependency Injection. Instead of creating the adapter directly inside
Awake, pass it from the outside when possible. - For platform-specific systems, avoid spreading
#if UNITY_IOSand#if UNITY_ANDROIDchecks across your code. Create separate adapters for each platform and use a factory to select the right one. - Be careful when wrapping
ScriptableObject-based systems. AScriptableObjectshould hold data, while the adapter exposes that data through a clean interface. - Avoid long adapter chains. If one adapter keeps calling another, debugging becomes harder and performance may suffer.
- When testing, keep both sides separate: test your main system with a mock adapter, and test the real SDK integration independently.
Composite
graph TD
    Root[Composite] -->|operation| Leaf1[Leaf]
    Root -->|operation| Child1[Composite]
    Child1 -->|operation| Leaf2[Leaf]
    Child1 -->|operation| Leaf3[Leaf]
The Composite pattern is a structural design pattern that lets you treat single objects and groups of objects in the same way. It hides the difference between one object and many objects from the code that uses them.
The Composite pattern can be summarized as:
Compose objects into tree structures to represent part-whole hierarchies, letting clients treat individual objects and compositions uniformly.
For example, calling TakeDamage() on a single Enemy or on an EnemyGroup containing several enemies works through the same method. If it is a single enemy, it takes the damage directly. If it is a group, the call is passed down to all children.
When to use it
Composite is useful when individual objects and groups of objects need to behave in a similar way. A common example is an army system: giving an attack command to one soldier and giving an attack command to a squad can be handled through the same method.
In Unity, this pattern can be used for enemy groups, UI panels and menus, buff or skill systems, behavior trees and parent-child object structures. It is a good choice when your system naturally has a hierarchy and the same action should work on both single and grouped objects.
However, if you only need to loop through a few objects, a simple List<T> with a foreach is usually enough.
Composite in Unity
Unity’s Transform hierarchy already works with parent-child relationships, so build on top of that instead of recreating the hierarchy manually.
The shared interface:
public interface IDamageable
{
    void TakeDamage(float amount);
}
The leaf node, a single enemy:
public class Enemy : MonoBehaviour, IDamageable
{
    [SerializeField] private float health = 100f;

    public void TakeDamage(float amount)
    {
        health -= amount;
        Debug.Log($"{name} took {amount} damage, remaining health: {health}");

        if (health <= 0)
            Destroy(gameObject);
    }
}
The composite that holds and delegates to children:
public class EnemyGroup : MonoBehaviour, IDamageable
{
    private List<IDamageable> children = new List<IDamageable>();

    private void Awake()
    {
        foreach (var child in GetComponentsInChildren<IDamageable>())
        {
            if (child != (IDamageable)this)
                children.Add(child);
        }
    }

    public void Add(IDamageable child)
    {
        children.Add(child);
    }

    public void TakeDamage(float amount)
    {
        foreach (var child in children)
            child.TakeDamage(amount);
    }
}
public class GameController : MonoBehaviour
{
[SerializeField] private EnemyGroup squad;
private void Update()
{
if (Input.GetKeyDown(KeyCode.Space))
squad.TakeDamage(10f);
}
}Advantages and disadvantages
Advantages:
- Keeps the calling code simple; it does not care if it is dealing with one or many.
- Lets groups contain other groups, creating flexible tree structures.
Disadvantages:
- Can become overcomplicated if used where it is not needed.
- Deep hierarchies can create performance issues.
- The shared interface must stay clean to remain useful for both leaves and composites.
Tips for Unity
- Use Unity’s existing
Transformhierarchy. Unity already works with parent-child relationships, so build on top of that instead of recreating the hierarchy manually. GetComponentsInChildren<T>()can be useful to collect child components. Cache the results instead of calling it every frame.- Be careful with update logic. If Unity’s normal
Update()is already running and a Composite also manually calls update methods on its children, the same objects may be updated twice. - Make sure a group cannot accidentally add itself or one of its parent groups as a child. This causes infinite loops when a command is passed through the hierarchy.
Decorator
graph LR
    Component[Component] --> ConcreteComponent[ConcreteComponent]
    Component --> Decorator[Decorator]
    Decorator --> ConcreteDecoratorA[Fire Enchantment]
    Decorator --> ConcreteDecoratorB[Poison Enchantment]
The Decorator is one of those patterns I genuinely love. It is elegant, flexible and solves a real problem: how to add behavior without creating an explosion of subclasses. Once you grasp it, you start seeing FirePoisonCriticalSword class names as the nightmare they are.
The Decorator pattern can be summarized as:
Attach additional responsibilities to an object dynamically, providing a flexible alternative to subclassing for extending functionality.
Instead of creating separate classes for every combination, you wrap the base object with decorator objects that all implement the same interface. Each decorator adds its own behavior and delegates the rest to the wrapped object.
When to use it
Decorator is useful when you need to add or remove features from an object at runtime. A character gaining armor, becoming poisoned, turning invisible or receiving a temporary damage boost are all good examples.
It is also helpful when inheritance starts to become too complicated. Instead of creating a separate subclass for every possible combination (FireSword, PoisonSword, FirePoisonSword, FirePoisonCriticalSword), you stack small decorators together.
In Unity, it is especially suitable for weapon modifiers, buff/debuff systems, status effects, ability chains and layered UI or audio systems.
Decorator in Unity
Decorators work best as plain C# classes sharing a common interface:
public interface IWeapon
{
    float GetDamage();
    string GetDescription();
}
The base weapon that will be wrapped:
public class BasicSword : IWeapon
{
    public float GetDamage() => 10f;
    public string GetDescription() => "Basic Sword";
}
An abstract decorator that delegates to the wrapped weapon:
public abstract class WeaponDecorator : IWeapon
{
    protected IWeapon weapon;

    public WeaponDecorator(IWeapon weapon)
    {
        this.weapon = weapon;
    }

    public virtual float GetDamage() => weapon.GetDamage();
    public virtual string GetDescription() => weapon.GetDescription();
}
Concrete decorators that add effects:
public class FireEnchantment : WeaponDecorator
{
    public FireEnchantment(IWeapon weapon) : base(weapon) { }

    public override float GetDamage() => weapon.GetDamage() + 5f;
    public override string GetDescription() => weapon.GetDescription() + " + Fire";
}

public class PoisonEnchantment : WeaponDecorator
{
    public PoisonEnchantment(IWeapon weapon) : base(weapon) { }

    public override float GetDamage() => weapon.GetDamage() + 3f;
    public override string GetDescription() => weapon.GetDescription() + " + Poison";
}

public class CriticalEnchantment : WeaponDecorator
{
    public CriticalEnchantment(IWeapon weapon) : base(weapon) { }

    public override float GetDamage() => weapon.GetDamage() * 2f;
    public override string GetDescription() => weapon.GetDescription() + " + Critical";
}
Stacking decorators at runtime:
public class Player : MonoBehaviour
{
    private void Start()
    {
        IWeapon weapon = new BasicSword();
        Debug.Log($"{weapon.GetDescription()} deals {weapon.GetDamage()} damage");

        weapon = new FireEnchantment(weapon);
        Debug.Log($"{weapon.GetDescription()} deals {weapon.GetDamage()} damage");

        weapon = new CriticalEnchantment(weapon);
        Debug.Log($"{weapon.GetDescription()} deals {weapon.GetDamage()} damage");
    }
}
Output:
Basic Sword deals 10 damage
Basic Sword + Fire deals 15 damage
Basic Sword + Fire + Critical deals 30 damage
Advantages and disadvantages
Advantages:
- Adds flexibility without changing existing classes.
- Prevents class explosion by composing behaviors instead of subclassing every combination.
- Improves separation of responsibilities; each decorator does one thing.
Disadvantages:
- Long decorator chains can be hard to follow and debug.
- Order matters; applying
FirethenCriticalgives a different result fromCriticalthenFire. - It may be unnecessary overhead in very simple systems.
Tips for Unity
- Use plain C# classes instead of
MonoBehaviourfor decorators. This keeps the system cleaner and avoids unnecessary component overhead. - Weapon systems are one of the clearest use cases, but the same idea applies to buffs, status effects, abilities or any stat modifier.
- Be careful with
GetComponent<T>(). If your decorator structure exists outside Unity’s component system, Unity will not automatically find the wrapped object. - If a long decorator chain is called every frame inside
Update(), cache the calculated values and update them only when something changes. - Avoid building decorator chains randomly across the project. A central builder class like
WeaponBuilderkeeps the order consistent and intentional.
Facade
graph TD
    Client[Client] -->|simple call| Facade[Facade]
    Facade -->|coordinates| Subsystem1[Subsystem 1]
    Facade -->|coordinates| Subsystem2[Subsystem 2]
    Facade -->|coordinates| Subsystem3[Subsystem 3]
The Facade pattern provides a simple, unified interface in front of a complex subsystem. Instead of forcing the rest of the code to deal with many different classes, the Facade offers a clean and controlled access point.
The Facade pattern can be summarized as:
Provide a simplified interface to a complex subsystem, hiding its internal complexity from the client.
The Facade does not remove the subsystem. It only hides its complexity from the outside, keeping the code easier to read, maintain and change later.
When to use it
Facade is useful when several classes need to work together to complete one larger task. Audio systems, UI systems, save/load systems, networking, achievements and third-party SDK integrations are common examples.
It is especially helpful when the same group of operations is repeated in different parts of the project. For example, a single ChangeMusic() method can handle lowering the current track, starting a new track and fading the volume back in, all behind one simple call.
Facade in Unity
Consider an audio system with separate classes for music, sound effects and fading. A Facade hides this complexity:
public class MusicPlayer
{
    private AudioSource source;
    public MusicPlayer(AudioSource source) => this.source = source;
    public void Play(AudioClip clip) { source.clip = clip; source.Play(); }
    public void SetVolume(float v) => source.volume = v;
}

public class SfxPlayer
{
    private AudioSource source;
    public SfxPlayer(AudioSource source) => this.source = source;
    public void PlayOneShot(AudioClip clip) => source.PlayOneShot(clip);
    public void SetVolume(float v) => source.volume = v;
}

public class AudioFader
{
    public IEnumerator FadeOut(AudioSource source, float duration)
    {
        float startVolume = source.volume;
        for (float t = 0; t < duration; t += Time.deltaTime)
        {
            source.volume = Mathf.Lerp(startVolume, 0, t / duration);
            yield return null;
        }
        source.volume = 0;
    }
}
The Facade ties them together behind simple methods:
public class AudioFacade : MonoBehaviour
{
    [SerializeField] private AudioSource musicSource;
    [SerializeField] private AudioSource sfxSource;

    private MusicPlayer music;
    private SfxPlayer sfx;
    private AudioFader fader;

    private void Awake()
    {
        music = new MusicPlayer(musicSource);
        sfx = new SfxPlayer(sfxSource);
        fader = new AudioFader();
    }

    public void PlayMusic(AudioClip clip) => music.Play(clip);
    public void PlaySfx(AudioClip clip) => sfx.PlayOneShot(clip);

    public void ChangeMusic(AudioClip newClip, float fadeDuration = 1f)
    {
        StartCoroutine(ChangeMusicRoutine(newClip, fadeDuration));
    }

    private IEnumerator ChangeMusicRoutine(AudioClip newClip, float duration)
    {
        yield return fader.FadeOut(musicSource, duration);
        music.Play(newClip);
        musicSource.volume = 1f;
    }

    public void SetMasterVolume(float value)
    {
        music.SetVolume(value);
        sfx.SetVolume(value);
    }
}
The client only talks to the Facade:
public class Player : MonoBehaviour
{
    [SerializeField] private AudioFacade audio;
    [SerializeField] private AudioClip explosionClip;

    private void Update()
    {
        if (Input.GetKeyDown(KeyCode.Space))
            audio.PlaySfx(explosionClip);
    }
}
Advantages and disadvantages
Advantages:
- Simplifies complex subsystems, making them easier to use.
- Reduces dependencies on internal classes; clients depend only on the Facade.
Disadvantages:
- Can grow into a God Object if too many responsibilities are added.
- Can hide too much or add an unnecessary extra layer in simple cases.
- May become a bottleneck if not split by responsibility.
Tips for Unity
- Keep each Facade focused on one responsibility. Instead of one large
GameFacadefor everything, split into smaller facades likeAudioFacade,UIFacadeorSaveFacade. - Write the Facade as a plain C# class when possible. If it needs scene-based objects, pass them from the outside through a constructor or
Initialize()method. - Only expose the methods that the rest of the project actually needs. A small public API reduces unnecessary coupling.
- Facade is especially useful for wrapping third-party SDKs like ads, analytics, cloud saves and in-app purchases. When the SDK changes, only the Facade needs updating.
Proxy
graph LR
    Client[Client] -->|uses| Proxy[Proxy]
    Proxy -->|delegates| RealSubject[Real Subject]
Proxy is another one of my favorites. It is deceptively simple: an object that stands in for another object, controlling how and when the real one gets used. The elegance is in how much power you get without the client ever knowing the difference.
The Proxy pattern can be summarized as:
Provide a placeholder that controls access to another object, adding a layer of indirection for lazy loading, access control, logging or caching.
The proxy implements the same interface as the real object, so the client does not need to know which one it is talking to. The proxy can allow, block, delay, log, cache or even lazy-create the real object before forwarding the request.
When to use it
Proxy is useful when access to an object needs to be controlled or managed. Common scenarios include:
- Lazy initialization: the real object is expensive to create, so the proxy creates it only when actually needed.
- Access control: if the player is not allowed to attack yet, the proxy blocks the request before it reaches the real object.
- Remote objects: in multiplayer, the actual player exists on another machine or server, while the local object only represents it.
- Logging or caching: intercept calls to measure, cache or profile without touching the original class.
Proxy in Unity
The interface shared by both the real object and the proxy:
public interface IEnemy
{
    void Attack();
}
The real, heavy object:
public class Enemy : IEnemy
{
    public void Attack()
    {
        Debug.Log("Enemy attacks!");
    }
}
The proxy that controls access and creates the real enemy lazily:
public class EnemyProxy : IEnemy
{
    private Enemy realEnemy;
    private bool canAttack;

    public EnemyProxy(bool canAttack)
    {
        this.canAttack = canAttack;
    }

    public void Attack()
    {
        if (!canAttack)
        {
            Debug.Log("Enemy cannot attack yet.");
            return;
        }

        if (realEnemy == null)
        {
            Debug.Log("Creating real enemy lazily.");
            realEnemy = new Enemy();
        }

        realEnemy.Attack();
    }
}
The client only knows the interface:
public class GameManager : MonoBehaviour
{
    private void Start()
    {
        IEnemy lockedEnemy = new EnemyProxy(false);
        lockedEnemy.Attack();

        IEnemy activeEnemy = new EnemyProxy(true);
        activeEnemy.Attack();
    }
}
Advantages and disadvantages
Advantages:
- Adds control without changing the real object.
- Keeps extra responsibilities like logging, caching or access checks away from the real class.
- Shared interfaces keep client code clean and unaware of the proxy.
Disadvantages:
- Adds another layer to the architecture, increasing indirection.
- Debugging can become harder when the call chain is not obvious.
- Small performance costs from the extra layer can matter in hot paths.
Tips for Unity
- Proxy works well with services, asset loading, AI systems and multiplayer objects. Use an interface and let a proxy handle access instead of directly depending on a specific
MonoBehaviour. - For Addressables or Asset Bundles, a virtual proxy can exist immediately and show placeholder behavior while the real asset loads, then forward calls once loading completes.
- Be careful with proxy checks inside
Update()orFixedUpdate(). Move proxy logic outside the frame loop when possible. - With lazy loading, avoid creating heavy objects at sudden gameplay moments. Warm them up before the critical moment to prevent frame drops.
- In multiplayer projects, tools like Mirror or Netcode for GameObjects already use similar ideas. Thinking of remote players as proxies makes RPC calls and local-versus-remote logic easier to design.
Flyweight
graph TD
    Client1[Client 1] -->|requests| Factory[Flyweight Factory]
    Client2[Client 2] -->|requests| Factory
    Factory -->|reuses| Shared[Shared Flyweight]
    Factory -->|creates| Unique1[Unique State 1]
    Factory -->|creates| Unique2[Unique State 2]
The Flyweight pattern shares common, immutable data across many objects to save memory. Instead of each object storing all its data, the shared data is extracted into a flyweight object that many instances reference.
The pattern can be summarized as:
Share common state across many objects to reduce memory usage, separating intrinsic data from extrinsic data.
Intrinsic state is what does not change across instances, like the mesh, material, texture, or shared stats of an enemy type. Extrinsic state is what varies per instance, like position, rotation, current health or color tint. In Unity, the intrinsic data often lives in a prefab or a ScriptableObject, and only the extrinsic data stays on each instance.
When to use it
Flyweight shines when you have thousands of objects that share most of their data. Think a forest where every tree shares the same mesh and material, with only position and scale being unique. Or a bullet hell shooter where hundreds of bullets share the same prefab and behavior.
The pattern is also used heavily in UI systems, tilemaps and particle systems, where Unity internally shares materials, textures and mesh data.
However, if objects are few or each one is truly unique, Flyweight adds unnecessary complexity.
Flyweight in Unity
Unity’s prefab system already embodies Flyweight principles. A ScriptableObject makes the pattern explicit:
[CreateAssetMenu(menuName = "Patterns/Flyweight/EnemyType")]
public class EnemyType : ScriptableObject
{
    public string enemyName;
    public float maxHealth;
    public float speed;
    public float attackDamage;
    public Mesh mesh;
    public Material material;
    public Color tint;
}
Each instance only stores what varies:
public class Enemy : MonoBehaviour
{
    [SerializeField] private EnemyType type;

    private float currentHealth;
    private Vector3 velocity;

    private void Start()
    {
        currentHealth = type.maxHealth;
        GetComponent<MeshFilter>().mesh = type.mesh;
        GetComponent<MeshRenderer>().material = type.material;
    }

    public void TakeDamage(float damage)
    {
        currentHealth -= damage;
    }
}
public class EnemySpawner : MonoBehaviour
{
[SerializeField] private Enemy prefab;
[SerializeField] private List<EnemyType> types;
private void SpawnEnemy(EnemyType type, Vector3 position)
{
var enemy = Instantiate(prefab, position, Quaternion.identity);
enemy.GetComponent<Enemy>().type = type;
}
}Advantages and disadvantages
Advantages:
- Dramatically reduces memory usage when objects share common data.
- Centralizes shared configuration, making it easy to tweak values globally.
- Separates what changes from what stays the same.
Disadvantages:
- Adds indirection, making the code slightly harder to follow.
- Shared data must be truly immutable at runtime or bugs become hard to trace.
- Not useful if every object needs unique data.
Tips for Unity
- Use
ScriptableObjects as flyweight containers. They hold the shared data and can be assigned via the Inspector. - Prefab variants already follow flyweight logic internally. Use them when the variation is static.
- Avoid modifying shared flyweight data at runtime. If you need per-instance overrides, copy the flyweight values to instance fields at initialization.
- For GPU-heavy scenarios like rendering thousands of trees, look into GPU Instancing and DrawMeshInstanced, which are hardware-level flyweight implementations.
Bridge
graph LR
    Abstraction[Abstraction] --> Implementation[Implementation]
    RefinedAbstraction[RefinedAbstraction] --> Implementation
    Implementation --> ConcreteImplA[ConcreteImplA]
    Implementation --> ConcreteImplB[ConcreteImplB]
The Bridge pattern separates an abstraction from its implementation so that both can evolve independently. Instead of having one monolithic class that handles everything, you split it into two hierarchies connected by a bridge, usually a reference to an interface.
The pattern can be summarized as:
Decouple an abstraction from its implementation so that the two can vary independently.
In Unity, this is useful when you have a single concept that needs to work with multiple platforms, input devices, rendering backends or data sources. The abstraction defines what to do, the implementation handles how to do it.
When to use it
Bridge is useful when both the abstraction and the implementation are likely to change over time. For example, a character controller might need to support keyboard, gamepad and touch input. Instead of writing three separate controllers, one abstraction uses different input implementations.
It is also useful for cross-platform support, rendering backends, save systems with different storage backends, or any place where you have a clear “what” vs “how” split.
Bridge in Unity
A character controller abstraction with swappable input implementations:
public interface IInputDevice
{
    Vector3 GetMovementDirection();
    bool IsJumpPressed();
}
Different input implementations:
public class KeyboardInput : IInputDevice
{
    public Vector3 GetMovementDirection()
    {
        var direction = new Vector3(
            Input.GetAxis("Horizontal"), 0, Input.GetAxis("Vertical"));
        return direction.normalized;
    }

    public bool IsJumpPressed() => Input.GetButtonDown("Jump");
}

public class GamepadInput : IInputDevice
{
    public Vector3 GetMovementDirection()
    {
        var direction = new Vector3(
            Input.GetAxis("Horizontal"), 0, Input.GetAxis("Vertical"));
        return direction.normalized;
    }

    public bool IsJumpPressed() => Input.GetButtonDown("Jump");
}
The abstraction uses the bridge:
public class PlayerController : MonoBehaviour
{
    [SerializeField] private float speed = 5f;
    [SerializeField] private float jumpForce = 10f;

    private IInputDevice input;
    private Rigidbody rb;

    public void SetInput(IInputDevice device)
    {
        input = device;
    }

    private void Awake()
    {
        rb = GetComponent<Rigidbody>();
        SetInput(new KeyboardInput());
    }

    private void Update()
    {
        var movement = input.GetMovementDirection() * speed;
        rb.linearVelocity = new Vector3(movement.x, rb.linearVelocity.y, movement.z);

        if (input.IsJumpPressed())
            rb.AddForce(Vector3.up * jumpForce, ForceMode.Impulse);
    }
}
Advantages and disadvantages
Advantages:
- Abstraction and implementation can evolve independently.
- Switching implementations at runtime is trivial.
- Adding new implementations does not require changing the abstraction.
Disadvantages:
- Adds an extra layer of indirection.
- Overkill for simple systems with a single, stable implementation.
- Requires careful interface design to avoid leaking implementation details.
Tips for Unity
- Use Bridge when you expect multiple implementations to exist, not “just in case” one might appear later.
- For input systems, Unity’s Input System package already uses this pattern internally with its Input Action assets.
- Bridge pairs well with Factory: a factory can choose the correct implementation based on the platform or player settings at startup.
- Avoid exposing implementation-specific details in the abstraction’s interface. The abstraction should only declare what it needs, not how.
Behavior
Command
graph TD
    Invoker[Invoker] -->|stores/executes| Command[Command]
    Command -->|calls| Receiver[Receiver]
    Client[Client] -->|creates| Command
The Command pattern is a behavioral design pattern that turns a request or action into a separate object instead of executing it directly. Instead of calling something like player.MoveForward() directly, the “move forward” action becomes a MoveCommand object, triggered by calling Execute() on it.
The Command pattern can be summarized as:
Encapsulate a request as an object, decoupling the invoker from the executor.
The main purpose is to separate the code that triggers an action from the code that performs it. For example, an InputHandler does not move the character directly. Instead, it creates the related command and sends it to a CommandInvoker. The command itself contains what should happen, who it should affect, and, if needed, how the action can be undone.
This makes commands easier to store, queue, delay, replay, log, or undo.
When to use it
The Command pattern is useful when actions need to be managed, not just executed. If an action needs to be stored, undone, redone, delayed, queued, or triggered later, this pattern becomes very helpful.
One of its most common use cases is undo / redo systems. In tools like level editors, drawing programs, or text editors, each user action can be stored as a command. This allows the last executed command to be taken back by calling its Undo() method.
It is also useful for key rebinding systems. If a player wants to bind the “jump” action to a different key, the input system does not need to be tightly connected to the actual behavior. The input system only chooses the correct command, while the command handles the action itself.
The pattern is also commonly used in turn-based games, replay systems, macro systems and combo systems. Commands can be placed in a queue, executed in order, saved, or replayed later in the same sequence.
Command in Unity
A typical Unity structure consists of three parts: an ICommand interface with Execute() and optionally Undo(), concrete commands such as MoveCommand that implement the interface, and a CommandInvoker that executes and stores commands.
public interface ICommand
{
    void Execute();
    void Undo();
}
A concrete command encapsulates all the information needed to perform and undo an action:
public class MoveCommand : ICommand
{
    private Transform transform;
    private Vector3 direction;
    private float distance;
    private Vector3 previousPosition;

    public MoveCommand(Transform transform, Vector3 direction, float distance)
    {
        this.transform = transform;
        this.direction = direction;
        this.distance = distance;
    }

    public void Execute()
    {
        previousPosition = transform.position;
        transform.position += direction * distance;
    }

    public void Undo()
    {
        transform.position = previousPosition;
    }
}
The CommandInvoker executes commands and keeps a history for undo:
public class CommandInvoker : MonoBehaviour
{
    private Stack<ICommand> history = new Stack<ICommand>();

    public void ExecuteCommand(ICommand command)
    {
        command.Execute();
        history.Push(command);
    }

    public void UndoLastCommand()
    {
        if (history.Count == 0)
            return;

        var last = history.Pop();
        last.Undo();
    }
}
A simple InputHandler that uses commands instead of direct method calls:
public class InputHandler : MonoBehaviour
{
    [SerializeField] private Transform player;
    [SerializeField] private CommandInvoker invoker;

    private void Update()
    {
        if (Input.GetKeyDown(KeyCode.W))
            invoker.ExecuteCommand(new MoveCommand(player, Vector3.forward, 1f));

        if (Input.GetKeyDown(KeyCode.S))
            invoker.ExecuteCommand(new MoveCommand(player, Vector3.back, 1f));

        if (Input.GetKeyDown(KeyCode.Z))
            invoker.UndoLastCommand();
    }
}
Advantages and disadvantages
Advantages:
- Separates the action trigger from the action itself, making code more flexible.
- Makes undo / redo, replay, macro and input rebinding systems easier to build.
- Each command can store its own data and be queued or executed again later.
Disadvantages:
- Can create too many files and too much boilerplate in small projects.
- Simple one-time actions are often easier with direct method calls.
- Too many command classes can become hard to organize as the project grows.
Tips for Unity
- Do not turn everything into a command. If an action does not need undo, replay, input rebinding, macro support, or queueing, a normal method call is usually enough. The Command pattern is most useful when there is a real need for it.
- If you are building an undo system, think about
Undo()from the beginning, not onlyExecute(). Undoing an action can sometimes be harder than performing it. Each command should keep the state information it needs to reverse itself. - Always send commands through the
CommandInvoker. CallingExecute()directly from random places bypasses the history stack, making undo impossible. - For longer games or editor tools, limit the size of the history stack so it does not grow endlessly.
Mediator
graph TD
    Colleague1[Colleague 1] -->|communicates| Mediator[Mediator]
    Colleague2[Colleague 2] -->|communicates| Mediator
    Colleague3[Colleague 3] -->|communicates| Mediator
    Mediator -->|relays| Colleague1
    Mediator -->|relays| Colleague2
    Mediator -->|relays| Colleague3
The Mediator pattern is a behavioral design pattern that manages communication between objects through a central intermediary instead of letting them talk to each other directly. Its main purpose is to prevent classes from becoming tightly connected to one another.
The Mediator pattern can be summarized as:
Centralize complex communications and control between related objects, so they don’t need to know about each other.
Normally, one object directly calls another. As the project grows, this can create too many references, complicated dependencies, and code flow that becomes hard to follow. With Mediator, objects do not need to know each other; they only know the mediator. Communication happens through this central structure.
In Unity, this is often seen through systems like UIMediator, CombatMediator, GameFlowMediator, or carefully designed manager classes. For example, when an enemy dies, the Enemy class does not directly call the score system, audio system, UI system and achievement system. Instead, it notifies the mediator, which then decides which systems should be updated and what actions should happen.
When to use it
Mediator is especially useful when one action requires coordination between multiple systems. For example, when the player takes damage, the mediator can coordinate updating the health bar, playing a sound effect, shaking the camera, and notifying the achievement system. Connecting all of these systems directly to the Player class would make the code messy.
It is also useful in UI systems. If buttons, panels, sliders and popups affect each other, it is cleaner to manage them through a UIMediator instead of making each panel directly reference the others.
Use Mediator when:
- Multiple systems need to be coordinated.
- You want to reduce direct references between objects.
- You want to separate systems like UI, gameplay, audio, score or achievements.
- Communication logic should be controlled from one place.
- You want the code to be easier to test and extend.
However, it should not be used everywhere. If there is a simple, fixed, one-to-one relationship between two classes , like Player and PlayerInventory , Mediator may create an unnecessary extra layer.
Mediator in Unity
A typical structure consists of a mediator interface defining the possible notifications, a concrete mediator that routes messages, and colleague classes that communicate only through the mediator.
The mediator interface defines the events that systems can notify:
public interface IGameMediator
{
    void NotifyEnemyKilled(Enemy enemy, int scoreValue);
    void NotifyPlayerDamaged(int damage);
    void NotifyGameOver();
}
The concrete mediator coordinates the systems:
public class GameMediator : MonoBehaviour, IGameMediator
{
    [SerializeField] private ScoreManager scoreManager;
    [SerializeField] private AudioManager audioManager;
    [SerializeField] private UIManager uiManager;

    public void NotifyEnemyKilled(Enemy enemy, int scoreValue)
    {
        scoreManager.AddScore(scoreValue);
        audioManager.PlaySound("enemy_death");
    }

    public void NotifyPlayerDamaged(int damage)
    {
        uiManager.UpdateHealthBar(damage);
        audioManager.PlaySound("player_hurt");
    }

    public void NotifyGameOver()
    {
        uiManager.ShowGameOverScreen();
        audioManager.StopMusic();
    }
}
An Enemy class that talks only to the mediator, not to every system:
public class Enemy : MonoBehaviour
{
    [SerializeField] private int scoreValue = 100;
    private IGameMediator mediator;

    private void Start()
    {
        mediator = FindObjectOfType<GameMediator>();
    }

    public void Die()
    {
        mediator.NotifyEnemyKilled(this, scoreValue);
        Destroy(gameObject);
    }
}
A Player class that also communicates through the mediator:
public class Player : MonoBehaviour
{
    [SerializeField] private int health = 100;
    private IGameMediator mediator;

    private void Start()
    {
        mediator = FindObjectOfType<GameMediator>();
    }

    public void TakeDamage(int damage)
    {
        health -= damage;
        mediator.NotifyPlayerDamaged(damage);

        if (health <= 0)
            mediator.NotifyGameOver();
    }
}
Advantages and disadvantages
Advantages:
- Reduces dependencies because objects do not directly know each other.
- Changing or adding behavior becomes easier without touching every class.
- Communication logic is gathered in one controlled place.
- Makes testing easier because classes are less dependent on other systems.
Disadvantages:
- Can add unnecessary abstraction in simple cases.
- Debugging can be harder because the flow passes through one central place.
- The mediator can become too large if responsibilities are not separated.
- If too many unrelated systems are handled by the same mediator, readability decreases.
Tips for Unity
- Create mediators based on responsibility. For example, UI interactions can be handled by a
UIMediator, combat-related communication by aCombatMediator, and level flow by aGameFlowMediator. This prevents one central class from controlling the entire project. - If you use a
GameManager, be careful not to turn it into a class that does everything. AGameManagercan manage the general game flow, but UI, combat, audio and input logic should be separated when the project grows. - Manage UI panel opening and closing through a
UIMediatorinstead of directly connecting panels to each other. - Keep gameplay classes like
Enemy,PlayerorNPCindependent from UI and audio systems. - Use mediators for coordination, not for storing every piece of game logic.
- Avoid putting all communication into a single
GameManager. If the mediator starts getting too large, split it by responsibility.
Memento
graph LR
    Originator[Originator] -->|creates| Memento[Memento]
    Caretaker[Caretaker] -->|stores| Memento
    Originator -->|restores from| Memento
The Memento pattern is a behavioral design pattern that allows an object’s current state to be saved without exposing its internal structure, and restored later when needed.
The Memento pattern can be summarized as:
Save the current state of an object so it can be restored later, without breaking encapsulation.
There are three main roles in this pattern. The Originator is the actual object whose state will be saved; it creates its own snapshot and restores itself from that snapshot. The Memento is the container that holds this saved state; its contents are not modified or directly accessed from the outside. The Caretaker is the structure that stores these snapshots; it does not need to know what is inside them, it only keeps them and gives them back when necessary.
When to use it
Memento is generally used when a system needs to return to a previous state. The most common example is an undo / redo system: before a change is made, the current state is saved, and when undo is triggered, the system returns to the last saved state.
In games, it is often used for save / load, checkpoint and sometimes replay systems. For example, a player’s position, health, inventory or current level can be saved. If the player makes a mistake or hits a dangerous obstacle, the system can restore them to the last saved point.
It is also suitable for level editors, character customization screens, playtesting tools and experimental game mechanics where the user should be able to try something and return to the previous state if needed.
Memento in Unity
In Unity, the Memento does not need to be a MonoBehaviour. A simple [Serializable] class or struct is usually enough and more efficient.
The Memento stores the snapshot:
[System.Serializable]
public class PlayerMemento
{
    public Vector3 Position { get; }
    public int Health { get; }
    public List<string> Inventory { get; }

    public PlayerMemento(Vector3 position, int health, List<string> inventory)
    {
        Position = position;
        Health = health;
        Inventory = new List<string>(inventory);
    }
}
The Originator (the player) creates and restores its own snapshots:
public class Player : MonoBehaviour
{
    [SerializeField] private int health = 100;
    [SerializeField] private List<string> inventory = new List<string>();

    public PlayerMemento SaveState()
    {
        return new PlayerMemento(transform.position, health, inventory);
    }

    public void RestoreState(PlayerMemento memento)
    {
        transform.position = memento.Position;
        health = memento.Health;
        inventory = new List<string>(memento.Inventory);
    }

    public void TakeDamage(int damage) => health -= damage;
    public void AddItem(string item) => inventory.Add(item);
}
The Caretaker stores and retrieves snapshots without knowing their contents:
public class PlayerHistory : MonoBehaviour
{
    private Stack<PlayerMemento> history = new Stack<PlayerMemento>();
    private const int MaxHistory = 50;

    public void Save(PlayerMemento memento)
    {
        history.Push(memento);
        if (history.Count > MaxHistory)
            history = new Stack<PlayerMemento>(history.Take(MaxHistory));
    }

    public PlayerMemento Undo()
    {
        if (history.Count == 0)
            return null;

        return history.Pop();
    }
}
A GameController that ties the pieces together:
public class GameController : MonoBehaviour
{
    [SerializeField] private Player player;
    [SerializeField] private PlayerHistory history;

    private void Update()
    {
        if (Input.GetKeyDown(KeyCode.S))
            history.Save(player.SaveState());

        if (Input.GetKeyDown(KeyCode.Z))
        {
            var memento = history.Undo();
            if (memento != null)
                player.RestoreState(memento);
        }
    }
}
Advantages and disadvantages
Advantages:
- Saves an object’s state safely without exposing its internal structure.
- Makes managing previous states easier in undo / redo systems.
- Outside systems do not need to know the object’s internal details.
Disadvantages:
- Saving too many snapshots can increase memory usage.
- Reference types can break snapshots if real copies are not made.
- Keeping an unlimited undo stack can cause memory problems over time.
Tips for Unity
- The Memento object does not need to be a
MonoBehaviour. A simple[Serializable]class is enough. The purpose of Memento is to carry the data of a specific moment, not to exist as an object in the scene. - For undo / redo,
Stack<T>makes sense because the last saved state is the first one to be restored. However, this stack should not be unlimited; limit it to 50 or 100 records. - Reference types must be handled carefully. If structures like
List<Item>orList<string>are assigned directly, a real snapshot is not created. Always create a new list:new List<string>(original). - For a save / load system, mark the Memento as
[Serializable]and convert it to JSON withJsonUtility. Save files underApplication.persistentDataPath. - For systems like replay or ghost mechanics, where data is recorded very frequently, avoid saving the entire state every frame. Record only the deltas or key frames instead.
Observer
graph TD
    Subject[Subject] -->|notifies| Observer1[Observer 1]
    Subject -->|notifies| Observer2[Observer 2]
    Subject -->|notifies| Observer3[Observer 3]
The Observer pattern is, without a doubt, one of my favorite patterns. It is everywhere , C# events, UnityEvents, delegates, Actions , and once you internalize it, you start seeing opportunities to decouple code everywhere. It is the backbone of event-driven architecture in Unity.
The Observer pattern can be summarized as:
Define a one-to-many dependency so that when one object changes state, all its dependents are notified automatically.
There are two sides in this structure: the Subject holds the data or triggers the event, and the Observers listen for that change and react when it happens. The Subject does not need to know exactly who is listening; it just publishes, and whoever cares reacts.
When to use it
The Observer pattern is useful when one event needs to affect multiple systems, especially when you do not know in advance how many objects will react to a change, or when that number may grow later.
In Unity, common use cases include: player health changes updating the HUD, playing a damage sound, triggering a screen shake and checking for game over; score updates refreshing the UI; quest progression; achievement unlocks; and general game events that ripple across systems.
Instead of writing all of this logic inside the Player class , creating a tangled web of references , each related system listens for the event and handles its own responsibility independently.
Observer in Unity
C# events are a natural fit for the Observer pattern. The Subject exposes an event, and any number of Observers subscribe to it.
The Subject that holds the data and raises the event:
public class PlayerHealth : MonoBehaviour
{
    public event System.Action<int> OnHealthChanged;
    public event System.Action OnPlayerDied;

    [SerializeField] private int maxHealth = 100;
    private int currentHealth;

    private void Start()
    {
        currentHealth = maxHealth;
    }

    public void TakeDamage(int damage)
    {
        currentHealth -= damage;
        OnHealthChanged?.Invoke(currentHealth);

        if (currentHealth <= 0)
            OnPlayerDied?.Invoke();
    }

    public void Heal(int amount)
    {
        currentHealth = Mathf.Min(currentHealth + amount, maxHealth);
        OnHealthChanged?.Invoke(currentHealth);
    }
}
Observers subscribe in OnEnable and unsubscribe in OnDisable to avoid dangling references:
public class HealthUI : MonoBehaviour
{
    [SerializeField] private PlayerHealth playerHealth;

    private void OnEnable()
    {
        playerHealth.OnHealthChanged += UpdateHealthBar;
    }

    private void OnDisable()
    {
        playerHealth.OnHealthChanged -= UpdateHealthBar;
    }

    private void UpdateHealthBar(int health)
    {
        Debug.Log($"Health bar updated: {health}");
    }
}
Another observer that plays a sound when the player is hurt:
public class AudioManager : MonoBehaviour
{
    [SerializeField] private PlayerHealth playerHealth;

    private void OnEnable()
    {
        playerHealth.OnHealthChanged += OnHealthChanged;
        playerHealth.OnPlayerDied += OnPlayerDied;
    }

    private void OnDisable()
    {
        playerHealth.OnHealthChanged -= OnHealthChanged;
        playerHealth.OnPlayerDied -= OnPlayerDied;
    }

    private void OnHealthChanged(int health)
    {
        Debug.Log("Playing damage sound");
    }

    private void OnPlayerDied()
    {
        Debug.Log("Playing death sound");
    }
}
Advantages and disadvantages
Advantages:
- Provides loose coupling between the Subject and its Observers.
- New observers can be added without changing existing code.
- Each system handles its own responsibility separately.
Disadvantages:
- Subscription management is critical in Unity; forgetting to unsubscribe causes errors.
- Too many observers can make the event flow harder to follow and debug.
- Relying on observer notification order too much can create fragile logic.
Tips for Unity
- Always subscribe in
OnEnableand unsubscribe inOnDisable. This is the most important habit when using Observer in Unity. - Choose the right tool for the job:
UnityEventis useful for Inspector-based wiring between designers and programmers, while C#eventorActiondelegates are lighter and better for code-only, frequent calls. - Avoid subscribing with anonymous lambdas when you need to unsubscribe later. Named method references are cleaner and safer.
- Be careful with static events. They survive scene changes and can keep references to destroyed objects, causing memory leaks. Always clean them up manually.
- In larger projects, add simple debug logs to the event callbacks. A few
Debug.Loglines can make the event flow much easier to trace.
State
graph TD
    Context[Context] -->|delegates| State[State]
    State --> ConcreteStateA[ConcreteStateA]
    State --> ConcreteStateB[ConcreteStateB]
    ConcreteStateA -->|transition| ConcreteStateB
    ConcreteStateB -->|transition| ConcreteStateA
The State pattern is a behavioral design pattern that allows an object to change its behavior depending on its current internal state. The object stays the same, but it behaves differently in different situations.
The State pattern can be summarized as:
Allow an object to alter its behavior when its internal state changes, as if it were a different class.
In this pattern, each state is a separate class. The main object, called the Context, keeps track of the active state and delegates behavior to that state object. This avoids long if-else or switch blocks and creates a cleaner, more readable structure that respects the Open/Closed principle.
When to use it
The State pattern is useful when an object’s behavior changes frequently at runtime and these changes start creating complicated conditions in the code. It is especially helpful when the same object needs to act in completely different ways depending on its current mode.
In Unity, it is commonly used for:
- Enemy AI: idle, chase, attack, escape.
- Character controllers: idle, running, jumping, attacking, taking damage.
- Game flow: main menu, gameplay, pause, game over.
- UI management: switching between menus, settings, loading screens.
However, if there are only two or three simple states, a bool, enum or small conditional structure may be enough.
State in Unity
A typical structure consists of an IState interface with Enter(), Tick() and Exit() methods, a StateMachine that manages transitions, and concrete state classes.
The state interface:
public interface IState
{
    void Enter();
    void Tick();
    void Exit();
}
A concrete state that handles the chase behavior:
public class ChaseState : IState
{
    private Enemy enemy;
    private Transform target;

    public ChaseState(Enemy enemy, Transform target)
    {
        this.enemy = enemy;
        this.target = target;
    }

    public void Enter()
    {
        Debug.Log("Entering Chase state");
    }

    public void Tick()
    {
        enemy.transform.position = Vector3.MoveTowards(
            enemy.transform.position,
            target.position,
            enemy.ChaseSpeed * Time.deltaTime
        );

        float distance = Vector3.Distance(enemy.transform.position, target.position);

        if (distance < enemy.AttackRange)
            enemy.ChangeState(new AttackState(enemy, target));
        else if (distance > enemy.DetectRange)
            enemy.ChangeState(new IdleState(enemy));
    }

    public void Exit()
    {
        Debug.Log("Exiting Chase state");
    }
}
Another state for attacking:
public class AttackState : IState
{
    private Enemy enemy;
    private Transform target;

    public AttackState(Enemy enemy, Transform target)
    {
        this.enemy = enemy;
        this.target = target;
    }

    public void Enter() => Debug.Log("Entering Attack state");

    public void Tick()
    {
        float distance = Vector3.Distance(enemy.transform.position, target.position);

        if (distance > enemy.AttackRange)
            enemy.ChangeState(new ChaseState(enemy, target));
    }

    public void Exit() => Debug.Log("Exiting Attack state");
}
An idle state:
public class IdleState : IState
{
    private Enemy enemy;

    public IdleState(Enemy enemy)
    {
        this.enemy = enemy;
    }

    public void Enter() => Debug.Log("Entering Idle state");

    public void Tick()
    {
        var player = GameObject.FindWithTag("Player");
        if (player == null) return;

        float distance = Vector3.Distance(enemy.transform.position, player.transform.position);
        if (distance < enemy.DetectRange)
            enemy.ChangeState(new ChaseState(enemy, player.transform));
    }

    public void Exit() => Debug.Log("Exiting Idle state");
}
The Enemy Context that delegates to the current state:
public class Enemy : MonoBehaviour
{
    public float DetectRange = 10f;
    public float AttackRange = 2f;
    public float ChaseSpeed = 3f;

    private IState currentState;

    private void Start()
    {
        ChangeState(new IdleState(this));
    }

    private void Update()
    {
        currentState?.Tick();
    }

    public void ChangeState(IState newState)
    {
        currentState?.Exit();
        currentState = newState;
        currentState.Enter();
    }
}
Advantages and disadvantages
Advantages:
- Makes the code more readable and easier to manage by isolating each behavior.
- New states can be added without changing existing state code.
- Each state can be tested more easily in isolation.
Disadvantages:
- The number of classes can increase quickly.
- In small projects, it can feel unnecessarily complicated.
- Too much shared data can make the Context grow over time.
Tips for Unity
- Define
Enter,TickandExitclearly for each state.Entersets things up,Tickruns the logic each frame, andExitcleans up before transitioning. - Manage state transitions from a central place, such as the Context or a dedicated
StateMachine, rather than from inside the states themselves when possible. - Avoid creating new state objects every time a transition happens. Cache and reuse state instances to reduce garbage collection pressure.
- When working with the
Animator, useAnimator.StringToHash()instead of repeating string parameters for better performance. - Consider ScriptableObject-based states for more flexible, data-driven systems that can be configured in the Inspector.
- If the number of states grows too large, a hierarchical state machine or behavior tree may be a better fit.
Strategy
graph TD
    Context[Context] -->|uses| Strategy[Strategy]
    Strategy --> StrategyA[Strategy A]
    Strategy --> StrategyB[Strategy B]
    Strategy --> StrategyC[Strategy C]
The Strategy pattern is a behavioral design pattern that lets you define a family of algorithms in separate classes and switch between them at runtime. The main class, called the Context, only knows the common interface; it does not need to understand how each strategy works internally.
The Strategy pattern can be summarized as:
Define a family of interchangeable algorithms and let them vary independently from the clients that use them.
For example, a character’s attack type can change: sword attack, bow attack or magic attack. The character itself stays the same; only the attack strategy changes. When you want to add a new behavior, you simply create a new strategy class instead of modifying the existing system.
When to use it
Strategy is used when the same behavior has different variants and you need to switch between them at runtime. In general, if you see if-else or switch blocks growing inside a class, Strategy might be a good candidate.
In Unity, it is commonly used for:
- Enemy AI behaviors: patrolling, attacking, escaping.
- Different weapon types: sword, bow, magic, automatic weapon.
- Character movement types: walking, running, jumping, swimming.
- Different input systems: keyboard, gamepad, touch screen.
However, if there are only two simple options and the system is unlikely to grow, using Strategy may add unnecessary complexity.
Strategy in Unity
Most strategies do not need Unity’s MonoBehaviour lifecycle; plain C# classes are often better. The Context holds a reference to the interface and delegates to it.
The strategy interface:
public interface IAttackStrategy
{
    void Attack(Transform origin, LayerMask targetMask);
}
Concrete strategies implement the interface with their own logic:
public class SwordAttack : IAttackStrategy
{
    public void Attack(Transform origin, LayerMask targetMask)
    {
        Debug.Log("Swinging sword!");
        var hits = Physics.OverlapSphere(origin.position, 1.5f, targetMask);
        foreach (var hit in hits)
            Debug.Log($"Hit {hit.name} with sword");
    }
}

public class BowAttack : IAttackStrategy
{
    public void Attack(Transform origin, LayerMask targetMask)
    {
        Debug.Log("Shooting arrow!");
        if (Physics.Raycast(origin.position, origin.forward, out var hit, 50f, targetMask))
            Debug.Log($"Hit {hit.collider.name} with arrow");
    }
}

public class MagicAttack : IAttackStrategy
{
    public void Attack(Transform origin, LayerMask targetMask)
    {
        Debug.Log("Casting fireball!");
        var hits = Physics.OverlapSphere(origin.position + origin.forward * 3f, 2f, targetMask);
        foreach (var hit in hits)
            Debug.Log($"Hit {hit.name} with magic");
    }
}
The Context uses the strategy without knowing the details:
public class PlayerCombat : MonoBehaviour
{
    private IAttackStrategy currentStrategy;
    private IAttackStrategy swordAttack;
    private IAttackStrategy bowAttack;
    private IAttackStrategy magicAttack;

    [SerializeField] private LayerMask targetMask;

    private void Awake()
    {
        swordAttack = new SwordAttack();
        bowAttack = new BowAttack();
        magicAttack = new MagicAttack();
    }

    public void SetStrategy(IAttackStrategy strategy)
    {
        currentStrategy = strategy;
    }

    private void Update()
    {
        if (Input.GetKeyDown(KeyCode.Space))
            currentStrategy?.Attack(transform, targetMask);

        if (Input.GetKeyDown(KeyCode.Alpha1))
            SetStrategy(swordAttack);

        if (Input.GetKeyDown(KeyCode.Alpha2))
            SetStrategy(bowAttack);

        if (Input.GetKeyDown(KeyCode.Alpha3))
            SetStrategy(magicAttack);
    }
}
Advantages and disadvantages
Advantages:
- Makes the code cleaner and easier to expand with new behaviors.
- New strategies can be added without changing existing code.
- Each strategy can be tested independently.
Disadvantages:
- Can create too many classes in simple systems.
- Too many strategies can be hard to track and organize.
- Sharing too much data between strategies can complicate the interface design.
Tips for Unity
- Write strategies as plain C# classes. Most strategies do not need
MonoBehaviourand work better without it. - Consider defining strategies as
ScriptableObjects. This allows you to assign them from the Inspector, share them between prefabs, and let designers test behaviors without touching code. - When switching strategies, handle the exit logic of the old strategy and the entry logic of the new one properly to avoid unexpected bugs.
- Provide a default or null-object strategy to prevent null reference errors when no strategy is assigned.
- Create strategies beforehand and reuse them. Avoid instantiating new strategy objects every frame.
Chain of Responsibility
graph LR
    Handler1[Handler 1] -->|can't handle| Handler2[Handler 2]
    Handler2 -->|can't handle| Handler3[Handler 3]
    Handler3 -->|handles| Request[Request]
Chain of Responsibility passes a request through a chain of handlers until one of them processes it. Each handler decides whether to handle the request or pass it to the next handler in the chain.
The pattern can be summarized as:
Avoid coupling the sender of a request to its receiver by giving multiple objects a chance to handle the request.
In Unity, this is useful for input systems where UI should consume clicks before the game world does, for damage pipelines where armor absorbs damage before health is reduced, or for achievement systems that chain-check conditions.
When to use it
Chain of Responsibility is useful when multiple objects might handle a request and the handler is not known at compile time. It is common in:
- Input handling: UI buttons consume a click first, then the game world, then nothing.
- Damage modifiers: dodge chance, armor reduction, shield absorption, health deduction.
- Achievement systems: check conditions in sequence, stop when one fails.
- Logging pipelines: debug log, warning log, error log, each handling its level.
If the set of handlers is fixed and known, a simple list or array with a loop is often simpler.
Chain of Responsibility in Unity
A damage pipeline where each handler can intercept damage:
public abstract class DamageHandler
{
    protected DamageHandler next;

    public DamageHandler SetNext(DamageHandler handler)
    {
        next = handler;
        return handler;
    }

    public virtual void Handle(DamageData data)
    {
        next?.Handle(data);
    }
}

public class DamageData
{
    public int amount;
    public bool consumed;
}
Concrete handlers in the chain:
public class DodgeHandler : DamageHandler
{
    public override void Handle(DamageData data)
    {
        if (Random.value < 0.2f)
        {
            Debug.Log("Dodged!");
            data.consumed = true;
            return;
        }
        next?.Handle(data);
    }
}

public class ArmorHandler : DamageHandler
{
    public override void Handle(DamageData data)
    {
        int absorbed = Mathf.Min(data.amount, 5);
        data.amount -= absorbed;
        Debug.Log($"Armor absorbed {absorbed} damage");
        next?.Handle(data);
    }
}

public class HealthHandler : DamageHandler
{
    [SerializeField] private int health = 100;

    public override void Handle(DamageData data)
    {
        health -= data.amount;
        Debug.Log($"Health reduced to {health}");
    }
}
Building and using the chain:
public class CombatSystem : MonoBehaviour
{
    private DamageHandler pipeline;

    private void Awake()
    {
        var dodge = new DodgeHandler();
        var armor = new ArmorHandler();
        var health = new HealthHandler();

        dodge.SetNext(armor).SetNext(health);
        pipeline = dodge;
    }

    public void ApplyDamage(int amount)
    {
        pipeline.Handle(new DamageData { amount = amount });
    }
}
Advantages and disadvantages
Advantages:
- Decouples the sender from the receivers; handlers can be added or reordered easily.
- Each handler has a single responsibility, making the system modular.
- The chain can be reconfigured at runtime.
Disadvantages:
- A request can fall through the entire chain unhandled if not designed carefully.
- Long chains can be hard to debug and may add performance overhead.
- Not suitable when the handler must be known deterministically.
Tips for Unity
- Each handler should be a plain C# class. This keeps the chain lightweight and independent from the scene.
- Give every handler a
SetNextmethod that returns the next handler, enabling fluent chain construction. - Always ensure the chain ends with a handler that guarantees the request is consumed, to avoid unexpected unhandled cases.
- For input systems specifically, Unity’s new Input System already supports similar concepts with its processor and interaction chains.
- If the chain becomes too long or the order changes frequently, consider a priority queue or a list of handlers instead of a linked chain.
Visitor
graph TD
    Visitor[Visitor] -->|visits| ElementA[Element A]
    Visitor -->|visits| ElementB[Element B]
    Client[Client] -->|accepts| Visitor
The Visitor pattern separates an algorithm from the object structure it operates on. Instead of adding a method to every class in a hierarchy each time you need a new operation, you write a single Visitor class that handles all types.
I love this one. Its power is subtle, it takes a moment to click, but once it does you see the elegance. Adding a new operation across a whole hierarchy without touching a single existing class feels like cheating.
The pattern can be summarized as:
Separate an algorithm from the object structure it operates on, allowing you to add new operations without modifying the classes.
When to use it
Visitor is useful when you have a stable object hierarchy but frequently need to add new operations across all types. Common examples include applying effects to different enemy types, serializing a complex object graph, calculating damage based on weapon-vs-armor type combinations, or generating reports from a data model.
It becomes especially powerful when the alternative would be a cascade of if (enemy is Goblin) type checks scattered across the codebase, or adding a method to every type every time a new feature is needed.
Visitor in Unity
An enemy hierarchy that accepts visitors:
public interface IEnemyVisitor
{
    void Visit(Goblin goblin);
    void Visit(Orc orc);
    void Visit(Dragon dragon);
}

public abstract class Enemy : MonoBehaviour
{
    public abstract void Accept(IEnemyVisitor visitor);
}

public class Goblin : Enemy
{
    public override void Accept(IEnemyVisitor visitor) => visitor.Visit(this);
    public int StolenGold = 5;
}

public class Orc : Enemy
{
    public override void Accept(IEnemyVisitor visitor) => visitor.Visit(this);
    public int Rage = 100;
}

public class Dragon : Enemy
{
    public override void Accept(IEnemyVisitor visitor) => visitor.Visit(this);
    public bool CanBreatheFire = true;
}
Visitors that add operations without touching the enemy classes:
public class DamageCalculator : IEnemyVisitor
{
    public int Result { get; private set; }

    public void Visit(Goblin goblin) => Result = 10 + goblin.StolenGold;
    public void Visit(Orc orc) => Result = 20 + orc.Rage / 10;
    public void Visit(Dragon dragon) => Result = 50 + (dragon.CanBreatheFire ? 30 : 0);
}

public class LootGenerator : IEnemyVisitor
{
    public List<string> Result { get; private set; }

    public void Visit(Goblin goblin)
    {
        Result = new List<string> { "Gold Coin", "Rusty Dagger" };
    }

    public void Visit(Orc orc)
    {
        Result = new List<string> { "Orcish Axe", "Leather Armor" };
    }

    public void Visit(Dragon dragon)
    {
        Result = new List<string> { "Dragon Scale", "Fire Essence", "Legendary Sword" };
    }
}
Using the visitor:
public class CombatManager : MonoBehaviour
{
    public void CalculateAndLoot(Enemy enemy)
    {
        var damageCalc = new DamageCalculator();
        enemy.Accept(damageCalc);
        Debug.Log($"Damage dealt: {damageCalc.Result}");

        var lootGen = new LootGenerator();
        enemy.Accept(lootGen);
        Debug.Log($"Loot: {string.Join(", ", lootGen.Result)}");
    }
}
Advantages and disadvantages
Advantages:
- Adding new operations across a whole hierarchy requires zero changes to the existing classes.
- Related behavior for all types lives in one place, making it easy to understand.
- Each visitor has a single, clear responsibility.
Disadvantages:
- Adding a new type to the hierarchy forces changes to every visitor.
- The Visitor interface must know about every concrete type, creating a dependency from visitor to visited.
- Overkill for small hierarchies or when operations change less often than types.
Tips for Unity
- Use Visitor when you have a stable set of types (enemies, items, abilities) and frequently need new cross-cutting operations.
- If you find yourself adding new types more often than new operations, Visitor becomes a liability. In that case, keep the behavior inside each class or use a different pattern.
- The
Acceptmethod is just double dispatch. It callsvisitor.Visit(this), which invokes the correct overload based on the concrete type at compile time. - For large hierarchies, consider the default Visitor pattern where an abstract visitor provides default implementations and concrete visitors override only what they need.
Architectural
Dependency Injection
graph TD
    DIContainer[DI Container] -->|provides| ServiceA[Service A]
    DIContainer -->|provides| ServiceB[Service B]
    Client[Client] -->|requests dependencies| DIContainer
Dependency Injection is the dragon slayer of coupled code. It does one simple thing, a class receives its dependencies from the outside instead of creating them internally, and in doing so it dismantles the tangled web of references that makes projects rigid and untestable.
The Dependency Injection principle can be summarized as:
Depend on abstractions, not on concrete implementations. Let someone else provide the objects you need.
A class should not need to know how the systems it uses are created. It should only use the dependency given to it. This keeps systems like PlayerController, AudioManager, SaveSystem and InputService loosely connected. The responsibility of creating and wiring objects moves outside the class, a concept known as Inversion of Control.
When to use it
Dependency Injection is useful when a system may need to change later. For example, you may use LocalSaveSystem today and replace it with CloudSaveSystem later. With DI, you do not need to modify the PlayerController; you only change the dependency being provided.
It is also very useful when writing tests. Instead of using a real AudioManager or HealthService, you can provide a fake version such as MockAudioManager or FakeHealthService. This makes it easier to test classes without setting up a full Unity scene.
DI becomes more valuable as a project grows. When systems start depending on each other, creating them directly inside each class can quickly become messy. Managing dependencies from a central place keeps the project cleaner.
For very small prototypes, simple data classes or one-file experiments, DI may be unnecessary.
Dependency Injection in Unity
Classic constructor injection does not work directly with MonoBehaviour because Unity creates those objects. The most common approaches in Unity are:
The interface that defines the contract:
public interface IHealthService
{
    void Reduce(int amount);
    int GetCurrentHealth();
}
A concrete implementation:
public class HealthService : IHealthService
{
    private int health = 100;

    public void Reduce(int amount)
    {
        health -= amount;
        Debug.Log($"Health reduced by {amount}, current: {health}");
    }

    public int GetCurrentHealth() => health;
}
The class receives its dependency through the constructor:
public class Player
{
    private readonly IHealthService healthService;

    public Player(IHealthService healthService)
    {
        this.healthService = healthService;
    }

    public void TakeDamage(int amount)
    {
        healthService.Reduce(amount);
    }
}
A bootstrap that wires everything together:
public class GameInstaller : MonoBehaviour
{
    private void Awake()
    {
        IHealthService healthService = new HealthService();
        var player = new Player(healthService);

        player.TakeDamage(10);
    }
}
Advantages and disadvantages
Advantages:
- Loose coupling makes systems easier to replace or update.
- Testability improves because fake or mock objects can be injected.
- Readability improves because dependencies are clearly visible in the constructor or injection point.
Disadvantages:
- Can add extra complexity, especially in small projects.
- Debugging can be harder when dependencies are wired incorrectly.
- Using a DI framework can make the project dependent on that tool.
Tips for Unity
- For small and medium-sized projects, start with manual DI before adding a framework. A
BootstraporGameInstallerobject can create the services once and pass them to the scripts that need them. - When constructor injection is not possible with
MonoBehaviour, use[SerializeField]references from the Inspector or pass dependencies manually through anInit(...)method. - Avoid searching for dependencies with
FindObjectOfType,GameObject.Findor repeatedGetComponentcalls. These make your classes depend on scene structure. - Depend on interfaces instead of concrete classes. Use
ISaveServiceinstead ofSaveServiceso you can swap implementations later. ScriptableObjects can work as a lightweight alternative to DI. Shared data or service references can be placed inside aScriptableObjectand assigned through the Inspector.- Singletons are not always forbidden, but they should be used carefully.
GameManager.Instancemay look convenient, but over time it creates a codebase where everything depends on everything else. DI keeps dependencies clear, visible and manageable.
MVP
graph TD
    View[View] -->|user input| Presenter[Presenter]
    Presenter -->|updates| Model[Model]
    Model -->|notifies| Presenter
    Presenter -->|updates UI| View
I am not the biggest fan of MVP in Unity, but I cannot deny it has its place. If your UI is complex enough and you need to test it without opening a scene, MVP delivers. For simpler projects, though, the extra boilerplate can feel like ceremony without reward.
MVP divides a screen into three separate responsibilities:
- Model: stores data and business rules. It knows nothing about the UI.
- View: handles what appears on screen. It only sends input events and displays values.
- Presenter: the middleman that listens to the View, updates the Model, and pushes results back to the View.
The pattern can be summarized as:
Separate the UI into Model, View and Presenter, so the UI logic can be developed and tested independently from Unity.
When to use it
MVP is most useful when the UI starts to grow. If a project only has a small prototype with a single button, this structure may be unnecessary. However, with multiple inputs, different screen states, validation steps or complex user flows, MVP makes the code easier to control.
It is a good choice when you want to test UI logic without opening Unity, since the Presenter can be a plain C# class. It also helps when the same game logic needs to be shown through different interfaces or when the team grows and designers and programmers need to work in parallel.
MVP in Unity
A simple coin counter demonstrates the pattern clearly:
public class CoinModel
{
    public int Coins { get; private set; }
    public void AddCoin() => Coins++;
}
The View exposes input events and displays data:
public class CoinView : MonoBehaviour
{
    [SerializeField] private Button addButton;
    [SerializeField] private TMP_Text coinText;

    public event Action OnAddCoinClicked;

    private void Start()
    {
        addButton.onClick.AddListener(() => OnAddCoinClicked?.Invoke());
    }

    public void UpdateCoinDisplay(int coins)
    {
        coinText.text = $"Coins: {coins}";
    }
}
The Presenter orchestrates the flow:
public class CoinPresenter
{
    private readonly CoinModel model;
    private readonly CoinView view;

    public CoinPresenter(CoinModel model, CoinView view)
    {
        this.model = model;
        this.view = view;
        view.OnAddCoinClicked += HandleAddCoin;
    }

    private void HandleAddCoin()
    {
        model.AddCoin();
        view.UpdateCoinDisplay(model.Coins);
    }

    public void Dispose()
    {
        view.OnAddCoinClicked -= HandleAddCoin;
    }
}
A bootstrap wires everything together:
public class CoinScreen : MonoBehaviour
{
    [SerializeField] private CoinView coinView;
    private CoinPresenter presenter;

    private void Start()
    {
        var model = new CoinModel();
        presenter = new CoinPresenter(model, coinView);
    }

    private void OnDestroy()
    {
        presenter?.Dispose();
    }
}
Advantages and disadvantages
Advantages:
- Testability improves because the Presenter can be tested without running Unity.
- Responsibilities stay clear between View, Presenter and Model.
- UI changes are easier because often only the View needs to be rewritten.
Disadvantages:
- Adds more files and boilerplate, which can feel unnecessary in small projects.
- The Presenter can become too large if too much logic is placed in one class.
- Event management needs care, especially during scene transitions.
Tips for Unity
- Keep the Presenter as a plain C# class. It does not need to inherit from
MonoBehaviour. If you need lifecycle methods, manage them through the View. - The View should stay passive. Its only job is to send input events and display values. Decisions belong in the Presenter.
- Always clean up event subscriptions. When the View is destroyed or the scene changes, unsubscribe in the Presenter to avoid ghost references.
- If the Presenter starts getting too large, split the screen into smaller components with their own Presenters.
- Keep UI information out of the Model. The Model should not know about colors, fonts, animations or panel states. Everything visual stays in the View.
Service Locator
graph TD
    Client1[Client 1] -->|requests| Locator[Service Locator]
    Client2[Client 2] -->|requests| Locator
    Locator -->|returns| ServiceA[Service A]
    Locator -->|returns| ServiceB[Service B]
I really love this one. It is simple, practical and hits a sweet spot between the rigidity of Singletons and the ceremony of full DI frameworks. A central registry where services register themselves and clients request them by interface, nothing more, nothing less.
The Service Locator pattern can be summarized as:
Provide a central registry where services register themselves, and clients request them by type, without knowing the concrete implementation.
At first it may look similar to Singleton, but the key difference is that Singleton creates a direct dependency on a concrete class, while Service Locator keeps the dependency flexible through interfaces. In Unity projects where scene management, object lifetimes and testing matter, that difference is huge.
When to use it
Service Locator is useful when multiple systems need access to the same service. If different parts of the game need to play sounds, save data, read player input or send analytics events, managing these services from one place makes the project easier to control.
It is a more organized alternative when Singleton usage starts scattering across the project. Instead of making every system directly know about each other, services are accessed through the locator, reducing direct coupling.
It is also useful when you want to swap a service at runtime. The real game uses AudioService, while tests use NullAudioService or MockAudioService, without changing any client code.
Service Locator in Unity
A simple but effective implementation:
public static class ServiceLocator
{
    private static readonly Dictionary<Type, object> services = new();

    public static void Register<T>(T service)
    {
        var type = typeof(T);

        if (services.ContainsKey(type))
        {
            Debug.LogWarning($"{type.Name} already registered, overwriting.");
            services[type] = service;
            return;
        }

        services.Add(type, service);
    }

    public static T Get<T>()
    {
        var type = typeof(T);

        if (!services.TryGetValue(type, out var service))
            throw new Exception($"Service of type {type.Name} is not registered.");

        return (T)service;
    }

    public static void Unregister<T>()
    {
        services.Remove(typeof(T));
    }

    public static void Clear()
    {
        services.Clear();
    }
}
Services register themselves early:
public class AudioService : MonoBehaviour
{
    private void Awake()
    {
        ServiceLocator.Register<IAudioService>(this);
    }

    private void OnDestroy()
    {
        ServiceLocator.Unregister<IAudioService>();
    }
}
Clients request services when needed:
public class Player : MonoBehaviour
{
    private IAudioService audio;

    private void Start()
    {
        audio = ServiceLocator.Get<IAudioService>();
    }

    private void Update()
    {
        if (Input.GetKeyDown(KeyCode.Space))
            audio.PlaySfx("jump");
    }
}
Advantages and disadvantages
Advantages:
- Reduces coupling because classes depend on interfaces instead of concrete services.
- Central management of shared services from one place.
- Great for testing because mock or null services can be registered instead.
Disadvantages:
- The biggest downside is hidden dependencies through
Get<T>()calls. - Missing or wrong registrations cause runtime errors instead of compile-time errors.
- If overused, it can turn into a global state container.
Tips for Unity
- Register services through interfaces, not concrete classes. Use
IAudioServiceinstead ofAudioServiceto make future changes easy. - Respect the registration order. Services should register in
Awake()and clients should retrieve them inStart(). This avoids requesting a service before it has been registered. - Handle scene transitions carefully. If the locator is kept alive with
DontDestroyOnLoad, the same service may be registered again. Clear old services or warn on overwrite. - Always unregister in
OnDestroy(). Otherwise, the locator may hold references to destroyed objects, causingNullReferenceExceptions on scene changes. - Avoid calling
ServiceLocator.Get<T>()every frame. Retrieve the service once inStart()and store it in a field. - Service Locator is not for everything. For small, scene-specific dependencies, Inspector references or constructor injection are cleaner. Use it for truly shared systems like audio, save, input and telemetry.
ECS
graph TD
    Entity[Entity] -->|has| Component1[Component 1]
    Entity -->|has| Component2[Component 2]
    System1[System 1] -->|queries| Component1
    System2[System 2] -->|queries| Component2
ECS, or Entity Component System, is an architectural pattern that structures code around data rather than objects. It flips the traditional MonoBehaviour approach on its head: instead of each object owning its behavior, data lives in components, behavior lives in systems, and entities are just IDs that group components together.
The pattern can be summarized as:
Structure code as data-oriented entities composed of components, processed by systems that operate on all matching entities at once.
Unity has its own high-performance ECS implementation: Unity DOTS (Data-Oriented Technology Stack). It includes the Entities package, the Job System, and the Burst Compiler. However, DOTS is not a replacement for MonoBehaviour, it is a specialized tool for CPU-bound scenarios with thousands of entities.
When to use it
ECS shines when you need to process thousands of similar entities efficiently. Common use cases include large-scale simulations, crowd systems, bullet hell patterns, destructible environments, and any scenario where MonoBehaviours with individual Update() calls become a bottleneck.
For typical games with dozens or hundreds of objects, MonoBehaviour is simpler and more than sufficient. ECS adds significant complexity to the project structure and workflow.
ECS in Unity
A lightweight ECS-like structure without DOTS, just the mental model:
public struct HealthComponent
{
    public int current;
    public int max;
}

public struct MovementComponent
{
    public Vector3 velocity;
    public float speed;
}
Systems process entities that have the right components:
public class MovementSystem
{
    public void Update(List<int> entities,
        Dictionary<int, MovementComponent> movements,
        Dictionary<int, Transform> transforms,
        float deltaTime)
    {
        foreach (var id in entities)
        {
            if (!movements.ContainsKey(id) || !transforms.ContainsKey(id))
                continue;

            var move = movements[id];
            var tf = transforms[id];
            tf.position += move.velocity * move.speed * deltaTime;
        }
    }
}

public class HealthSystem
{
    public void Update(List<int> entities,
        Dictionary<int, HealthComponent> healths)
    {
        foreach (var id in entities)
        {
            if (!healths.ContainsKey(id)) continue;

            var health = healths[id];
            if (health.current <= 0)
                Debug.Log($"Entity {id} died");
        }
    }
}
Advantages and disadvantages
Advantages:
- Excellent cache utilization: data for all entities is stored contiguously.
- Systems can run in parallel when they operate on different components.
- Behavior is completely separated from data, making the architecture flexible.
Disadvantages:
- Steep learning curve and a completely different mental model.
- Overkill for most projects; MonoBehaviour handles the vast majority of games well.
- Debugging is harder because entities are just IDs with no class to inspect.
Tips for Unity
- Do not jump into DOTS just because it sounds fast. Profile first. MonoBehaviour with good optimization is enough for most games.
- If you need DOTS, start with the Unity Entities Graphics package and the official samples. The API is still evolving.
- For a middle ground, consider the mental model of ECS without DOTS: keep data in plain structs, separate logic from MonoBehaviours, and batch operations where possible.
- Burst-compiled jobs can replace heavy MonoBehaviour logic even without the full Entities package, giving you a performance boost with less architectural change.
Game Loop
graph TD
    A[Process Input] --> B[Update Game State]
    B --> C[Render Frame]
    C --> D[Wait for next frame]
    D --> A
The Game Loop is the heartbeat of every real-time game. It decouples the passage of game time from user input and rendering speed, ensuring the simulation runs at a consistent rate regardless of frame rate.
The pattern can be summarized as:
Decouple the progression of game time from user input and frame rate, ensuring a stable and deterministic simulation.
In Unity, you do not write the game loop yourself, the engine provides it through Update, FixedUpdate and LateUpdate. Understanding how it works under the hood, however, is essential for building games that feel smooth and behave consistently.
When to use it
If you are using Unity, the game loop is already there. You only need to implement your own when building an engine from scratch or when you need custom timing behavior that Unity’s built-in loop does not provide.
Understanding the game loop matters when you need to decide between Update (runs every rendered frame, variable delta time) and FixedUpdate (runs at a fixed timestep independent of frame rate). Physics goes in FixedUpdate, input and rendering-dependent logic go in Update.
How the Game Loop works
The classic game loop decouples simulation from rendering using a fixed timestep with an accumulator, as described by Glenn Fiedler in his essential article Fix Your Timestep:
double t = 0.0;
double dt = 0.01;
double currentTime = Time.realtimeSinceStartupAsDouble;
double accumulator = 0.0;

while (running)
{
    double newTime = Time.realtimeSinceStartupAsDouble;
    double frameTime = newTime - currentTime;
    currentTime = newTime;

    accumulator += frameTime;

    while (accumulator >= dt)
    {
        Integrate(state, t, dt);
        accumulator -= dt;
        t += dt;
    }

    double alpha = accumulator / dt;
    state = Interpolate(previousState, currentState, alpha);
    Render(state);
}
The key ideas are:
- Fixed timestep: the simulation always advances by
dt, never more, never less. This guarantees deterministic, stable physics regardless of frame rate. - Accumulator: leftover time carries over to the next frame. Nothing is wasted.
- Interpolation: when rendering, the display state is interpolated between the previous and current simulation state using
alpha, the fraction ofdtremaining in the accumulator. This produces smooth visuals even when the render rate and simulation rate do not align.
Without this decoupling, a variable frame rate causes the simulation to behave differently every time it runs, fast machines and slow machines get different results, and physics can explode or objects can tunnel through walls.
Game Loop in Unity
Unity already implements a variant of this pattern:
FixedUpdateruns the physics at a fixed timestep, configurable inEdit > Project Settings > Time > Fixed Timestep(default 0.02s, 50Hz).Updateruns every rendered frame at variable delta time, available viaTime.deltaTime.LateUpdateruns after allUpdatecalls, useful for camera follow and post-processing logic.- Unity internally interpolates rigidbody positions for smooth rendering using the accumulator approach described above.
The practical rule in Unity is: put physics and anything that needs deterministic behavior in FixedUpdate; put input, rendering-dependent logic and anything that benefits from variable frame rate in Update.
Advantages and disadvantages
Advantages:
- Decouples simulation speed from rendering speed.
- Makes physics deterministic and reproducible.
- Smooth rendering even at inconsistent frame rates via interpolation.
Disadvantages:
- Adds complexity when implementing from scratch.
- Fixed timestep can cause the “spiral of death” if the simulation is too heavy.
- Interpolation adds one frame of latency to the rendered output.
Tips for Unity
- You rarely need to implement the game loop yourself in Unity. Focus on using
UpdatevsFixedUpdatecorrectly. - Set the fixed timestep based on your target physics fidelity. 0.02s (50Hz) is the default; increase to 0.01s (100Hz) for competitive games needing more precise physics.
- Use
Time.deltaTimeinUpdateandTime.fixedDeltaTimeinFixedUpdatefor frame-independent calculations. - For custom deterministic simulations, use
Time.fixedDeltaTimein a loop insideUpdatewith your own accumulator, following the pattern from the article above.
Optimization
Dirty Flag
graph TD
    Data[Data changes] -->|sets| Flag[Dirty Flag]
    System[System] -->|checks| Flag
    Flag -->|if dirty| Recalculate[Recalculate]
    Recalculate -->|clears| Flag
Dirty Flag is a simple optimization pattern that tracks whether data has changed, so you can skip redundant expensive calculations. If the data has not changed, there is no need to recalculate.
The pattern can be summarized as:
Use a boolean flag to track unprocessed changes, and recalculate only when needed.
When the data changes, the flag becomes true. When the result is requested, the flag is checked: if dirty, the value is recalculated and cached, and the flag is reset. If clean, the cached value is returned immediately.
When to use it
Dirty Flag is useful when a calculation is expensive but the data does not change very often. It works best when a value is read many times but updated only sometimes.
Common use cases include:
- Character stat calculations (power, defense, speed derived from base stats).
- Pathfinding results that should only update when the map changes.
- UI layout or mesh rebuilds.
- Transform or world matrix calculations.
It also helps when you want to delay updates and process multiple changes at once, instead of recalculating after every small change. However, if the calculation is already cheap or if the data changes every frame, Dirty Flag adds complexity without benefit.
Dirty Flag in Unity
Property setters are the safest way to trigger the flag, avoiding the risk of forgetting to mark dirty when a field changes directly:
public class PlayerStats : MonoBehaviour
{
    [SerializeField] private int strength = 10;
    [SerializeField] private int agility = 5;
    [SerializeField] private int intelligence = 3;

    private int cachedPower;
    private bool isDirty = true;

    public int Strength
    {
        get => strength;
        set
        {
            if (strength == value) return;
            strength = value;
            isDirty = true;
        }
    }

    public int Agility
    {
        get => agility;
        set
        {
            if (agility == value) return;
            agility = value;
            isDirty = true;
        }
    }

    public int Intelligence
    {
        get => intelligence;
        set
        {
            if (intelligence == value) return;
            intelligence = value;
            isDirty = true;
        }
    }

    public int GetPower()
    {
        if (isDirty)
        {
            RecalculatePower();
            isDirty = false;
        }

        return cachedPower;
    }

    private void RecalculatePower()
    {
        Debug.Log("Recalculating power...");
        cachedPower = strength * 2 + agility * 3 + intelligence * 4;
    }
}
public class GameController : MonoBehaviour
{
[SerializeField] private PlayerStats player;
private void Update()
{
var power = player.GetPower();
if (Input.GetKeyDown(KeyCode.Alpha1))
player.Strength += 1;
if (Input.GetKeyDown(KeyCode.Alpha2))
player.Agility += 1;
}
}Advantages and disadvantages
Advantages:
- Improves performance by avoiding unnecessary recalculations.
- Simple to implement: one flag and one cached value.
- Gives control over exactly when recalculation happens.
Disadvantages:
- Returning stale data is the biggest risk if the flag is not updated correctly.
- Delayed recalculation can be a problem for systems that need instant accuracy.
- Managing multiple dirty flags can become complicated in larger systems.
Tips for Unity
- Always use property setters to set
isDirty = true. Avoid changing backing fields directly. - Check the dirty flag in
LateUpdate()rather thanUpdate()when possible, so all changes for the frame have already been applied. - To support Inspector changes, use
OnValidate()to mark dirty when values are edited in the editor. - Unity already uses similar ideas internally, such as
transform.hasChangedand UI layout rebuild systems. Note thattransform.hasChangedis not reset automatically after reading. - Do not serialize the dirty flag itself; it is a runtime concept and should always start as
true.
Object Pooling
graph TD
    Client[Client] -->|requests| Pool[Object Pool]
    Pool -->|returns existing| Object1[Object]
    Pool -->|creates new| Object2[Object]
    Client -->|returns| Object1
    Object1 --> Pool
Object Pooling is a pattern where objects that are expensive to create and destroy are prepared in advance and stored in a pool. When an object is needed, it is taken from the pool instead of being newly created. When done, it is returned to the pool instead of being destroyed. The idea is simple: stop throwing objects away and reuse them.
The pattern can be summarized as:
Maintain a pool of pre-instantiated objects, reusing them instead of constantly creating and destroying.
Unity has its own built-in pool system since 2021: UnityEngine.Pool.ObjectPool<T>. If you are using a recent version, you can use it directly instead of writing a custom one.
When to use it
Object Pooling is useful when the same type of object is created and removed many times during gameplay. It is a good choice when:
- Many objects are spawned and removed in a short time.
InstantiateandDestroycalls cause frame drops or stutters.- The game targets mobile or lower-end devices.
- Repeated objects such as bullets, enemies, particles or popups are used often.
- Resetting an object is cheaper than creating it from scratch.
For objects that appear only once or a few times in a scene, pooling adds unnecessary complexity.
Object Pooling in Unity
A simple generic pool implementation:
public class ObjectPool : MonoBehaviour
{
    [SerializeField] private GameObject prefab;
    [SerializeField] private int initialSize = 20;

    private readonly Queue<GameObject> pool = new Queue<GameObject>();

    private void Awake()
    {
        for (int i = 0; i < initialSize; i++)
        {
            var obj = Instantiate(prefab);
            obj.SetActive(false);
            pool.Enqueue(obj);
        }
    }

    public GameObject Get()
    {
        if (pool.Count > 0)
        {
            var obj = pool.Dequeue();
            obj.SetActive(true);
            return obj;
        }

        var newObj = Instantiate(prefab);
        newObj.SetActive(true);
        return newObj;
    }

    public void Return(GameObject obj)
    {
        obj.SetActive(false);
        pool.Enqueue(obj);
    }
}
A bullet that returns itself to the pool:
public class Bullet : MonoBehaviour
{
    [SerializeField] private float lifetime = 2f;
    private ObjectPool pool;

    public void Init(ObjectPool parentPool)
    {
        pool = parentPool;
        Invoke(nameof(ReturnToPool), lifetime);
    }

    private void ReturnToPool()
    {
        CancelInvoke();
        pool.Return(gameObject);
    }

    private void OnDisable()
    {
        CancelInvoke();
    }
}
Using the pool to fire bullets:
public class Gun : MonoBehaviour
{
    [SerializeField] private ObjectPool bulletPool;

    private void Update()
    {
        if (Input.GetKeyDown(KeyCode.Space))
        {
            var bullet = bulletPool.Get();
            bullet.transform.position = transform.position;
            bullet.GetComponent<Bullet>().Init(bulletPool);
        }
    }
}
Advantages and disadvantages
Advantages:
- Reduces the use of
InstantiateandDestroy, lowering Garbage Collector pressure. - Helps prevent frame drops and runtime stutters.
- Makes performance more stable, especially on mobile.
- Reuses object components instead of allocating new ones repeatedly.
Disadvantages:
- Large pools can waste memory if over-allocated.
- Small pools may still need to create objects during gameplay.
- Objects must be reset correctly after every use.
- More complex than simply using
InstantiateandDestroy. - Scene changes and object references need extra attention.
Tips for Unity
- Pre-warm the pool: instantiate objects before gameplay starts, during loading, to move creation cost away from runtime.
- Unity has its own pool: since Unity 2021,
UnityEngine.Pool.ObjectPool<T>provides a built-in, allocation-free pool. Prefer it over custom implementations unless you need specific behavior. - Decide the pool size by testing with the Unity Profiler, not by guessing.
- Always reset the object before returning it to the pool: clear velocity, health, effects, coroutines and event subscriptions.
- Use a separate pool for each prefab type. Mixing different prefabs in the same pool causes chaos.
- Be careful with pools during scene changes. Objects from old scenes should not stay in the pool.
Spatial Partition
graph TD
    World[World] -->|divides into| Grid[Grid / Quadtree]
    Grid --> Cell1[Cell 1]
    Grid --> Cell2[Cell 2]
    Grid --> Cell3[Cell 3]
    Entity1[Entity] --> Cell1
    Entity2[Entity] --> Cell2
Spatial Partition is an optimization technique that organizes objects in a game world based on their physical position. Instead of checking every object against every other object, the world is divided into smaller regions. This is not just a nice idea, it is essential knowledge for game development. Without it, games with hundreds or thousands of objects would grind to a halt. Every open-world game, every RTS with unit selection, every collision-heavy action game relies on some form of spatial partitioning to stay performant.
The pattern can be summarized as:
Divide the game world into regions so that spatial queries only need to check nearby objects, not the entire scene.
When something happens in one area, the game only checks the objects near that area. Collision checks, distance checks, visibility checks and “who is near me?” searches become vastly cheaper, especially in scenes with many objects.
When to use it
Spatial Partition is useful when a scene contains many dynamic objects that need proximity, collision or range checks. Common use cases include open-world object management, bullet-enemy collision systems, RTS unit selection, crowd simulations, flocking behavior and chunk-based world loading.
However, if a scene only has a few objects, a simple loop through all of them may be faster and easier to maintain.
Spatial Partition in Unity
A simple spatial grid that divides the world into cells:
public class SpatialGrid
{
    private float cellSize;
    private Dictionary<Vector2Int, List<Transform>> grid = new();

    public SpatialGrid(float cellSize)
    {
        this.cellSize = cellSize;
    }

    public void Clear() => grid.Clear();

    public void Add(Transform obj)
    {
        var cell = GetCell(obj.position);

        if (!grid.ContainsKey(cell))
            grid[cell] = new List<Transform>();

        grid[cell].Add(obj);
    }

    public List<Transform> GetNearby(Vector3 position)
    {
        var nearby = new List<Transform>();
        var centerCell = GetCell(position);

        for (int x = -1; x <= 1; x++)
        {
            for (int y = -1; y <= 1; y++)
            {
                var cell = centerCell + new Vector2Int(x, y);

                if (grid.TryGetValue(cell, out var objects))
                    nearby.AddRange(objects);
            }
        }

        return nearby;
    }

    private Vector2Int GetCell(Vector3 position)
    {
        return new Vector2Int(
            Mathf.FloorToInt(position.x / cellSize),
            Mathf.FloorToInt(position.z / cellSize)
        );
    }
}
Using the grid for efficient collision detection:
public class CollisionSystem : MonoBehaviour
{
    [SerializeField] private float cellSize = 5f;
    private SpatialGrid grid;

    private void Awake()
    {
        grid = new SpatialGrid(cellSize);
    }

    private void Update()
    {
        grid.Clear();

        foreach (var enemy in FindObjectsOfType<Enemy>())
            grid.Add(enemy.transform);

        foreach (var enemy in FindObjectsOfType<Enemy>())
        {
            var nearby = grid.GetNearby(enemy.transform.position);
            foreach (var other in nearby)
            {
                // Only check collision with nearby objects
            }
        }
    }
}
Common spatial structures
While the uniform grid shown above works well for evenly distributed objects, different game scenarios demand different structures. Spatial partitioning in game development is a deep topic, and knowing when to use each structure is what separates a performant game from a stuttering one.
Quadtrees divide a 2D space recursively into four quadrants. Each node can hold a limited number of objects; when a node overflows, it splits into four children. This adapts naturally to object density: empty areas become coarse nodes, while dense areas refine further. Quadtrees are ideal for 2D games, top-down spatial queries, and terrain systems.
public class QuadTree
{
    private const int MaxObjects = 4;
    private const int MaxLevels = 5;

    private int level;
    private List<Transform> objects;
    private Rect bounds;
    private QuadTree[] children;

    public QuadTree(int level, Rect bounds)
    {
        this.level = level;
        this.bounds = bounds;
        objects = new List<Transform>();
        children = new QuadTree[4];
    }

    public void Clear()
    {
        objects.Clear();
        for (int i = 0; i < children.Length; i++)
        {
            if (children[i] != null)
            {
                children[i].Clear();
                children[i] = null;
            }
        }
    }

    private void Split()
    {
        float subWidth = bounds.width / 2f;
        float subHeight = bounds.height / 2f;
        float x = bounds.x;
        float y = bounds.y;

        children[0] = new QuadTree(level + 1, new Rect(x + subWidth, y, subWidth, subHeight));
        children[1] = new QuadTree(level + 1, new Rect(x, y, subWidth, subHeight));
        children[2] = new QuadTree(level + 1, new Rect(x, y + subHeight, subWidth, subHeight));
        children[3] = new QuadTree(level + 1, new Rect(x + subWidth, y + subHeight, subWidth, subHeight));
    }

    private int GetIndex(Transform obj)
    {
        var pos = obj.position;
        bool topHalf = pos.y > bounds.y + bounds.height / 2f;
        bool rightHalf = pos.x > bounds.x + bounds.width / 2f;

        if (rightHalf && !topHalf) return 0;
        if (!rightHalf && !topHalf) return 1;
        if (!rightHalf && topHalf) return 2;
        return 3;
    }

    public void Insert(Transform obj)
    {
        if (children[0] != null)
        {
            children[GetIndex(obj)].Insert(obj);
            return;
        }

        objects.Add(obj);

        if (objects.Count > MaxObjects && level < MaxLevels)
        {
            if (children[0] == null) Split();

            for (int i = objects.Count - 1; i >= 0; i--)
            {
                children[GetIndex(objects[i])].Insert(objects[i]);
                objects.RemoveAt(i);
            }
        }
    }

    public List<Transform> Query(Rect area)
    {
        var result = new List<Transform>();

        if (!bounds.Overlaps(area)) return result;

        foreach (var obj in objects)
        {
            if (area.Contains(obj.position))
                result.Add(obj);
        }

        if (children[0] != null)
        {
            for (int i = 0; i < 4; i++)
                result.AddRange(children[i].Query(area));
        }

        return result;
    }
}
Octrees are the 3D counterpart of Quadtrees. Instead of four quadrants, each node splits into eight octants, covering a cubic volume. They are the go-to structure for 3D spatial queries in games with large, non-uniform 3D environments. Use them for 3D collision detection, visibility culling, and voxel-based systems like destructible terrain or Minecraft-style worlds.
Bounding Volume Hierarchies (BVHs) take a different approach. Instead of partitioning space itself, BVHs organize objects into a tree of bounding volumes. Each node stores a volume that encloses all its children. BVHs do not care about empty space, which makes them excellent for ray tracing, frustum culling of dynamic objects, and physics broad-phase detection. When objects move, only the bounding volumes need updating, not the entire spatial structure.
Choosing the right structure depends on your game’s needs. Uniform grids shine when objects are evenly distributed and queries are local. Quadtrees and Octrees excel when object density varies wildly across the world. BVHs dominate when you have many moving objects and need to rebuild or update the tree frequently. Many modern game engines combine multiple structures: a uniform grid for static world geometry, an octree for dynamic entities, and a BVH for the rendering pipeline.
Advantages and disadvantages
Advantages:
- Improves performance by limiting checks to nearby areas.
- Keeps CPU work lower and frame rates more stable.
- Different partition structures fit different distributions of objects.
Disadvantages:
- Moving objects must be updated in the partition correctly.
- A bad cell size choice can reduce or negate the benefit.
- Adds extra management complexity to the project.
Tips for Unity
- Try Unity’s built-in physics queries first.
Physics.OverlapSphereandPhysics.OverlapBoxalready solve many proximity problems and are heavily optimized. - Choose the cell size carefully. A good starting point is to make the cell size close to the query range or the average spacing between objects.
- For moving objects, avoid updating the grid every frame if the object is still inside the same cell. Only re-register when the object crosses a cell boundary.
- For heavier systems, combine with Unity’s Job System and Burst Compiler using
NativeArrayandNativeMultiHashMapfor efficient multi-threaded processing. - Visualize the grid while debugging. Use
OnDrawGizmoswithGizmos.DrawWireCubeto see if cells are covering the world correctly.