Store
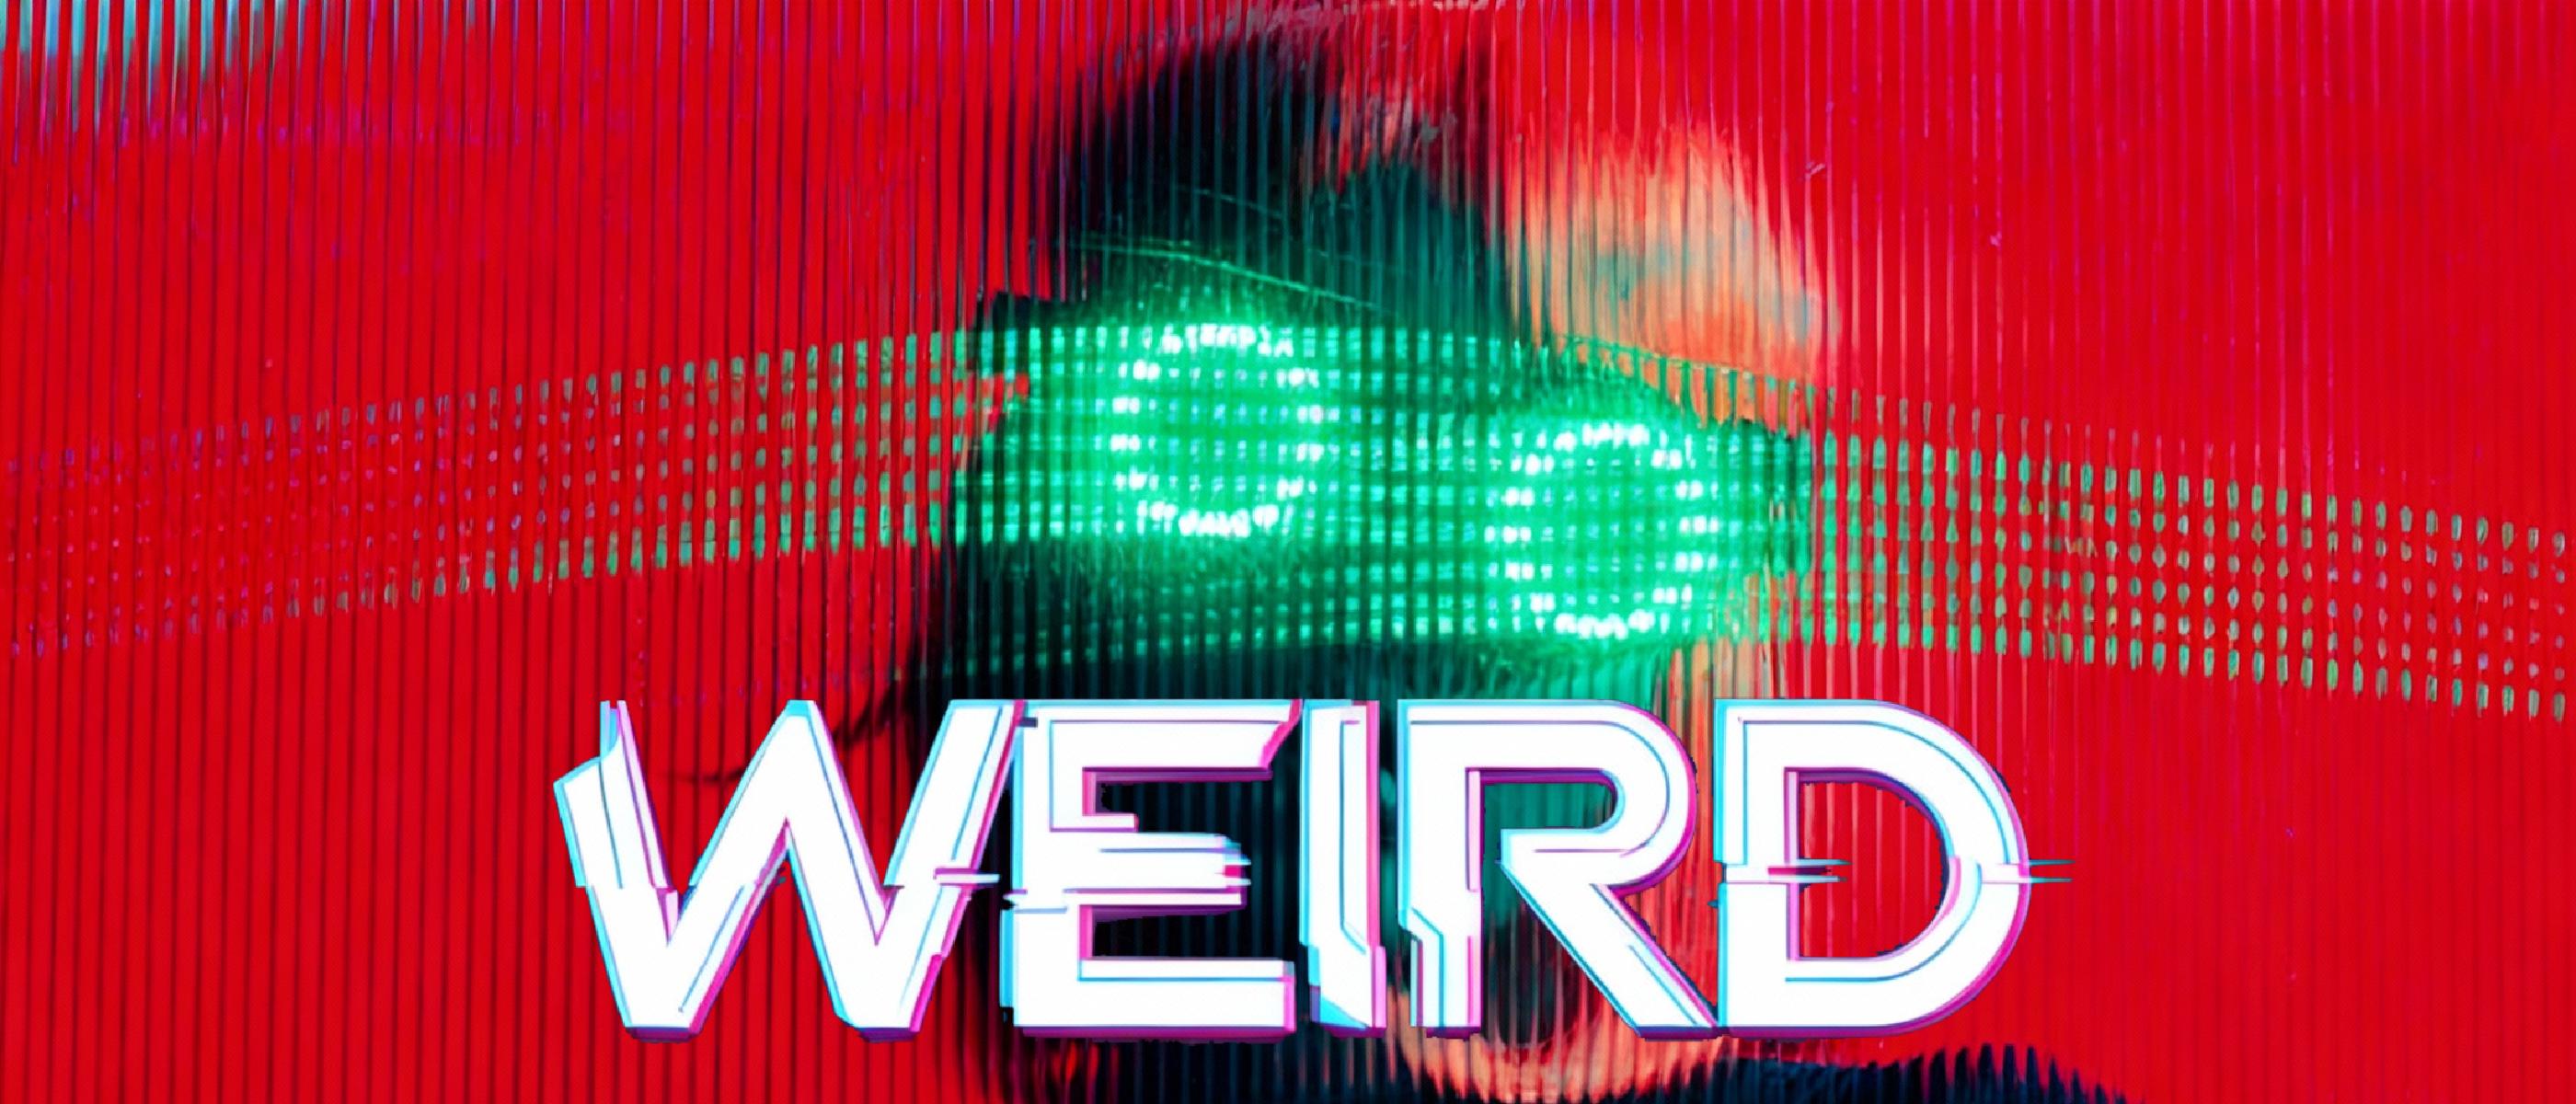
‘Weird’ is a collection of 10 fullscreen post-processing effects designed to add surreal, psychedelic, and artistic visual treatments to your games. From hypnotic fire tunnels to reality-warping distortions and ethereal auras, give your projects that extra edge in horror, magic, and psychedelic experiences.
Each effect can be used as a standalone package, but inside the bundle they share the same URP workflow, volume-driven runtime model, and editor conventions.
It consists of the following effects:
- 🔥 Fire Tunnel, a hypnotic fire tunnel screen-space effect.
- 🔲 Extruder, pixelated voxel effect with customizable camera, lighting.
- 🔮 Crystal, crystalline patterns and dynamic light effects.
- 🫧 Bubbles, pop your games with funky bubbles!
- 🤏 Pinch, a raymarching-based dynamic pinch distortion.
- ✏️ Doodle, a hand-drawn doodle effect.
- 🌈 Kaleidoscope, a symmetrical, rotating patterns.
- 🌀 Spiral, a hypnotic droste effect.
- ☁️ Dither Fog, a retro dithering fog.
- 📐 Edges, edge detection and stylization.
Requirements
All ‘Weird’ effects are developed for ‘Universal Render Pipeline’ (URP), which means they do not work with Built-In or HDRP.
Unity 6 or Higher
The current bundle is centered on Unity 6 and the URP Render Graph workflow. You will need URP 17.0.2 or higher installed. If you need help with setup, follow the official URP installation guide.
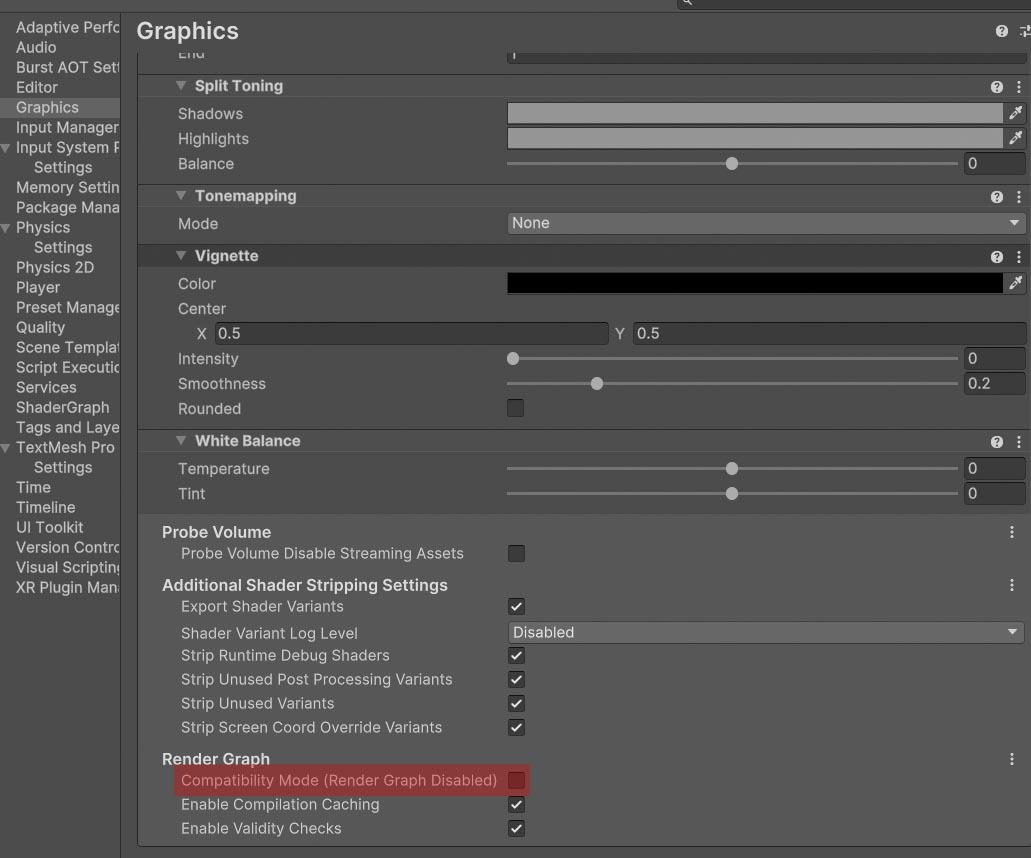
Make sure that ‘Compatibility Mode’ is disabled in ‘Project Settings > Graphics > Render Graph’.
Installation
Step 1: Add Renderer Feature
The effects must be registered in your project’s URP configuration:
- Locate your Universal Renderer Data asset.
- Click Add Renderer Feature and select the desired effect from Fronkon Games > Weird.
Once installed, you have to add the effect you want to use from ‘Weird’ as a ‘Render Feature’. This official tutorial tells how to do it.
Remember that the camera you are using must have the ‘Post Processing’ option enabled.

‘Quality’ levels (Project Settings > Quality) can have their own active ‘Render Pipeline Asset’.
If so, whatever you assign in ‘Scriptable Render Pipeline Settings’ in ‘Graphics’ will be ignored.
Remember to add the effect to the quality levels you want to use.
Step 2: Configure The Volume
To apply the effects to your scene:
- Create a Volume component (Global or Local) or select one that has already been created.
- In the Volume component, create or assign a Volume Profile.
- Click Add Override and select the desired effect from Fronkon Games > Weird.
- Enable the ‘Intensity’ parameter (and any others you wish to modify).
VR
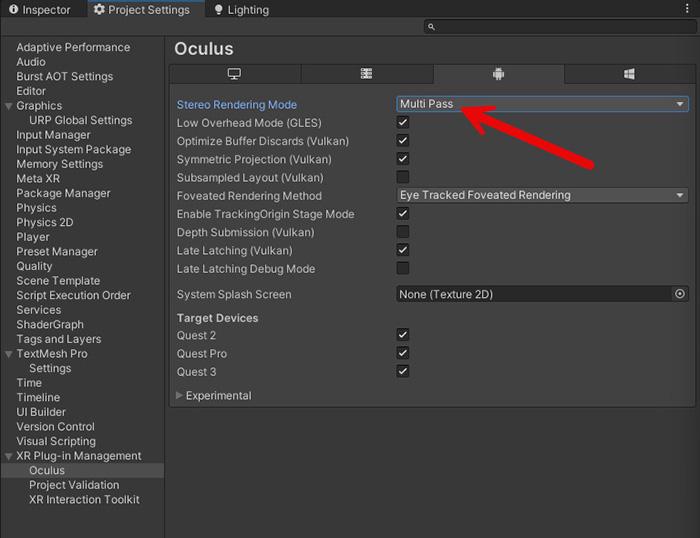
To increase compatibility with VR devices, I recommend that you select ‘Stereo Rendering Mode’ in ‘Multi Pass’ mode:
🔥 Fire Tunnel
Transform your game into a hypnotic journey through flames with Fire Tunnel, a captivating post-processing effect that creates a swirling vortex of fire that engulfs the screen. Perfect for dramatic transitions, hellish portals, or just making your players feel like they’re diving into the heart of an inferno.
Requisites
To ensure optimal performance and compatibility, your project must meet the following requirements:
- Unity: 6000.0.58f2 or higher.
- Universal RP: 17.0.2 or higher.
Installation Guide
Step 1: Add Renderer Feature
The effect must be registered in your project’s URP configuration:
- Locate your Universal Renderer Data asset.
- Click Add Renderer Feature and select Fronkon Games > Weird > Fire Tunnel.
Step 2: Configure the Volume
To apply the effect to your scene:
- Create a Volume component (Global or Local).
- In the Volume component, create or assign a Volume Profile.
- Click Add Override and select Fronkon Games > Weird > Fire Tunnel.
- Enable ‘Intensity’ and the fire parameters you want to animate.
Parameter Configuration
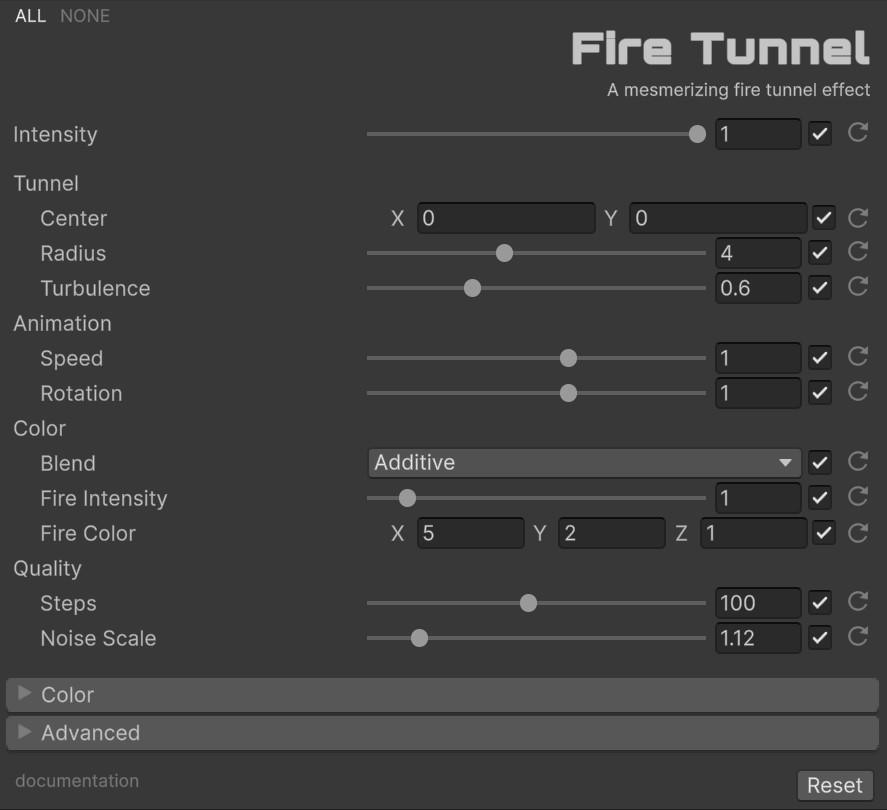
With ‘Intensity’ you can control the overall strength of the effect [0.0 - 1.0]. If it is 0, the effect will not be active.
Tunnel
Controls the spatial layout and dimensions of the fire tunnel effect. Adjust the center position to move the vortex focal point around the screen, modify the radius to change the tunnel opening size, and tweak turbulence to add chaotic movement to the flames.
| Center | Position of the tunnel’s center point on screen. (0,0) is center, (-1,-1) bottom-left, (1,1) top-right. |
| Radius [0-10] | Controls how wide the tunnel appears. Higher values create a larger tunnel opening. |
| Turbulence [0-1] | Amount of chaos in the fire movement. Higher values create more erratic patterns. |
Animation
Controls the temporal behavior and motion of the fire effect. Speed determines how quickly the flames churn and move through the tunnel, while rotation adds a spinning motion to create a more dynamic and hypnotic visual.
| Speed [0-10] | How fast the fire effect moves and churns. |
| Rotation [0-10] | Speed at which the tunnel rotates around its center. |
Color
Defines the chromatic properties and blending behavior of the fire. The color blend mode determines how flames composite with the underlying scene, intensity controls brightness, and fire color sets the base hue that gets modulated by the fire algorithms.
| Color Blend | How the fire effect blends with the scene. |
| Intensity [0-10] | Adjusts the strength and brightness of the fire effect. |
| Fire Color | Base color of the flames (RGB values from 0-10). Default is (5, 2, 1) for a natural fire look. |
Quality
Adjusts the rendering fidelity and performance characteristics of the effect. Steps controls the raymarching precision for volumetric rendering quality, while noise scale determines the granularity of fire pattern detail.
| Steps [1-200] | Number of steps in the raymarching calculation. Higher values mean better quality but lower performance. |
| Noise Scale [0-10] | Controls the size and detail of the fire patterns. Lower values create finer detail. |
Runtime Control
Want to summon the flames programmatically? It’s easier than you think:
// Add the namespace
using UnityEngine;
using UnityEngine.Rendering;
using FronkonGames.Weird.FireTunnel;

[SerializeField] private VolumeProfile volumeProfile;

private void OpenFireTunnel()
{
  if (volumeProfile.TryGet(out FireTunnelVolume volume))
  {
    volume.intensity.overrideState = true;
    volume.tunnelRadius.overrideState = true;

    volume.intensity.value = 1.0f;
    volume.tunnelRadius.value = 4.0f;
  }
}
Want a smooth, dramatic reveal? Here’s how to animate the tunnel opening:
IEnumerator AnimateTunnelOpen()
{
  if (volumeProfile.TryGet(out FireTunnelVolume volume))
  {
    volume.intensity.overrideState = true;
    volume.tunnelRadius.overrideState = true;

    volume.intensity.value = 1.0f;

    float duration = 3.0f;
    float elapsed = 0.0f;

    while (elapsed < duration)
    {
      volume.tunnelRadius.value = Mathf.Lerp(0.0f, 4.0f, elapsed / duration);
      elapsed += Time.deltaTime;
      yield return null;
    }

    volume.tunnelRadius.value = 4.0f;
  }
}
Here’s the fade-out version:
IEnumerator AnimateTunnelClose()
{
  if (volumeProfile.TryGet(out FireTunnelVolume volume))
  {
    volume.intensity.overrideState = true;
    volume.tunnelRadius.overrideState = true;

    float duration = 3.0f;
    float elapsed = 0.0f;

    while (elapsed < duration)
    {
      volume.tunnelRadius.value = Mathf.Lerp(4.0f, 0.0f, elapsed / duration);
      elapsed += Time.deltaTime;
      yield return null;
    }

    volume.tunnelRadius.value = 0.0f;
    volume.intensity.value = 0.0f;
  }
}
Full parameter control for dynamic flame manipulation:
if (volumeProfile.TryGet(out FireTunnelVolume volume))
{
  // Tunnel
  volume.center.value = new Vector2(0f, 0f);
  volume.tunnelRadius.value = 4f;
  volume.turbulence.value = 0.6f;

  // Animation
  volume.speed.value = 1f;
  volume.rotation.value = 1f;

  // Color
  volume.colorBlend.value = ColorBlends.Additive;
  volume.fireIntensity.value = 2f;
  volume.fireColor.value = new Vector3(5f, 2f, 1f);

  // Quality
  volume.raymarchSteps.value = 100;
  volume.noiseScale.value = 1.12f;

  // Color adjustments
  volume.brightness.value = 0f;
  volume.contrast.value = 1f;
  volume.gamma.value = 1f;
  volume.hue.value = 0f;
  volume.saturation.value = 2f;
}
💡 Take a look at the code in the included demo to learn more about how the effect works.
Performance Characteristics
The effect executes in a single full-screen render pass with raymarching calculations.
- Pass Count: 1 blit pass.
- Texture Samples: Low.
- Complexity: O(n) per pixel where n is raymarch steps.
Usage Patterns and Presets
Portal Opening
For dramatic hellish transitions:
- Intensity: 1.0
- Tunnel Radius: animate 0 -> 4
- Turbulence: 0.6
- Color Blend: Additive
- Fire Color: (5, 2, 1)
Magic Spell
For mystical fire effects:
- Intensity: 0.7 - 1.0
- Speed: 2.0
- Fire Color: (5, 0.75f, 3) for purple flames
- Noise Scale: 0.5
🔲 Extruder
Transform your rendered scene into a stunning 3D voxel-extruded world! This postprocess effect uses advanced raymarching techniques to convert your screen into an artistic grid of height-mapped blocks, creating a unique retro-futuristic aesthetic reminiscent of classic voxel graphics.
Perfect for artistic visualizations, music videos, stylized game cinematics, or adding that extra “weird” factor to your Unity projects!
Requisites
To ensure optimal performance and compatibility, your project must meet the following requirements:
- Unity: 6000.0.58f2 or higher.
- Universal RP: 17.0.2 or higher.
Installation Guide
Step 1: Add Renderer Feature
- Locate your Universal Renderer Data asset.
- Click Add Renderer Feature and select Fronkon Games > Weird > Extruder.
Step 2: Configure the Volume
- Create a Volume component (Global or Local).
- In the Volume component, create or assign a Volume Profile.
- Click Add Override and select Fronkon Games > Weird > Extruder.
- Enable ‘Intensity’ and the extruder parameters you want to control.
Parameter Configuration
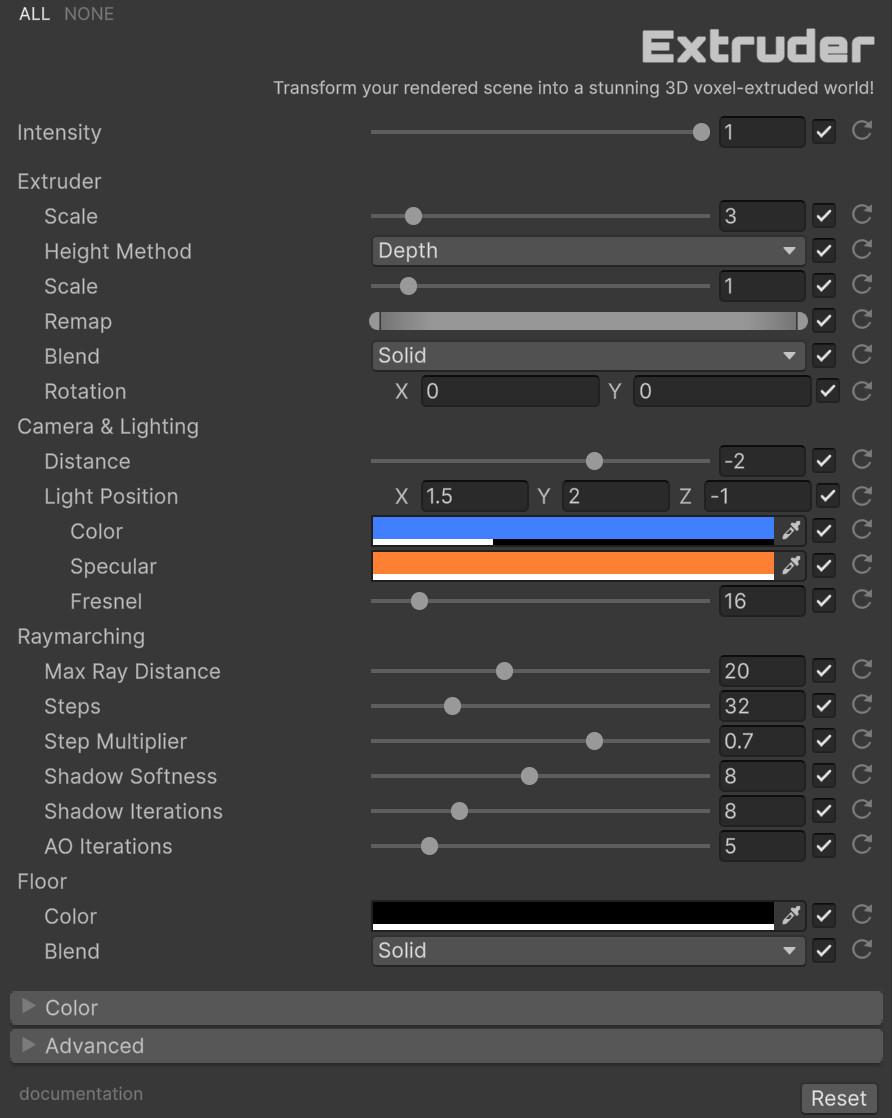
With ‘Intensity’ you can control the overall strength of the effect [0.0 - 1.0]. If it is 0, the effect will not be active.
Extruder
Controls the core voxel extrusion behavior and geometric properties. These settings determine how the 2D screen image gets converted into 3D height-mapped blocks, including the grid scale, height calculation method, and color blending options.
| Scale [1-20] | Controls the size of individual voxel blocks. Smaller values create larger, more visible blocks. Default: 3. |
| Height | Method for calculating voxel height (Grayscale or Depth). |
| Depth Scale [0.1-10] | Amplifies depth differences for height calculation. Only used with Depth mode. |
| Depth Remap Min/Max [0-1] | Depth value range to remap. |
| Luminosity Remap Min/Max [0-1] | Luminosity value range to remap. Only used with Grayscale mode. |
| Blend | Blend mode for colors (Solid, Additive, Multiply, Overlay, Screen, etc.). |
| Rotation [0-360] | Camera rotation in degrees (X, Y axes). |
Camera & Lighting
Configures the virtual camera position and illumination settings for the extruded scene. Adjust the camera distance for perspective control, position the light source for dramatic shadows, and tune the fresnel effect for edge highlighting.
| Distance [-5 to -0.5] | Distance of the virtual camera from the extruded scene. |
| Light Position [-3 to 3] | 3D position of the light source (X, Y, Z). |
| Light Color | Color and intensity of the light source (RGBA). |
| Specular Color | Color of specular highlights. |
| Fresnel Intensity [0-128] | Intensity of the fresnel effect (edge lighting). |
Raymarching
Fine-tunes the quality and performance of the volumetric raymarching algorithm. These parameters control rendering precision, shadow quality, and ambient occlusion for the extruded voxel geometry.
| Max Ray Distance [1-50] | Maximum distance rays can travel. |
| Raymarching Steps [4-128] | Number of steps per ray. Higher values = more accurate but slower. |
| Step Multiplier [0.1-1] | Controls raymarching precision. |
| Shadow Softness [1-16] | Controls how soft or hard shadows appear. |
| Shadow Iterations [0-32] | Number of shadow ray iterations (0 = no shadows). |
| Ambient Occlusion Iterations [0-32] | Number of ambient occlusion iterations (0 = no AO). |
Floor Settings
Defines the appearance of the background plane that appears behind the extruded geometry. Set the floor color and blend mode to create the desired backdrop for your voxel scene.
| Floor Color | Color of the floor/background plane. |
| Floor Color Blend | Blend mode for the floor color. |
Runtime Control
// Add the namespace
using UnityEngine;
using UnityEngine.Rendering;
using FronkonGames.Weird.Extruder;

[SerializeField] private VolumeProfile volumeProfile;

private void SetExtruder(bool enabled)
{
  if (volumeProfile.TryGet(out ExtruderVolume volume))
  {
    volume.intensity.overrideState = true;
    volume.intensity.value = enabled ? 1.0f : 0.0f;
  }
}
Complete voxel configuration at your command:
if (volumeProfile.TryGet(out ExtruderVolume volume))
{
  // Extruder settings
  volume.gridScale.value = 3.0f;
  volume.heightMethod.value = HeightMethod.Depth;
  volume.depthScale.value = 1.0f;
  volume.colorBlend.value = ColorBlends.Solid;
  volume.rotation.value = new Vector2(0f, 0f);

  // Camera & lighting
  volume.cameraDistance.value = -2.0f;
  volume.lightPosition.value = new Vector3(1.5f, 2.0f, -1.0f);
  volume.lightColor.value = new Color(0.25f, 0.5f, 1.0f, 0.3f);
  volume.specularColor.value = new Color(1.0f, 0.5f, 0.2f);
  volume.fresnelIntensity.value = 16.0f;

  // Raymarching
  volume.maxRayDistance.value = 20.0f;
  volume.raymarchingSteps.value = 32;
  volume.stepMultiplier.value = 0.7f;
  volume.shadowSoftness.value = 8.0f;
  volume.shadowIterations.value = 8;
  volume.ambientOcclusionIterations.value = 5;
}
💡 Take a look at the code in the included demo to learn more about how the effect works.
Performance Characteristics
The effect executes in a single full-screen pass with raymarching calculations.
- Pass Count: 1 blit pass.
- Texture Samples: Low.
- Complexity: O(n) per pixel where n is raymarch steps.
Usage Patterns and Presets
Retro Voxel Look
For classic voxel aesthetic:
- Scale: 5
- Height: Depth
- Depth Scale: 2.0
- Color Blend: Solid
Artistic Visualization
For music videos or cinematics:
- Scale: 3
- Height: Grayscale
- Fresnel: 32
- Shadow Iterations: 16
- AO Iterations: 8
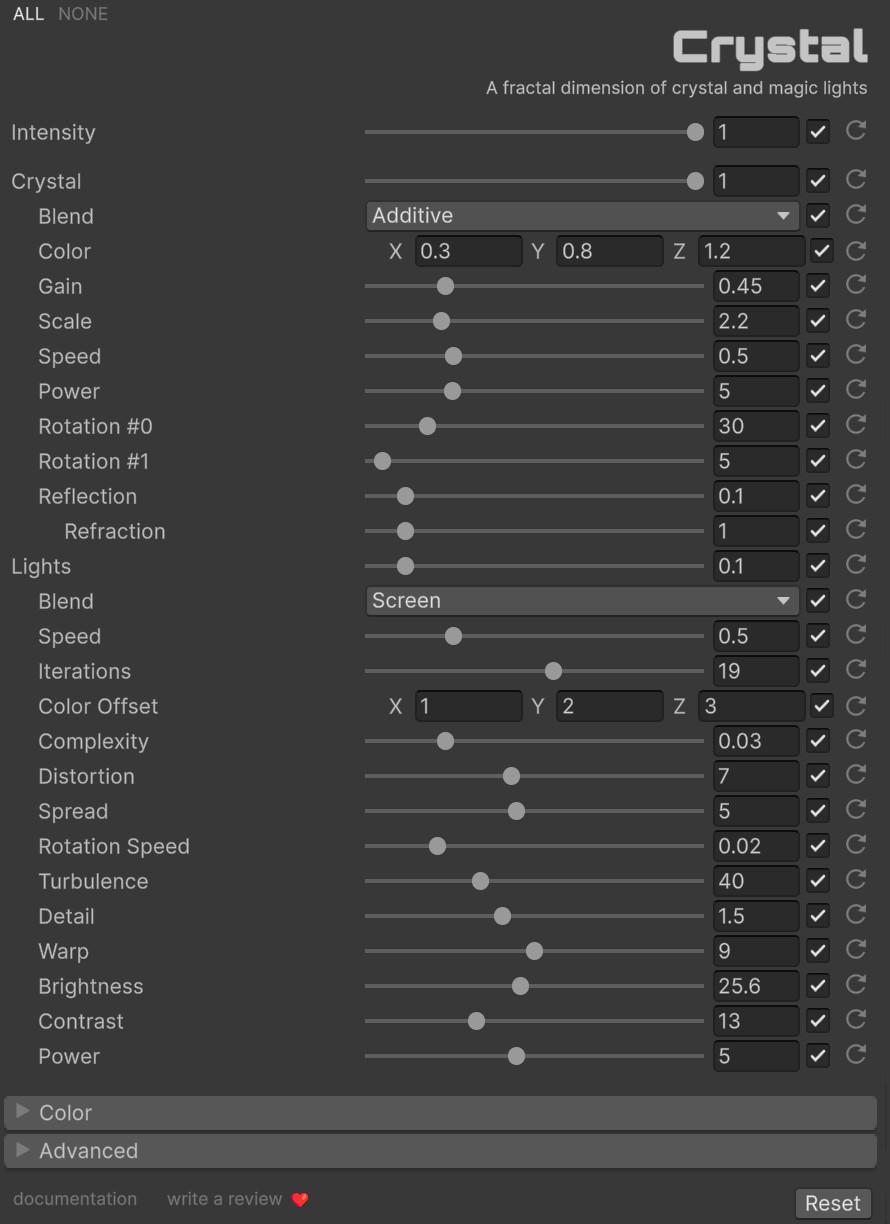
🔮 Crystal
Transform your games with enchanting crystalline patterns and dynamic light effects! This post-processing effect creates stunning visual distortions reminiscent of looking through a kaleidoscopic crystal, enhanced with flowing particle-like lights.
Requisites
To ensure optimal performance and compatibility, your project must meet the following requirements:
- Unity: 6000.0.58f2 or higher.
- Universal RP: 17.0.2 or higher.
Installation Guide
Step 1: Add Renderer Feature
- Locate your Universal Renderer Data asset.
- Click Add Renderer Feature and select Fronkon Games > Weird > Crystal.
Step 2: Configure the Volume
- Create a Volume component (Global or Local).
- In the Volume component, create or assign a Volume Profile.
- Click Add Override and select Fronkon Games > Weird > Crystal.
- Enable ‘Intensity’ and the crystal parameters you want to tune.
Parameter Configuration
With ‘Intensity’ you can control the overall strength of the effect [0.0 - 1.0]. If it is 0, the effect will not be active.
Crystal Effect
Controls the crystalline pattern overlay that creates the distinctive kaleidoscopic glass distortion. Adjust the crystal intensity, color tint, and reflection properties to shape the ethereal geometric patterns that warp the screen.
| Crystal [0-1] | Controls the intensity of the crystalline pattern overlay. |
| Blend | Color blend operation for the crystal effect. |
| Color | RGB color tint for the crystal pattern. |
| Gain [0-2] | Amplification of the crystal pattern. |
| Scale [0.1-10] | Size of the crystal patterns. |
| Speed [0-2] | Animation speed of the crystal effect. |
| Power [0.1-20] | Exponential power applied to the crystal pattern. |
| Rotation #0/#1 [0-180] | Primary and secondary rotation angles for layered complexity. |
| Reflection [0-1] | Amount of reflection/mirroring in the crystal effect. |
| Refraction [0-10] | Strength of refraction when reflection is active. |
Lights Effect
Manages the flowing particle-like light elements that dance across the crystal patterns. These animated lights add dynamic motion and luminous accents that enhance the magical, otherworldly atmosphere of the effect.
| Lights [0-1] | Intensity of the flowing particle-like lights effect. |
| Blend | Color blend operation for the lights. |
| Speed [0-2] | Animation speed of the light particles. |
| Iterations [5-30] | Number of iterations for detail and complexity. |
| Color Offset | RGB values that shift the color spectrum of the lights. |
| Complexity [0.01-0.1] | Growth rate per iteration. |
| Distortion [1-15] | Spatial warping intensity of the light patterns. |
| Spread [1-10] | How much the light patterns disperse across the screen. |
| Rotation Speed [0-0.1] | Speed of rotation animation for the light patterns. |
| Turbulence [10-100] | Intensity of chaotic motion in the lights. |
| Detail [0.5-3.0] | Level of fine detail in the light patterns. |
| Warp [3-15] | Amount of spatial warping applied. |
| Brightness [5-50] | Overall brightness multiplier for the lights. |
| Contrast [5-30] | Contrast level and clipping threshold. |
| Power [1-10] | Final exponential curve applied to the lights. |
Runtime Control
// Add the namespace
using UnityEngine;
using UnityEngine.Rendering;
using FronkonGames.Weird.Crystal;

[SerializeField] private VolumeProfile volumeProfile;

private void SetCrystalEffect(float crystalIntensity, float lightsIntensity)
{
  if (volumeProfile.TryGet(out CrystalVolume volume))
  {
    volume.intensity.overrideState = true;
    volume.crystalIntensity.overrideState = true;
    volume.lightsIntensity.overrideState = true;

    volume.intensity.value = 1.0f;
    volume.crystalIntensity.value = crystalIntensity;
    volume.lightsIntensity.value = lightsIntensity;
  }
}
Animate effects at runtime:
// Smoothly fade in the crystal effect
if (volumeProfile.TryGet(out CrystalVolume volume))
{
  volume.crystalIntensity.overrideState = true;
  volume.crystalIntensity.value = Mathf.Lerp(
    volume.crystalIntensity.value,
    1.0f,
    Time.deltaTime * 2.0f);
}
All crystal and lighting parameters ready for adjustment:
if (volumeProfile.TryGet(out CrystalVolume volume))
{
  // Crystal parameters
  volume.crystalIntensity.value = 1.0f;
  volume.crystalColorBlend.value = ColorBlends.Additive;
  volume.crystalColor.value = new Vector3(0.3f, 0.8f, 1.2f);
  volume.crystalGain.value = 0.45f;
  volume.crystalScale.value = 2.2f;
  volume.crystalPower.value = 5.0f;
  volume.crystalRotation0.value = 30.0f;
  volume.crystalRotation1.value = 5.0f;
  volume.crystalReflection.value = 0.1f;
  volume.crystalRefraction.value = 1.0f;

  // Lights parameters
  volume.lightsIntensity.value = 0.1f;
  volume.lightsColorBlend.value = ColorBlends.Screen;
  volume.lightsSpeed.value = 0.5f;
  volume.lightsIterations.value = 19;
  volume.lightsColorOffset.value = new Vector3(1f, 2f, 3f);
  volume.lightsComplexity.value = 0.03f;
  volume.lightsDistortion.value = 7.0f;
  volume.lightsTurbulence.value = 40.0f;
}
💡 Take a look at the code in the included demo to learn more about how the effect works.
Performance Characteristics
The effect executes in a single full-screen pass with procedural pattern generation.
- Pass Count: 1 blit pass.
- Texture Samples: Low.
- Complexity: O(n) per pixel where n is light iterations.
Usage Patterns and Presets
Mystical Crystal
For magical crystalline effects:
- Crystal: 1.0
- Blend: Additive
- Color: (0.3, 0.8, 1.2)
- Lights: 0.1
- Lights Blend: Screen
Full Power
For maximum visual impact:
- Crystal: 1.0
- Lights: 1.0
- Crystal Power: 5.0
- Lights Iterations: 25
- Lights Turbulence: 40
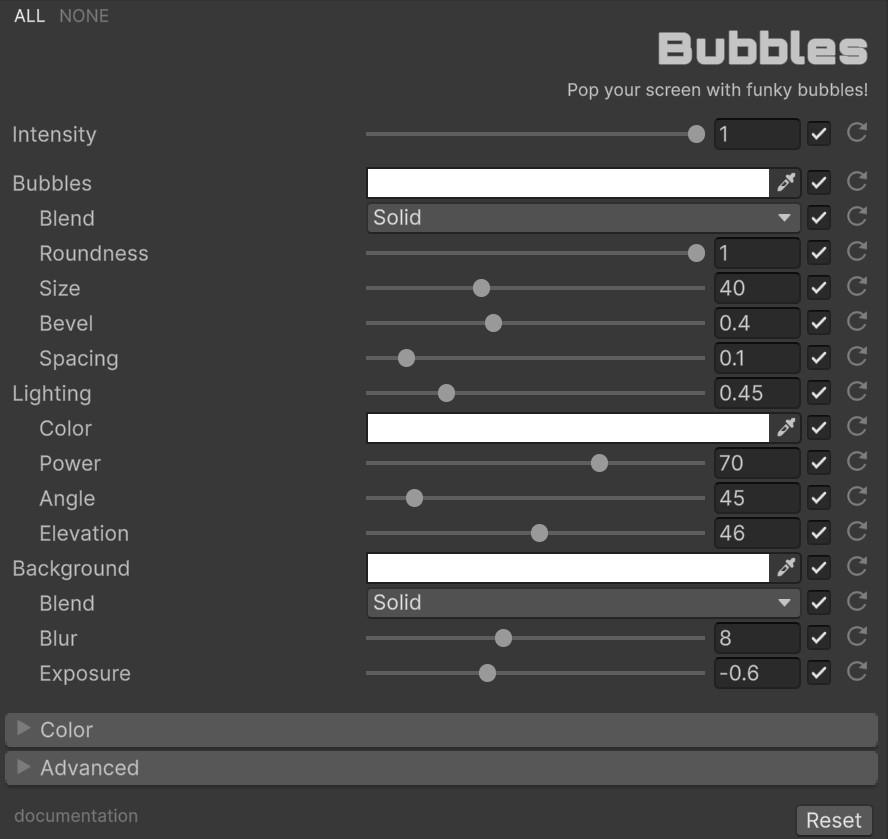
🫧 Bubbles
Pop your games with funky bubbles! A mesmerizing bubble-like effect that transforms your screen into a glossy, effervescent surface with customizable lighting, bubble shapes, and colors. Perfect for playful transitions, underwater scenes, or adding that extra bubbly charm to your projects.
Requisites
To ensure optimal performance and compatibility, your project must meet the following requirements:
- Unity: 6000.0.58f2 or higher.
- Universal RP: 17.0.2 or higher.
Installation Guide
Step 1: Add Renderer Feature
- Locate your Universal Renderer Data asset.
- Click Add Renderer Feature and select Fronkon Games > Weird > Bubbles.
Step 2: Configure the Volume
- Create a Volume component (Global or Local).
- In the Volume component, create or assign a Volume Profile.
- Click Add Override and select Fronkon Games > Weird > Bubbles.
- Enable ‘Intensity’ and the bubble parameters you want to control.
Parameter Configuration
With ‘Intensity’ you can control the overall strength of the effect [0.0 - 1.0].
Bubbles
Controls the appearance and arrangement of the bubble pattern. Adjust bubble size, shape roundness, spacing, and color to create anything from small fizzy bubbles to large decorative spheres.
| Bubble Size [10-100] | Size of individual bubbles. Default: 40. |
| Bubble Color | Color of the bubbles. Default: white. |
| Bubble Color Blend | Blend mode for bubble color (Solid, Additive, Multiply, etc.). |
| Bubble Bevel [0.05-1] | 3D bevel effect intensity on bubble edges. Default: 0.4. |
| Bubble Spacing [0-1] | Space between bubbles. Default: 0.1. |
| Bubble Roundness [0-1] | Bubble shape from square (0) to circle (1). Default: 1. |
Lighting
Configures the specular lighting that gives bubbles their glossy, 3D appearance. Adjust light color, specular intensity, power, and positioning to create realistic or stylized bubble reflections.
| Light Specular [0-2] | Specular highlight intensity. Default: 0.45. |
| Light Color | Color of the specular highlights. Default: white. |
| Light Specular Power [0-100] | Sharpness of specular highlights. Default: 70. |
| Light Angle [0-360] | Light direction angle. Default: 45. |
| Light Elevation [0-90] | Light height angle (0 = horizontal, 90 = from above). Default: 46. |
Background
Defines how the scene appears behind and between the bubbles. Control background color, blend mode, blur amount, and exposure to create the desired backdrop for your bubbly scene.
| Background Color | Color tint for background areas. Default: white. |
| Background Blend | Blend mode for background color. |
| Background Blur [0-20] | Gaussian blur radius in pixels. Default: 8. |
| Background Exposure [-2-2] | Brightness adjustment for background. Default: -0.6. |
Runtime Control
// Add the namespace
using UnityEngine;
using UnityEngine.Rendering;
using FronkonGames.Weird.Bubbles;

[SerializeField] private VolumeProfile volumeProfile;

private void SetBubbles(bool enabled)
{
  if (volumeProfile.TryGet(out BubblesVolume volume))
  {
    volume.intensity.overrideState = true;
    volume.intensity.value = enabled ? 1.0f : 0.0f;
  }
}
Animate bubbles at runtime:
// Pop bubbles in gradually
if (volumeProfile.TryGet(out BubblesVolume volume))
{
  volume.bubbleSize.overrideState = true;
  volume.bubbleSize.value = Mathf.Lerp(
    volume.bubbleSize.value,
    60.0f,
    Time.deltaTime * 3.0f);
}
Complete bubble customization available:
if (volumeProfile.TryGet(out BubblesVolume volume))
{
  // Bubbles
  volume.bubbleSize.value = 40.0f;
  volume.bubbleColor.value = Color.white;
  volume.bubbleColorBlend.value = ColorBlends.Solid;
  volume.bubbleBevel.value = 0.4f;
  volume.bubbleSpacing.value = 0.1f;
  volume.bubbleRoundness.value = 1.0f;

  // Background
  volume.backgroundColor.value = Color.white;
  volume.backgroundBlend.value = ColorBlends.Solid;
  volume.backgroundBlur.value = 8.0f;
  volume.backgroundExposure.value = -0.6f;

  // Lighting
  volume.lightSpecular.value = 0.45f;
  volume.lightColor.value = Color.white;
  volume.lightSpecularPower.value = 70.0f;
  volume.lightAngle.value = 45.0f;
  volume.lightElevation.value = 46.0f;

  // Color adjustments
  volume.brightness.value = 0.0f;
  volume.contrast.value = 1.0f;
  volume.gamma.value = 1.0f;
  volume.hue.value = 0.0f;
  volume.saturation.value = 1.0f;
}
💡 Take a look at the code in the included demo to learn more about how the effect works.
Performance Characteristics
- Pass Count: 1 blit pass.
- Texture Samples: Low.
- Complexity: O(1) per pixel.
Usage Patterns and Presets
Fizzy Drinks
For beverage bubble effects:
- Bubble Size: 15
- Bubble Spacing: 0.05
- Bubble Roundness: 1.0
- Light Specular: 0.8
- Light Elevation: 70
Soap Bubbles
For large iridescent bubbles:
- Bubble Size: 80
- Bubble Bevel: 0.6
- Bubble Color Blend: Additive
- Light Specular: 1.0
- Light Specular Power: 50
Square Tiles
For decorative tile patterns:
- Bubble Size: 50
- Bubble Roundness: 0.0
- Bubble Spacing: 0.2
- Background Blur: 0
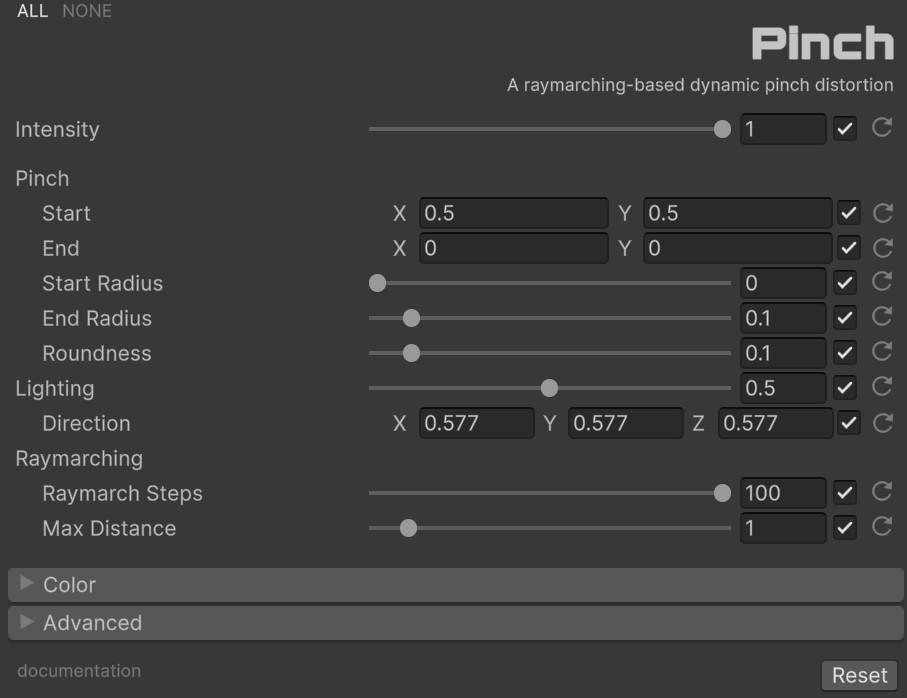
🤏 Pinch
A raymarching-based post-processing effect that creates a dynamic pinch distortion on the screen. Click and drag to create a conical extrusion effect that follows your pointer, with configurable start and end areas, roundness, and Lambert lighting.
Requisites
- Unity: 6000.0.58f2 or higher.
- Universal RP: 17.0.2 or higher.
Installation Guide
Step 1: Add Renderer Feature
- Locate your Universal Renderer Data asset.
- Click Add Renderer Feature and select Fronkon Games > Weird > Pinch.
Step 2: Configure the Volume
- Create a Volume component (Global or Local).
- In the Volume component, create or assign a Volume Profile.
- Click Add Override and select Fronkon Games > Weird > Pinch.
- Enable ‘Intensity’ and the pinch parameters you want to control.
Parameter Configuration
With ‘Intensity’ you can control the overall strength of the effect [0.0 - 1.0].
Pinch
Controls the geometric distortion parameters that create the conical pinch effect. Adjust start and end positions to define the pinch path, modify radii to control the cone width at each end, and set roundness to soften or sharpen the pinch edge.
- Start [0-1]: Center/start position of the pinch effect.
- End [0-1]: End/target position for the pinch distortion.
- Start Radius [0-1]: Size at the start position.
- End Radius [0-1]: Size at the end position.
- Roundness [0-1]: Controls sharpness of the pinch.
Lighting
Configures the Lambert lighting model that gives the pinch effect its 3D volumetric appearance. Light intensity controls how much shading affects the geometry, while direction sets the angle of illumination.
- Light Intensity [0-1]: Lambert lighting influence.
- Light Direction [0-1]: Direction vector for the light.
Raymarching
Adjusts the precision and range of the raymarching algorithm used to render the 3D pinch geometry. Steps controls quality vs performance, while max distance limits how far rays travel into the scene.
- Steps [1-100]: Number of iterations.
- Max Distance [0.1-10]: Maximum distance.
Runtime Control
using UnityEngine;
using UnityEngine.Rendering;
using FronkonGames.Weird.Pinch;

[SerializeField] private VolumeProfile volumeProfile;

private void CreatePinch(Vector2 screenPosition)
{
  if (volumeProfile.TryGet(out PinchVolume volume))
  {
    volume.intensity.overrideState = true;
    volume.start.overrideState = true;
    volume.end.overrideState = true;
    volume.intensity.value = 1.0f;
    volume.start.value = new Vector2(screenPosition.x / Screen.width, screenPosition.y / Screen.height);
    volume.end.value = new Vector2(0.3f, 0.2f);
  }
}
💡 Take a look at the code in the included demo to learn more about how the effect works.
Performance Characteristics
- Pass Count: 1 blit pass.
- Texture Samples: Low.
- Complexity: O(n) per pixel.
Usage Patterns and Presets
Interactive Pinch
- Intensity: 1.0
- Start: mouse position
- End: offset from start
- Roundness: 0.1
✏️ Doodle
A hand-drawn doodle effect. It applies a noise-based distortion to simulate a wobbly, sketched look, combined with posterization and edge detection for a complete artistic style.
Requisites
- Unity: 6000.0.58f2 or higher.
- Universal RP: 17.0.2 or higher.
Installation Guide
Step 1: Add Renderer Feature
- Locate your Universal Renderer Data asset.
- Click Add Renderer Feature and select Fronkon Games > Weird > Doodle.
Step 2: Configure the Volume
- Create a Volume component (Global or Local).
- In the Volume component, create or assign a Volume Profile.
- Click Add Override and select Fronkon Games > Weird > Doodle.
- Enable ‘Intensity’ and the doodle parameters you want to control.
Parameter Configuration

With ‘Intensity’ you can control the overall strength of the effect [0.0 - 1.0].
Doodle
Controls the core hand-drawn distortion effect that gives scenes a wobbly, animated sketch appearance. Adjust distortion strength for the wobble intensity, scale for noise pattern size, and frame rate to control animation smoothness.
- Doodle [0-10]: Distortion strength.
- Scale: Noise texture scale.
- Frame Rate [0-60]: Animation FPS.
- Blend: Color blend mode.
Paper
Adds a paper texture overlay to simulate drawing on physical media. Control the paper intensity for visibility, scale for texture detail, and distortion to match the wobble effect. Apply color tinting to create colored paper backgrounds.
- Paper [0-1]: Paper texture intensity.
- Blend: Blend mode for paper.
- Scale: Paper texture scale.
- Doodle [0-1]: Paper distortion amount.
- Tint: Paper tint color.
Grid
Overlays a customizable grid pattern to enhance the technical drawing aesthetic. Set grid intensity, choose blend mode, adjust cell size, and modify line width and color to create the desired grid appearance.
- Grid [0-1]: Grid intensity.
- Line Blend: Blend mode for grid lines.
- Size [1-32]: Grid cell size.
- Width [0-5]: Line width.
- Color: Line color.
Sketch
Adds hand-drawn hatching or cross-hatching patterns to simulate sketch shading. Choose from simple, cross-hatch, or animated modes and adjust scale, speed, angle, and color to match your artistic style.
- Sketch [0-1]: Sketch intensity.
- Mode: Sketch mode (Simple, Cross, Animated).
- Scale [0.1-10]: Hatch pattern scale.
- Speed [0-10]: Animation speed.
- Angle [0-360]: Hatch angle.
- Color: Line color.
- Blend: Blend mode.
Sobel
Applies edge detection using the Sobel algorithm to emphasize outlines in the scene. Control the edge intensity for outline prominence, strength for line thickness, and apply color tinting to achieve various artistic styles.
- Sobel [0-1]: Edge detection intensity.
- Strength [0-10]: Edge thickness.
- Tint: Edge color.
- Blend: Blend mode.
Posterize
Reduces the number of color levels in the image to create a poster-like aesthetic with distinct color bands. Lower values create more dramatic posterization with fewer color levels.
- Posterize [2-256]: Color quantization levels.
Color Remapping
Transforms the entire color palette using presets to achieve different moods and artistic styles. Choose from blueprint, sepia, grayscale, or other color grading options.
- Remapping: Color preset (None, Blueprint, Sepia, etc.).
Runtime Control
using UnityEngine;
using UnityEngine.Rendering;
using FronkonGames.Weird.Doodle;

[SerializeField] private VolumeProfile volumeProfile;

private void SetDoodle(bool enabled)
{
  if (volumeProfile.TryGet(out DoodleVolume volume))
  {
    volume.intensity.overrideState = true;
    volume.intensity.value = enabled ? 1.0f : 0.0f;
  }
}
💡 Take a look at the code in the included demo to learn more about how the effect works.
Performance Characteristics
- Pass Count: 1 blit pass.
- Texture Samples: Low to moderate.
- Complexity: O(1) per pixel.
Usage Patterns and Presets
Hand Drawn
- Doodle: 0.25
- Frame Rate: 6
- Paper: 0.74
- Sketch: 0
- Sobel: 1
- Posterize: 4
Blueprint Style
- Doodle: 0.25
- Paper: 0.5
- Grid: 0.5
- Grid Color: Blue
- Remapping: Blueprint
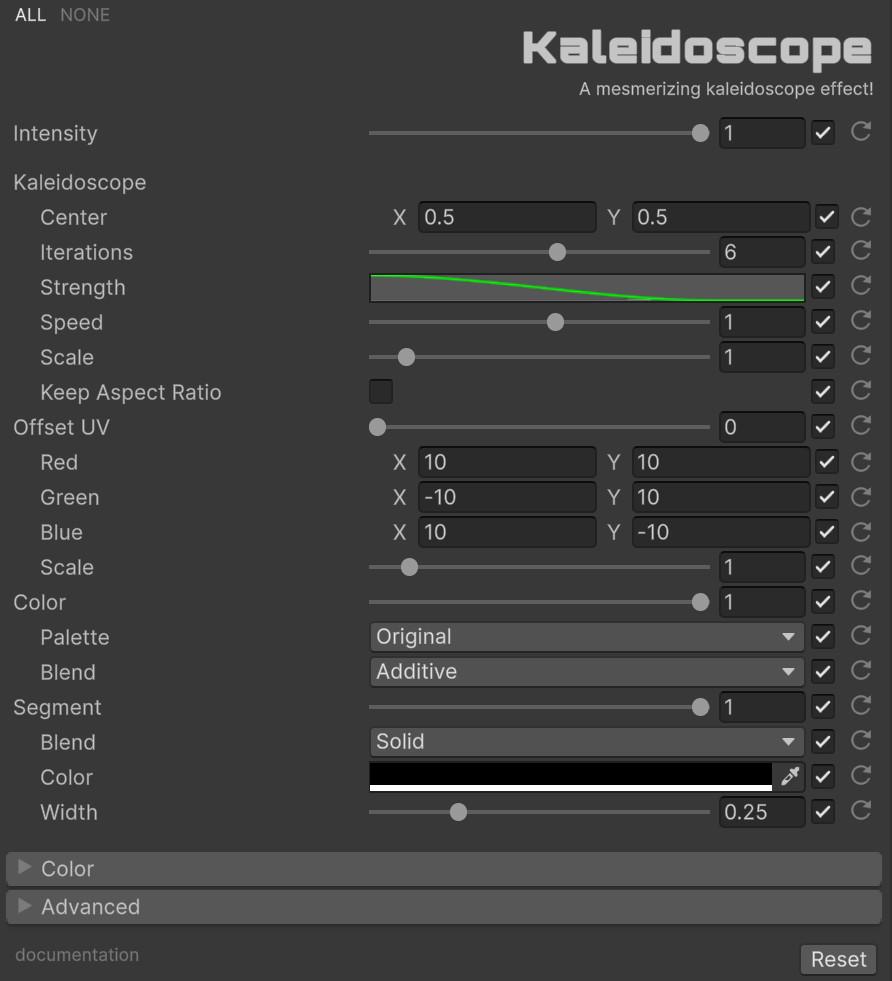
🌈 Kaleidoscope
A kaleidoscope effect for Unity. It creates a symmetrical, rotating pattern from the screen content.
Requisites
- Unity: 6000.0.58f2 or higher.
- Universal RP: 17.0.2 or higher.
Installation Guide
Step 1: Add Renderer Feature
- Locate your Universal Renderer Data asset.
- Click Add Renderer Feature and select Fronkon Games > Weird > Kaleidoscope.
Step 2: Configure the Volume
- Create a Volume component (Global or Local).
- In the Volume component, create or assign a Volume Profile.
- Click Add Override and select Fronkon Games > Weird > Kaleidoscope.
- Enable ‘Intensity’ and the kaleidoscope parameters you want to control.
Parameter Configuration
With ‘Intensity’ you can control the overall strength of the effect [0.0 - 1.0].
Kaleidoscope
Controls the core symmetrical pattern generation. Set the center position for the focal point, iterations for pattern complexity, and adjust scale, speed, and strength to shape the hypnotic geometric reflections.
- Center [0-1]: Center position of the effect.
- Iterations [1-10]: Pattern complexity.
- Strength: AnimationCurve for radial falloff.
- Speed [-10-10]: Animation speed.
- Scale [0.1-10]: Effect scale.
- Aspect Ratio: Preserve circular symmetry.
Offset UV
Adds chromatic aberration by offsetting the RGB color channels separately, creating colorful fringing at pattern edges. Adjust the intensity and individual channel scales for different chromatic effects.
- Offset UV [0-1]: Chromatic aberration intensity.
- Red/Green/Blue: Channel offset scales.
- Scale [0-10]: Overall offset multiplier.
Color
Manages the color transformation and grading of the kaleidoscopic patterns. Apply color palettes, adjust brightness and contrast, or shift hue and saturation to create vibrant or moody color schemes.
- Color [0-1]: Pattern color intensity.
- Palette: Color preset (Original, Rainbow, Neon, etc.).
- Blend: Blend mode.
- Brightness [-1-1]: Luminosity adjustment.
- Contrast [0-10]: Light/dark difference.
- Gamma [0.1-10]: Brightness curve.
- Hue [0-1]: Color wheel shift.
- Saturation [0-2]: Color intensity.
Segment
Overlays decorative lines that segment the kaleidoscopic patterns. Control line intensity, color, width, and blend mode to add structural elements to the symmetrical design.
- Segment [0-1]: Line intensity.
- Blend: Line blend mode.
- Color: Line color.
- Width [0-1]: Line thickness.
Runtime Control
using UnityEngine;
using UnityEngine.Rendering;
using FronkonGames.Weird.Kaleidoscope;

[SerializeField] private VolumeProfile volumeProfile;

private void SetKaleidoscope(bool enabled)
{
  if (volumeProfile.TryGet(out KaleidoscopeVolume volume))
  {
    volume.intensity.overrideState = true;
    volume.intensity.value = enabled ? 1.0f : 0.0f;
  }
}
💡 Take a look at the code in the included demo to learn more about how the effect works.
Performance Characteristics
- Pass Count: 1 blit pass.
- Texture Samples: Low.
- Complexity: O(n) per pixel where n is iterations.
Usage Patterns and Presets
Hypnotic Pattern
- Iterations: 6
- Speed: 1
- Scale: 1
- Palette: Rainbow
Minimal
- Iterations: 3
- Color: 0.5
- Segment: 0.5
- Palette: BlackAndWhite
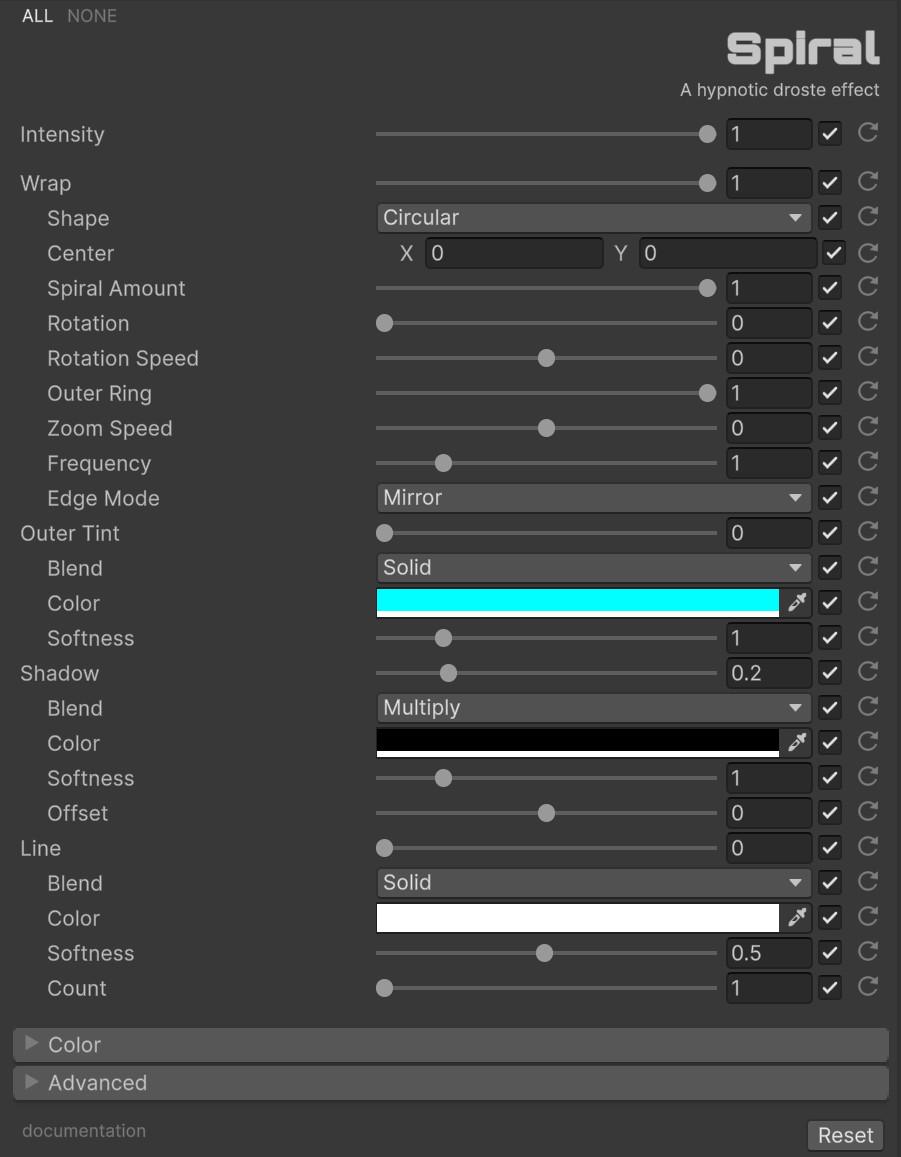
🌀 Spiral
A captivating Droste effect that warps image-space to recursively appear within itself, creating infinite spiral tunnels and recursive patterns.
Requisites
- Unity: 6000.0.58f2 or higher.
- Universal RP: 17.0.2 or higher.
Installation Guide
Step 1: Add Renderer Feature
- Locate your Universal Renderer Data asset.
- Click Add Renderer Feature and select Fronkon Games > Weird > Spiral.
Step 2: Configure the Volume
- Create a Volume component (Global or Local).
- In the Volume component, create or assign a Volume Profile.
- Click Add Override and select Fronkon Games > Weird > Spiral.
- Enable ‘Intensity’ and the spiral parameters you want to control.
Parameter Configuration
With ‘Intensity’ you can control the overall strength of the effect [0.0 - 1.0].
Wrap
Controls the core Droste effect transformation, creating the infinite spiral recursion. Adjust wrap for the transition between flat and warped, choose boundary shapes, set the focal center, and fine-tune spiral amount, rotation, and zoom speed for the desired hypnotic tunnel effect.
- Wrap [0-1]: Transition between flat and warped.
- Shape: Boundary type (Circular, Rectangular, Triangular, etc.).
- Center [-0.5, 0.5]: Focal point of the spiral.
- Spiral Amount [0-1]: Twist factor.
- Rotation [0-360]: Static rotation.
- Rotation Speed [-2, 2]: Continuous rotation.
- Outer Ring Size [0-1]: Edge source size.
- Zoom Speed [-2, 2]: Tunnel travel speed.
- Frequency [0.1-5]: Recursion density.
- Edge Mode: UV handling (Clamp, Mirror, Repeat).
Outer Tint
Applies color tinting to the outer recursive layers, creating depth through color grading. Control tint strength, blend mode, color selection, and softness falloff to add atmospheric color to the spiral edges.
- Outer Tint [0-1]: Tint strength for outer layers.
- Blend: Blend mode.
- Color: Tint color.
- Softness [0.1-5]: Falloff curve.
Shadow
Adds shadow effects to the inner spiral layers, enhancing the sense of depth and dimension. Adjust shadow intensity, blend mode, color, softness, and offset to create dramatic volumetric depth cues.
- Shadow [0-1]: Inner layer darkening.
- Blend: Shadow blend mode.
- Color: Shadow color.
- Softness [0.1-5]: Falloff.
- Offset [-1, 1]: Shadow position shift.
Line
Overlays decorative boundary lines along the spiral edges to accentuate the recursive structure. Control line thickness, blend mode, color, softness, and count per recursion to add graphic definition to the effect.
- Line [0-1]: Boundary line thickness.
- Blend: Line blend mode.
- Color: Line color.
- Softness [0.01-1]: Edge softness.
- Count [1-10]: Lines per recursion.
Runtime Control
using UnityEngine;
using UnityEngine.Rendering;
using FronkonGames.Weird.Spiral;

[SerializeField] private VolumeProfile volumeProfile;

private void SetSpiral(bool enabled)
{
  if (volumeProfile.TryGet(out SpiralVolume volume))
  {
    volume.intensity.overrideState = true;
    volume.wrap.overrideState = true;
    volume.intensity.value = 1.0f;
    volume.wrap.value = enabled ? 1.0f : 0.0f;
  }
}
💡 Take a look at the code in the included demo to learn more about how the effect works.
Performance Characteristics
- Pass Count: 1 blit pass.
- Texture Samples: Low.
- Complexity: O(1) per pixel.
Usage Patterns and Presets
Infinite Tunnel
- Wrap: 1.0
- Spiral Amount: 1.0
- Zoom Speed: 0.5
- Rotation Speed: 0.1
Escher Style
- Wrap: 1.0
- Shape: Rectangular
- Spiral Amount: 0.5
- Frequency: 2.0
☁️ Dither Fog
A retro-styled post-processing fog effect that mimics the dithered fog from classic games like Doom, using ordered dithering patterns to create pixelated, atmospheric depth.
Requisites
- Unity: 6000.0.58f2 or higher.
- Universal RP: 17.0.2 or higher.
- Depth Texture: Must be enabled in URP settings.
Installation Guide
Step 1: Add Renderer Feature
- Locate your Universal Renderer Data asset.
- Click Add Renderer Feature and select Fronkon Games > Weird > Dither Fog.
Step 2: Configure the Volume
- Create a Volume component (Global or Local).
- In the Volume component, create or assign a Volume Profile.
- Click Add Override and select Fronkon Games > Weird > Dither Fog.
- Enable ‘Intensity’ and the fog parameters you want to control.
Parameter Configuration

With ‘Intensity’ you can control the overall strength of the effect [0.0 - 1.0].
Fog
Controls the atmospheric depth and distance fading of the scene. Set fog opacity, choose between solid, auto, or gradient color modes, define start distances, and adjust the curve for smooth transitions between clear and foggy areas.
- Fog [0-1]: Overall fog opacity multiplier.
- Color Mode: Solid, Auto, or Gradient.
- Color: Fog color (Solid mode).
- Near/Far: Gradient colors (Gradient mode).
- Fog Start [0-1]: Distance where fog begins.
- Curve Start/End [0-1]: Smoothstep range.
- Curved: Toggle curved spherical falloff.
Dithering
Applies retro-style Bayer pattern dithering to create that classic 8-bit/16-bit game aesthetic. Choose dither patterns, adjust scale, enable adaptive dithering for intelligent detail preservation, and quantize colors for authentic retro banding effects.
- Dithering: Pattern type (None, Bayer4x4, Bayer8x8, etc.).
- Scale [1-8]: Pattern size multiplier.
- Adaptive: Intelligent dithering adjustment.
- Brightness Threshold [0-1]: Adaptation brightness.
- Contrast Sensitivity [0-2]: Detail preservation.
- Quantize [0-255]: Color precision reduction.
Runtime Control
using UnityEngine;
using UnityEngine.Rendering;
using FronkonGames.Weird.DitherFog;

[SerializeField] private VolumeProfile volumeProfile;

private void SetDitherFog(bool enabled)
{
  if (volumeProfile.TryGet(out DitherFogVolume volume))
  {
    volume.intensity.overrideState = true;
    volume.fogOpacity.overrideState = true;
    volume.intensity.value = 1.0f;
    volume.fogOpacity.value = enabled ? 0.8f : 0.0f;
  }
}
💡 Take a look at the code in the included demo to learn more about how the effect works.
Performance Characteristics
- Pass Count: 1 blit pass.
- Texture Samples: Low.
- Complexity: O(1) per pixel.
Usage Patterns and Presets
Classic Doom
- Fog: 0.8
- Color: (0.2, 0.2, 0.2)
- Dithering: Bayer8x8
- Scale: 2
- Fog Start: 0.3
- Curved: true
Modern Retro
- Fog: 0.5
- Dithering: Bayer16x16
- Scale: 1
- Quantize: 16
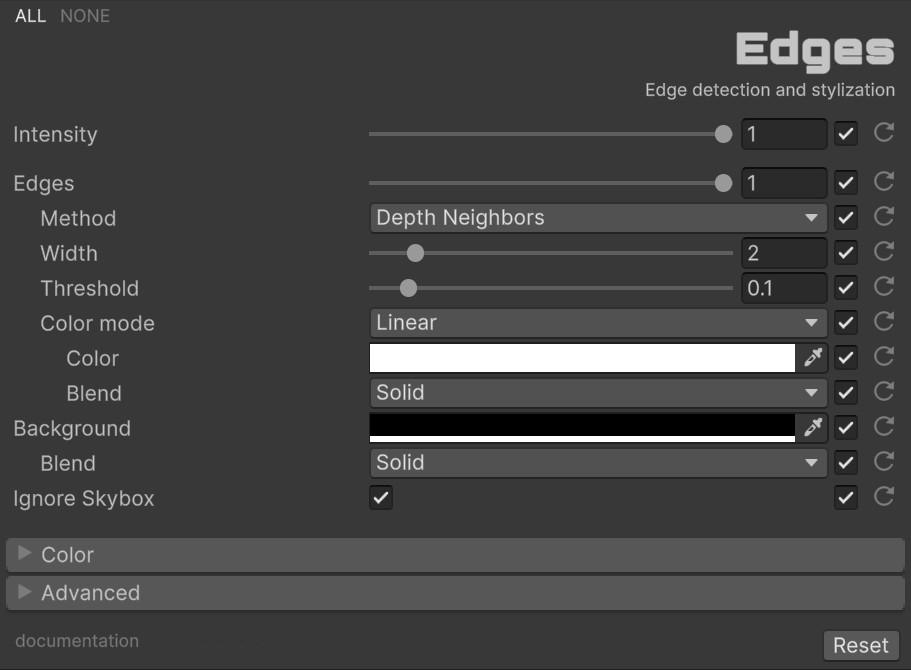
📐 Edges
A sophisticated edge detection and stylization effect that transforms your scene with customizable edge outlines, offering multiple detection algorithms and artistic control.
This effect uses the depth buffer. Go to your URP Renderer asset > Rendering > Depth Texture and enable depth buffer.
Requisites
- Unity: 6000.0.58f2 or higher.
- Universal RP: 17.0.2 or higher.
- Depth Texture: Must be enabled in URP settings.
Installation Guide
Step 1: Add Renderer Feature
- Locate your Universal Renderer Data asset.
- Click Add Renderer Feature and select Fronkon Games > Weird > Edges.
Step 2: Configure the Volume
- Create a Volume component (Global or Local).
- In the Volume component, create or assign a Volume Profile.
- Click Add Override and select Fronkon Games > Weird > Edges.
- Enable ‘Intensity’ and the edge parameters you want to control.
Parameter Configuration
With ‘Intensity’ you can control the overall strength of the effect [0.0 - 1.0].
Edges
Controls the edge detection algorithm and appearance. Choose from multiple detection methods (Sobel, Prewitt, Depth-based, etc.), adjust detection strength and sensitivity, set edge width, and configure edge coloring with various blend modes.
- Edges [0-1]: Edge detection strength.
- Method: Detection algorithm (Depth Neighbors, Sobel, Prewitt, Normal-Based, Color-Based, Hybrid).
- Width [1-10]: Edge width multiplier.
- Threshold [0.01-1]: Detection sensitivity.
- Edge Color: Linear (single color) or DepthBased (gradient).
- Blend: Blend mode for edges.
Background
Defines how non-edge areas of the scene are treated. Set a background color and blend mode to either preserve the original scene or replace it with a solid fill, creating different artistic styles from cel-shading to sketch effects.
- Color: Background color for non-edge areas.
- Blend: Background blend mode.
Skybox
Controls whether the skybox is included in the edge detection or excluded from the effect. This is useful for maintaining clean edges on scene geometry while leaving the sky unaffected.
- Ignore Skybox: Exclude skybox from effect.
Runtime Control
using UnityEngine;
using UnityEngine.Rendering;
using FronkonGames.Weird.Edges;

[SerializeField] private VolumeProfile volumeProfile;

private void SetEdges(bool enabled)
{
  if (volumeProfile.TryGet(out EdgesVolume volume))
  {
    volume.intensity.overrideState = true;
    volume.edges.overrideState = true;
    volume.intensity.value = 1.0f;
    volume.edges.value = enabled ? 1.0f : 0.0f;
  }
}
💡 Take a look at the code in the included demo to learn more about how the effect works.
Performance Characteristics
- Pass Count: 1 blit pass.
- Texture Samples: Low.
- Complexity: O(1) per pixel.
Usage Patterns and Presets
Neon Wireframe
- Edges: 1.0
- Edge Color: Cyan
- Background: Dark Gray
- Blend: Solid
Soft Sketch
- Edges: 0.5
- Method: Sobel
- Width: 2
- Threshold: 0.1
- Blend: Multiply
F.A.Q.
Effect Not Appearing
If the effect doesn’t appear in your scene:
- Verify Renderer Feature: Check that the renderer feature is added to your Universal Renderer Data asset.
- Check Volume Profile: Ensure a Volume component exists in your scene with the effect override enabled.
- Confirm Intensity: Verify that the Intensity parameter is set to a value greater than 0.0 and enabled.
- Camera Settings: Check that your camera has Post Processing enabled in the Camera component.
Why does changing a value from code sometimes do nothing?
In URP volumes, the parameter override must be enabled. When setting values from code, remember to set overrideState = true for every parameter you want the volume system to apply.
volume.someParameter.overrideState = true;
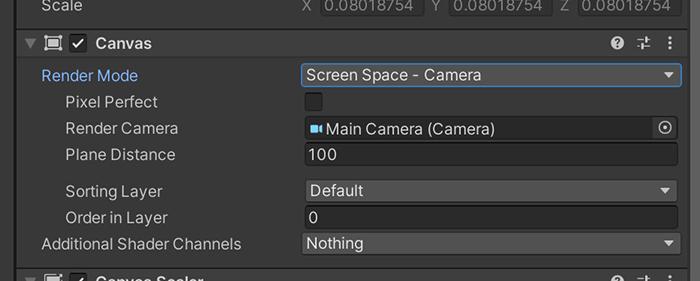
volume.someParameter.value = newValue;How do I make the effect also affect the UI?
If your UI is using ‘Screen Space - Overlay’, it bypasses the camera and therefore bypasses the effect. Change the canvas to ‘Screen Space - Camera’ and assign the camera used for rendering the effect.
Can I use it in a material?
Yes! Any effect can easily be used on a material. Just follow these steps:
- In the ‘Project’ window, open the ‘Create’ menu with the right mouse button and select ‘Create > Render Texture’.
- Create a new camera and in ‘Output Texture’ select the Render Texture previously created. Remember to activate ‘Post Processing’ and select in ‘Renderer’ where you have the effect added.
- In the material you want to use, select in ‘Base Map’ the Render Texture.
Support
Do you have any problem or any suggestions? Send me an email to fronkongames@gmail.com and I’ll be happy to help you.
If you want to report an error, it helps a lot if you include the Unity log file.
If you are happy with this asset, consider writing a review in the store.
Thanks!
If you are happy with this asset, consider writing a review in the store.
Thanks!