Store
‘Retro’ is a comprehensive collection of retro-style post-processing effects, designed to transform modern 3D visuals into nostalgic retro aesthetics. It consists of the following effects:
- VHS, the warm, magnetic imperfection of 80s home video.
- Pixelator, advanced mosaic and dithering for that golden age look.
- Old Films, cinematic aging with scratches, dust, and projector jitter.
- CRT TV, the ultimate cathode-ray tube simulation with shadow masks and glow.
- Lo-Fi, aesthetic degradation with palette crushing and quantization.
- NTSC, authentic broadcast signal artifacts, color bleeding, and dot crawl.
- Noir, dramatic monochrome styles from dithered ink to classic cinema.
- Old Computers, faithful color palettes from the C64, CGA, EGA, and more.
- ASCII, turns your world into living text with shape-aware character rendering.
- Spectrum, the distinct color clash and vivid style of the 8-bit legend.
- LCD, physical grid simulation of early handhelds and digital displays.
- Vintage Filters, instant cinematic color grading inspired by classic photography.
- Handheld 8-Bit, the iconic four-shade green aesthetic of portable gaming history.
Requirements
All ‘Retro’ effects are developed for ‘Universal Render Pipeline’ (or URP), which means they will not work with Built-In, or HDRP.
Unity 6 or Higher
All effects are compatible with Unity 6, and use the new Render Graph. You will need to have URP version 17.0.2 or higher installed. In the official documentation you can find the steps to install it correctly.
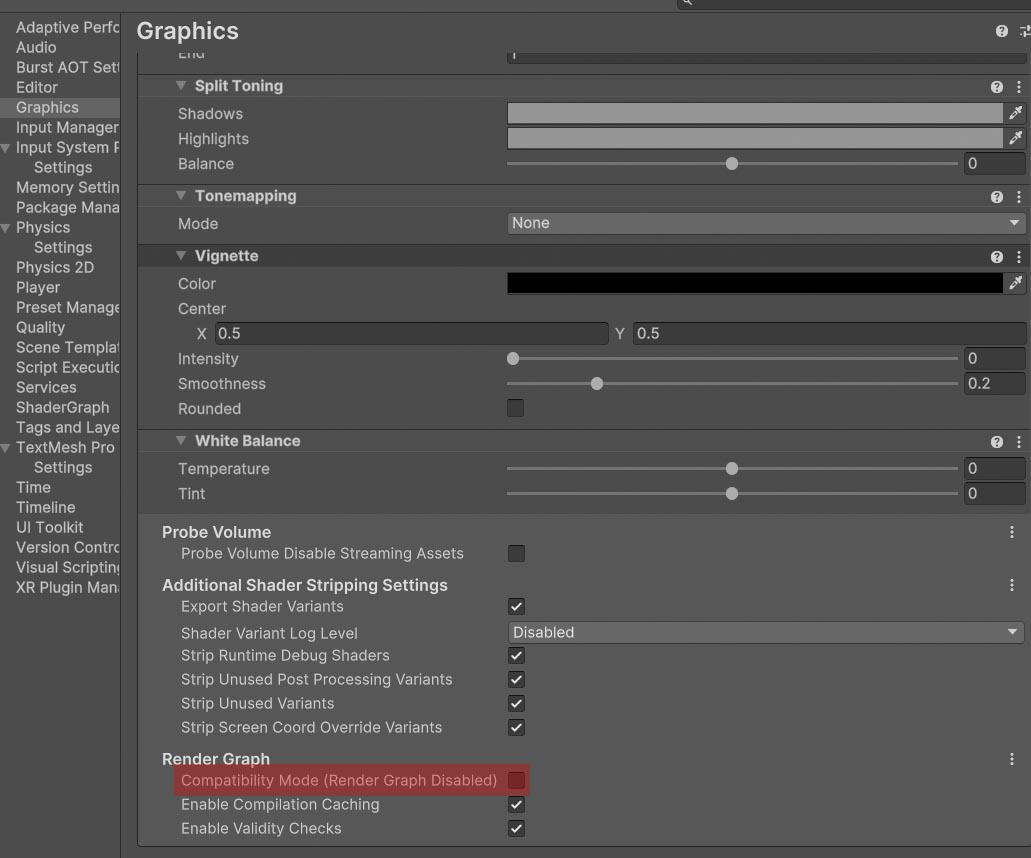
Make sure that the ‘Compatibility Mode’ is disabled (Project Settings > Graphics > Render Graph).
Installation
Step 1: Add Renderer Feature
The effects must be registered in your project’s URP configuration:
- Locate your Universal Renderer Data asset.
- Click Add Renderer Feature and select the desired distortion from Fronkon Games > Retro.
Once installed, you have to add the effect you want to use from ‘Retro’ as a ‘Render Feature’. This official tutorial tells how to do it.
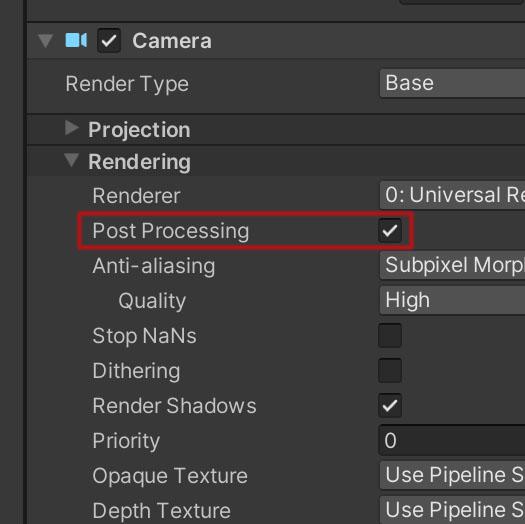
Remember that the camera you are using must have the ‘Post Processing’ option enabled.
‘Quality’ levels (Project Settings > Quality) can have their own active ‘Render Pipeline Asset’.
If so, whatever you assign in ‘Scriptable Render Pipeline Settings’ in ‘Graphics’ will be ignored.
Remember to add the effect to the quality levels you want to use.
Step 2: Configure The Volume
To apply the effects to your scene:
- Create a Volume component (Global or Local) or select one that has already been created.
- In the Volume component, create or assign a Volume Profile.
- Click Add Override and select the desired distortion from Fronkon Games > Retro.
- Enable the ‘Intensity’ parameter (and any others you wish to modify).
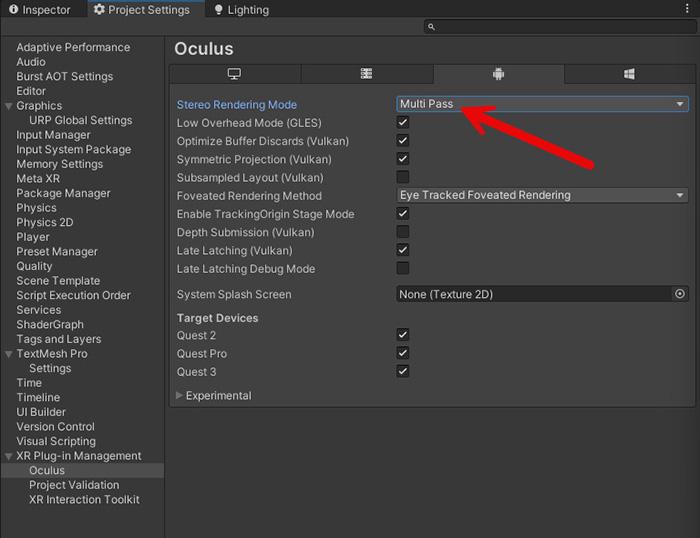
VR
To increase compatibility with VR devices, I recommend that you select ‘Stereo Rendering Mode’ in ‘Multi Pass’ mode:
📼 VHS
Immerse players in the analog warmth of the 80s and 90s. ‘VHS’ meticulously recreates the tracking errors, color bleeding, tape noise, and magnetic degradation of vintage home video, perfect for found-footage horror, flashbacks, or a cozy retro vibe.
Requisites
To ensure optimal performance and compatibility, your project must meet the following requirements:
- Unity: 6000.0.58f2 or higher.
- Universal RP: 17.0.3 or higher.
Installation Guide
Step 1: Add Renderer Feature
The effect must be registered in your project’s URP configuration:
- Locate your Universal Renderer Data asset.
- Click Add Renderer Feature and select Fronkon Games > Retro > VHS.
Step 2: Configure the Volume
To apply the effect to your scene:
- Create a Volume component (Global or Local).
- In the Volume component, create or assign a Volume Profile.
- Click Add Override and select Fronkon Games > Retro > VHS.
- Enable the ‘Intensity’ parameter (and any others you wish to modify).
Core VHS Artifacts
Tape Distortion System
The signature VHS appearance emerges from multiple layers of tape-related distortions that simulate physical tape mechanics and signal degradation. The tape wave creates horizontal displacement using both low and high-frequency noise, simulating the mechanical instability of VCR playback heads. This is implemented through UV coordinate perturbations that shift pixel sampling positions horizontally across the screen.
Tape creases represent physical damage to the magnetic tape, manifested as vertical bands of distortion that scroll vertically through the image. These creases combine a phase calculation using sine functions with noise-based modulation, creating realistic banding patterns that vary in intensity and position. The crease strength determines how severe these distortions appear, while the count parameter controls the number of bands present simultaneously.
The bottom warp effect simulates head-switching noise, a characteristic artifact visible at the bottom of VHS recordings where the playback head transitions between tracks. This effect applies displacement and jitter specifically to the lower portion of the screen based on the height parameter, creating the distinctive horizontal tearing pattern at the image bottom.
Color Space and Bandwidth Reduction
VHS technology employed a sophisticated color encoding system with significantly reduced bandwidth for chrominance (color) information compared to luminance (brightness). The effect faithfully replicates this by downscaling the chroma channel to 1/16th resolution and luma to 1/2 resolution before blending them back together. This bandwidth reduction causes the characteristic color bleeding and softness inherent to VHS recordings.
The implementation processes the image in YIQ color space rather than RGB, allowing for accurate simulation of how VHS encoded color information. YIQ separates luminance from chrominance into in-phase and quadrature components. This enables precise control over the characteristic color shifts and saturation variations typical of aging VHS tapes.
Parameter Configuration
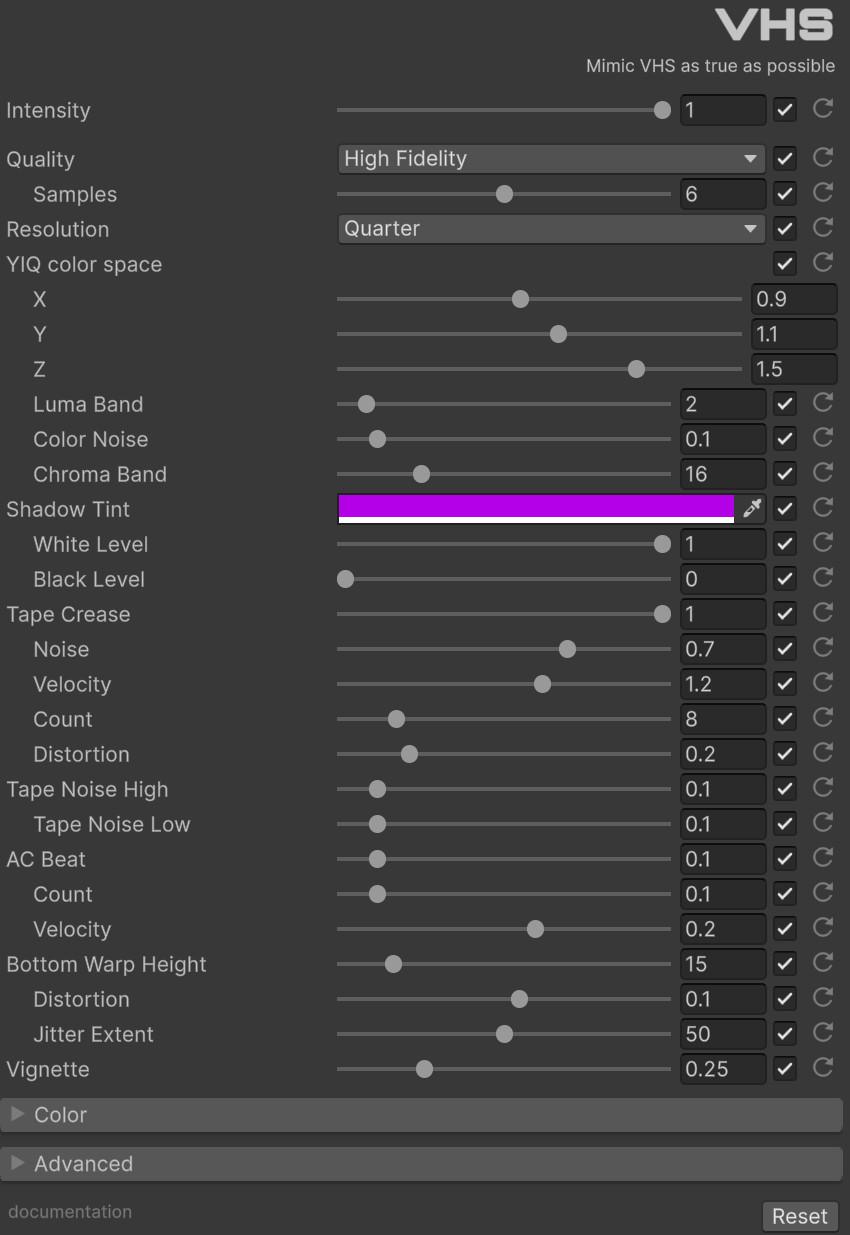
With ‘Intensity’ you can control the overall strength of the effect [0.0 - 1.0]. If it is 0, the effect will not be active.
The effect provides two quality modes that balance computational cost against visual fidelity. Each mode offers different parameter availability suited for target platform capabilities.
| Quality | Determines shader complexity and available features |
| Samples | YIQ calculation samples (HighFidelity only) |
| Resolution | Final output resolution scaling |
The resolution parameter scales the final output, with Quarter (1/4) providing the classic VHS appearance. Lower resolutions increase the apparent pixelation and blur while improving performance, making it possible to achieve different aesthetic results from near-digital to heavily degraded tape looks.
YIQ Color Space Parameters
The YIQ color space parameters control color reproduction and bandwidth limitation.
| YIQ | YIQ color space (x: luma, y: in-phase, z: quadrature) |
| Luma Band | Luma resolution reduction factor (VHS uses half) |
| Color Noise | Tape noise |
| Chroma Band | Chroma resolution reduction factor (VHS uses 1/16th) |
The YIQ parameter provides fine-grained control over color reproduction. The luma component (x) affects overall brightness, while in-phase (y) and quadrature (z) components manipulate specific color channels. Increasing these values creates the characteristic oversaturated colors of VHS, while decreasing them produces the faded appearance of aging tapes.
Shadow Tint Parameters
Shadow tinting simulates color casts common in VHS recordings due to phosphor decay or tape chemical breakdown. The default purple tint creates a distinctive horror aesthetic, but this can be adjusted to match specific visual requirements.
| Shadow Tint | Shadow tint color |
| White Level | Color levels (white) |
| Black Level | Color levels (black) |
The YIQ parameter provides fine-grained control over color reproduction. The luma component (x) affects overall brightness, while in-phase (y) and quadrature (z) components manipulate specific color channels. Increasing these values creates the characteristic oversaturated colors of VHS, while decreasing them produces the faded appearance of aging tapes.
Shadow tinting simulates color casts common in VHS recordings due to phosphor decay or tape chemical breakdown. The default purple tint creates a distinctive horror aesthetic, but this can be adjusted to match specific visual requirements.
Tape Crease Parameters
The physical tape degradation is controlled through multiple parameters that simulate different aspects of VHS signal instability and damage.
| Tape Crease Strength | Noise band that also deforms the color |
| Tape Crease Noise | Band noise |
| Tape Crease Velocity | Band speed |
| Tape Crease Count | Number of bands |
| Tape Crease Distortion | Band color distortion (HighFidelity only) |
The tape parameters work synergistically to create the organic, unpredictable nature of VHS playback. The crease system combines periodic motion with noise modulation, preventing the bands from appearing artificial or repetitive. The velocity parameter can be negative to reverse the scrolling direction or set to zero for stationary bands, useful for creating paused VCR effects.
Tape Noise Parameters
The tape noise system simulates high and low frequency mechanical distortions from the tape transport mechanism.
| Tape Noise High | Tape distortion (high frequency) |
| Tape Noise Low | Tape distortion (low frequency) |
AC Beat Parameters
AC beat interference simulates electrical hum from power sources affecting the analog signal, creating horizontal bands of brightness variation that scroll through the image. This was particularly common in older consumer VCRs with poor shielding.
| AC Beat Strength | Amount of AC interferences |
| AC Beat Count | AC interferences density |
| AC Beat Velocity | AC interferences velocity |
Bottom Warp Parameters
The bottom warp effect simulates head-switching noise, a characteristic artifact visible at the bottom of VHS recordings where the playback head transitions between tracks.
| Bottom Warp Height | ‘Head-switching’ noise height |
| Bottom Warp Distortion | Distortion strength |
| Bottom Warp Jitter Extent | Extra noise |
Display Parameters
| Vignette | Vignette effect strength |
Color Grading
Standard color correction parameters apply to the final output.
| Brightness | Additive luminance offset |
| Contrast | Mid-tone contrast expansion |
| Gamma | Nonlinear tonal mapping (inverted) |
| Hue | Color wheel rotation |
| Saturation | Color intensity relative to luminance |
Runtime Control
using UnityEngine;
using UnityEngine.Rendering;
using FronkonGames.Retro.VHS;

// ...

[SerializeField]
private VolumeProfile volumeProfile;

// Access the effect
if (volumeProfile.TryGet(out VHSVolume volume))
{
    volume.intensity.value = 1.0f;
    volume.quality.value = Quality.HighFidelity;
    volume.samples.value = 8;
    volume.resolution.value = Resolution.Half;
    volume.tapeCreaseStrength.value = 0.8f;
    volume.colorNoise.value = 0.2f;
    // ...
}
Performance Characteristics
The effect executes in a single render pass. Cost varies with quality setting and sample count.
- Pass Count: 1 blit pass.
- Texture Samples: Multiple samples depending on quality and effects enabled (tape noise, crease, etc.).
- Memory: No additional textures.
Usage Patterns and Presets
Clean Recording Look
For a well-maintained VCR recording appearance:
- Quality: High Fidelity
- Tape Crease Strength: 0.1-0.3
- Tape Noise High/Low: 0.05
- AC Beat Strength: 0.0-0.05
- Color Noise: 0.05
- Saturation: 1.2-1.5
Heavily Degrade Tape
For maximum degradation and damage simulation:
- Quality: High Fidelity
- Tape Crease Strength: 0.8-1.0
- Tape Crease Count: 15-25
- Bottom Warp Height: 30-50
- AC Beat Strength: 0.2-0.4
- Color Noise: 0.2-0.3
- White Level: 0.8
- Black Level: 0.1
Horror / Creepy Vibe
For unsettling, atmospheric effects:
- Quality: High Fidelity
- YIQ: (1.2, 1.3, 1.8)
- Shadow Tint: Purple (0.7, 0, 0.9)
- Tape Crease Velocity: -2.0 to -3.0
- Contrast: 1.3-1.5
- Vignette: 0.4-0.6
- Saturation: 0.7-0.9
🧊 Pixelator
Unlock the golden age of gaming with ‘Pixelator’. This versatile powerhouse goes beyond simple downsampling, offering advanced pixelation modes (including circular and hexagonal), rich dithering patterns, and authentic color posterization to craft distinctive low-res art styles instantly.
Requisites
To ensure optimal performance and compatibility, your project must meet the following requirements:
- Unity: 6000.0.58f1 or higher.
- Universal RP: 17.0.3 or higher.
Installation Guide
Step 1: Add Renderer Feature
The effect must be registered in your project’s URP configuration:
- Locate your Universal Renderer Data asset.
- Click Add Renderer Feature and select Fronkon Games > Retro > Pixelator.
Step 2: Configure the Volume
To apply the effect to your scene:
- Create a Volume component (Global or Local).
- In the Volume component, create or assign a Volume Profile.
- Click Add Override and select Fronkon Games > Retro > Pixelator.
- Enable the ‘Intensity’ parameter (and any others you wish to modify).
Core Pixelation System
Advanced Pixelation Modes
The foundation of Pixelator lies in its diverse pixelation modes that go far beyond simple square blocking. Each mode implements unique UV coordinate transformations and shape-based sampling to create distinct visual styles.
Rectangle Mode provides the classic blocky pixelation by dividing the screen into uniform rectangular cells. The pixel size and scale parameters control the coarseness, while the aspect ratio settings ensure proper proportions across different screen resolutions.
Circle Mode creates circular pixel clusters with adjustable radius, producing an organic, bubble-like aesthetic. The background color parameter fills the gaps between circles, allowing for creative color combinations and transparency effects.
Hexagon Mode implements hexagonal tiling for a honeycomb-like pattern that mimics certain LED displays and artistic styles. The geometry-based sampling creates natural edge transitions between adjacent cells.
Knitted Mode simulates woven textile patterns with configurable thread counts. This mode creates interlaced visual effects reminiscent of knitted fabrics or basket-weave patterns, adding tactile texture to digital imagery.
Specialized Modes including Triangle, Diamond, and Leaf shapes offer additional artistic options for specific aesthetic requirements. Each mode uses custom shader logic to define cell boundaries and sampling regions.
Color Reduction and Dithering
Pixelator employs sophisticated color processing techniques to achieve authentic retro color limitations. The posterization system quantizes color values to discrete steps, configurable separately for RGB channels, luminance, or HSV color space.
The dithering implementation uses ordered Bayer patterns with adjustable pattern scales (2x2, 4x4, or 8x8). The threshold scale and color steps parameters control the intensity and granularity of the dither effect, creating smooth color transitions even with limited palettes.
Gradient mapping via CIELAB color space enables accurate color replacement based on luminance values. The system samples multiple points along the gradient curve to find optimal color matches, with optional luminance preservation for maintaining image depth.
Stylistic Filter System
The integrated filter collection provides one-click aesthetic transformations. Filters operate by applying color matrix transformations, overlay blending, and specialized channel manipulations:
- Photographic Filters (Sepia, Kodachrome, Polaroid) simulate analog film chemistry through color channel mixing and contrast curves.
- Social Media Styles (Hudson, Hefe, X-Pro, Rise, Toaster) recreate popular app filter aesthetics using gradient overlays and selective color adjustments.
- Specialized Effects (Thermal, Night Vision, Infrared, Pop Art, Blueprint) implement domain-specific color transformations for thematic visuals.
Parameter Configuration
With ‘Intensity’ you can control the overall strength of the effect [0.0 - 1.0]. If it is 0, the effect will not be active.
Pixelation Parameters
The core pixelation behavior is controlled through these parameters that define shape, size, and appearance of the pixel grid.
| Pixelation Mode | Shape of the pixelation cells |
| Pixel Size | Size of individual pixels |
| Screen Aspect Ratio | Use screen aspect for pixel scaling |
| Aspect Ratio | Custom aspect ratio when not using screen |
| Pixel Scale | Scale multiplier for pixel dimensions |
| Radius | Circle radius (Circle mode only) |
| Background | Fill color for gaps between shapes |
| Threads | Thread count (Knitted mode only) |
Gradient Mapping Parameters
These parameters control gradient-based color mapping to achieve limited palette aesthetics.
| Gradient Intensity | Strength of gradient color mapping |
| Gradient | Color gradient for mapping |
| Apply Luminance | Preserve original luminance |
| Luminance Range | Min/Max luminance for gradient mapping |
| Gradient Mapping Mode | Color space for gradient matching |
| CIELAB Samples | Sample count for CIELAB mode |
A tool with thousands of palettes is included. Just click on the magnifying glass to find the perfect color palette.
Chromatic Aberration Parameters
| Chromatic Aberration Intensity | Color channel separation strength |
| Chromatic Aberration Offset | RGB channel offset directions |
Bevel Parameters
| Bevel | 3D bevel effect on pixel edges |
Dithering Parameters
The dithering implementation uses ordered Bayer patterns with adjustable pattern scales (2x2, 4x4, or 8x8).
| Dither Intensity | Strength of dither pattern |
| Dither Pattern Scale | Bayer pattern size (2x2, 4x4, 8x8) |
| Dither Threshold Scale | Dither pattern influence |
| Dither Color Steps | Number of color steps for dithering |
Posterization Parameters
The posterization system quantizes color values to discrete steps, configurable separately for RGB channels, luminance, or HSV color space.
| Posterize Intensity | Overall posterization strength |
| Posterize RGB Steps | Steps per RGB channel |
| Posterize Luminance Steps | Steps for luminance mode |
| Posterize HSV Steps | Steps for HSV mode |
| Posterize Gamma | Gamma correction for posterization |
Filter Parameters
| Filters Intensity | Global filter strength |
| Sepia Intensity | Sepia tone strength |
| Cool Blue Intensity | Cool blue filter strength |
| Warm Filter Intensity | Warm overlay strength |
| Invert Color Intensity | Color inversion strength |
| Hudson Intensity | Hudson filter strength |
| Hefe Intensity | Hefe filter strength |
| X-Pro Intensity | Cross-process strength |
| Rise Intensity | Rise filter strength |
| Toaster Intensity | Toaster filter strength |
| IR Filter Intensity | Infrared filter strength |
| Thermal Filter Intensity | Thermal vision strength |
| Duotone Intensity | Duotone effect strength |
| Duotone Color A | First duotone color |
| Duotone Color B | Second duotone color |
| Night Vision Intensity | Night vision strength |
| Pop Art Intensity | Pop art filter strength |
| Blueprint Intensity | Blueprint/technical drawing style |
| Blueprint Edge Color | Edge highlight color |
| Blueprint Background | Background color |
| Blueprint Edge Threshold | Edge detection sensitivity |
Color Grading
Standard color correction parameters apply to the final output.
| Brightness | Additive luminance offset |
| Contrast | Mid-tone contrast expansion |
| Gamma | Nonlinear tonal mapping (inverted) |
| Hue | Color wheel rotation |
| Saturation | Color intensity relative to luminance |
Runtime Control
using UnityEngine;
using UnityEngine.Rendering;
using FronkonGames.Retro.Pixelator;

// ...

[SerializeField]
private VolumeProfile volumeProfile;

// Access the effect
if (volumeProfile.TryGet(out PixelatorVolume volume))
{
    volume.intensity.value = 1.0f;
    volume.pixelationMode.value = Pixelator.PixelationModes.Circle;
    volume.pixelSize.value = 0.5f;
    volume.posterizeIntensity.value = 0.8f;
    volume.posterizeRGBSteps.value = new Vector3Int(4, 4, 4);
    volume.filtersIntensity.value = 1.0f;
    volume.thermalFilterIntensity.value = 0.5f;
    volume.ditherIntensity.value = 0.6f;
    volume.bevel.value = 2.0f;
}
Performance Characteristics
The effect executes in a single render pass. Cost varies with pixelation mode complexity and dithering settings.
- Pass Count: 1 blit pass.
- Texture Samples: 1 per pixel + gradient texture if gradient mode enabled.
- Complexity: O(1) per pixel, with additional cost for ShapeAware and CIELAB modes.
Usage Patterns and Presets
Classic 8-Bit Gaming Look
For authentic retro gaming aesthetics:
- Pixelation Mode: Rectangle
- Pixel Size: 0.6-0.8
- Posterize Intensity: 0.7-0.9
- Posterize RGB Steps: (8, 8, 8)
- Dither Intensity: 0.4-0.6
- Bevel: 0.5-1.0
Artistic Hexagon Mosaic
For stylized artistic presentations:
- Pixelation Mode: Hexagon
- Pixel Size: 0.4-0.6
- Pixel Scale: (1.2, 1.2)
- Bevel: 2.0-3.0
- Gradient Intensity: 0.5-0.8
- Chromatic Aberration: 0.3-0.5
Night Vision Tactical
For stealth game aesthetics:
- Filters Intensity: 1.0
- Night Vision Intensity: 0.8-1.0
- Pixelation Mode: Rectangle
- Pixel Size: 0.3-0.5
- Scanlines: 0.2-0.4 (if combined with Lo-Fi)
- Contrast: 1.2-1.5
🎞️ Old Films
Transport your audience back in time with ‘Old Films’. From the silent era to the gritty 70s, this effect authentically simulates film stock characteristics, projector jitter, dust, scratches, and grain, delivering a cinematic experience that feels truly lived-in.
Requisites
To ensure optimal performance and compatibility, your project must meet the following requirements:
- Unity: 6000.0.58f1 or higher.
- Universal RP: 17.0.3 or higher.
Installation Guide
Step 1: Add Renderer Feature
The effect must be registered in your project’s URP configuration:
- Locate your Universal Renderer Data asset.
- Click Add Renderer Feature and select Fronkon Games > Retro > Old Films.
Step 2: Configure the Volume
To apply the effect to your scene:
- Create a Volume component (Global or Local).
- In the Volume component, create or assign a Volume Profile.
- Click Add Override and select Fronkon Games > Retro > Old Films.
- Enable the ‘Intensity’ parameter (and any others you wish to modify).
Film Characteristics Simulation
Manufacturer-Based Color Grading
The foundation of Old Films lies in its accurate reproduction of vintage camera color science. The system implements Color Decision Lists (CDL) derived from actual historical film stock characteristics. Each manufacturer preset recreates the unique color response curves of specific camera models:
German Engineering presets including KineExakta I/II, Leica I, and Leica III recreate the warm yellows and muted cyans characteristic of 1930s-1940s German optical systems. These cameras used specific lens coatings and film processing techniques that created distinct color casts.
Japanese Innovation presets like Canon VT and Nikon F capture the sharp contrast and distinct blue shadows of post-war Japanese camera technology. These presets implement film grain patterns specific to Japanese film stock of the era.
American Consumer presets for Kodak Retina series cameras reproduce the consumer-grade color processing of 1950s-1960s family photography, with characteristic warm skin tones and slightly oversaturated greens.
Each manufacturer preset automatically configures color temperature, tint, saturation curves, and contrast profiles specific to the camera’s optical characteristics.
Frame Artifacts and Damage Simulation
Old Films implements multi-layered noise systems to simulate physical film damage:
Scratches use procedural noise generation with temporal coherence to create linear damage patterns that evolve realistically over time. The intensity and speed parameters control the visibility and movement rate of scratch artifacts.
Blotches simulate chemical damage or dust accumulation through randomized circular mask generation. The noise-based distribution ensures organic placement across the frame.
Film Frame Movement introduces subtle temporal instability through per-frame position offset simulation. This mimics the mechanical imperfections of early film transport systems that caused frames to shift slightly during projection.
Frame Jumping creates occasional vertical displacement artifacts that simulate sprocket hole wear or projection stuttering. The jump interval and speed control the frequency and magnitude of these disruptions.
Film Grain and Texture
The grain system uses blue noise generation for natural, visually pleasing film grain that doesn’t produce aliasing patterns. Key characteristics:
- ISO Simulation: Higher grain values simulate high-sensitivity film stock used in low-light conditions.
- Temporal Consistency: Grain pattern evolves frame-to-frame for authentic organic movement.
- Luminance-Based: Grain intensity varies with scene luminance, heavier in shadows like real film.
The vignette system simulates lens light falloff characteristic of vintage optics, with configurable shape and intensity.
Parameter Configuration
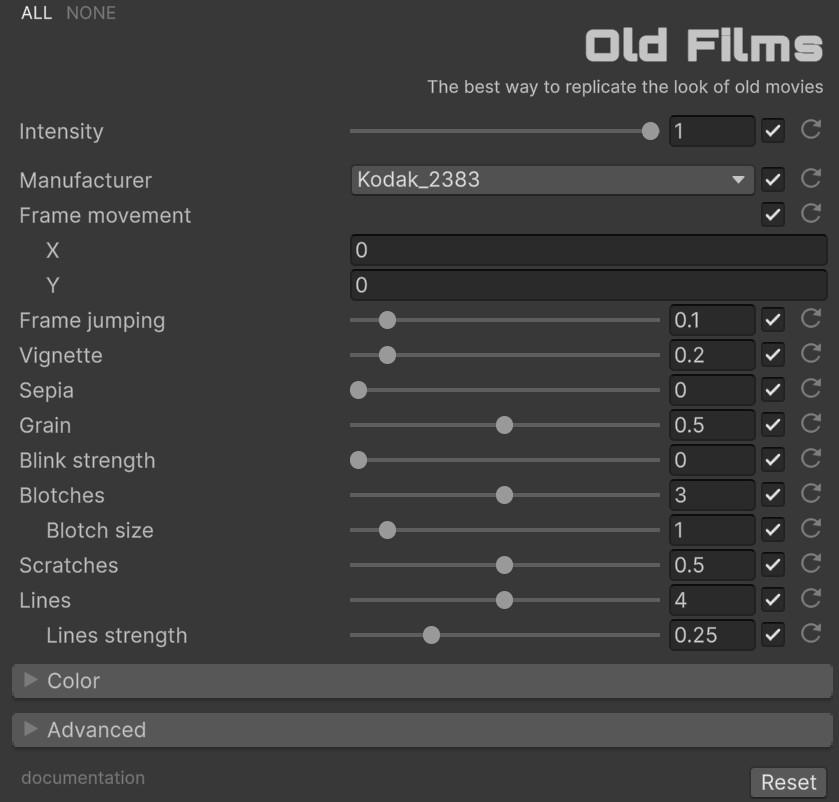
With ‘Intensity’ you can control the overall strength of the effect [0.0 - 1.0]. If it is 0, the effect will not be active.
Camera and Frame Parameters
Select a vintage camera manufacturer and configure frame behavior.
| Manufacturer | Vintage camera preset |
| Move Frame | Subtle frame position jitter |
| Jump Frame | Frame jumping intensity |
| Vignette | Corner darkening intensity |
| Sepia | Brownish tint intensity |
| Grain | Film grain intensity |
Blink Parameters
| Blink Strength | Damaged film flicker effect |
| Blink Speed | Blink animation speed |
Blotches Parameters
| Blotches | Chemical/dust damage count |
| Blotch Size | Blotch size |
Scratches and Lines Parameters
| Scratches | Film scratch intensity |
| Lines | Analog noise line count |
| Lines Strength | Noise line intensity |
Color Grading
Standard color correction parameters apply to the final output.
| Brightness | Additive luminance offset |
| Contrast | Mid-tone contrast expansion |
| Gamma | Nonlinear tonal mapping (inverted) |
| Hue | Color wheel rotation |
| Saturation | Color intensity relative to luminance |
Runtime Control
using UnityEngine;
using UnityEngine.Rendering;
using FronkonGames.Retro.OldFilms;

// ...

[SerializeField]
private VolumeProfile volumeProfile;

// Access the effect
if (volumeProfile.TryGet(out OldFilmsVolume volume))
{
    volume.intensity.value = 1.0f;
    volume.manufacturer.value = OldFilms.Manufacturers.LeicaI;
    volume.sepia.value = 0.5f;
    volume.grain.value = 0.3f;
    volume.blotches.value = 0.4f;
    volume.scratches.value = 0.2f;
    volume.blink.value = 0.1f;
    volume.vignette.value = 0.4f;
    volume.jumpFrame.value = true;
    volume.jumpFrameInterval.value = 15.0f;
}
Performance Characteristics
The effect executes in a single render pass with procedurally generated noise. Performance cost scales with damage effect intensity due to increased noise sampling.
- Pass Count: 1 blit pass.
- Texture Samples: 1 per pixel + noise samples for each enabled effect.
- Complexity: O(1) per pixel, with additional noise computation for artifacts.
Usage Patterns and Presets
1920s Silent Film Aesthetic
For authentic early cinema appearance:
- Manufacturer: KineExakta I
- Sepia: 0.8-1.0
- Grain: 0.4-0.6
- Blink: 0.3-0.5
- Blotches: 0.2-0.4
- Scratches: 0.3-0.5
- Frame Rate Hint: Consider reducing game to 16-18 FPS with skip frames
1950s Family Photograph
For warm nostalgic memories:
- Manufacturer: Kodak Retina I or Kodak Retinette
- Sepia: 0.3-0.5
- Grain: 0.2-0.4
- Vignette: 0.2-0.3
- Blotches: 0.1-0.2
- Lines: 0.0-0.1
Heavily Damaged Archive
For distressed archival footage:
- Manufacturer: Any vintage camera
- Blink: 0.5-0.8
- Blotches: 0.5-0.8
- Scratches: 0.6-0.9
- Jump Frame: true
- Jump Frame Speed: 2.0-5.0
- Jump Frame Interval: 3.0-8.0
- Sepia: 0.7-0.9
📺 CRT TV
The ultimate cathode-ray tube simulation. ‘CRT TV’ delivers a hyper-realistic display experience complete with adjustable shadow masks, phosphor glow, scanlines, barrel distortion, and signal interference. It’s not just a filter; it’s a virtual monitor for your digital world.
Requisites
To ensure optimal performance and compatibility, your project must meet the following requirements:
- Unity: 6000.0.58f1 or higher.
- Universal RP: 17.0.3 or higher.
Installation Guide
Step 1: Add Renderer Feature
The effect must be registered in your project’s URP configuration:
- Locate your Universal Renderer Data asset.
- Click Add Renderer Feature and select Fronkon Games > Retro > CRT TV.
Step 2: Configure the Volume
To apply the effect to your scene:
- Create a Volume component (Global or Local).
- In the Volume component, create or assign a Volume Profile.
- Click Add Override and select Fronkon Games > Retro > CRT TV.
- Enable the ‘Intensity’ parameter (and any others you wish to modify).
Physical Display Simulation
Shadow Mask Technology
The shadow mask was a critical component of color CRT displays, responsible for ensuring each electron beam struck only its designated phosphor color. CRT TV implements multiple shadow mask types:
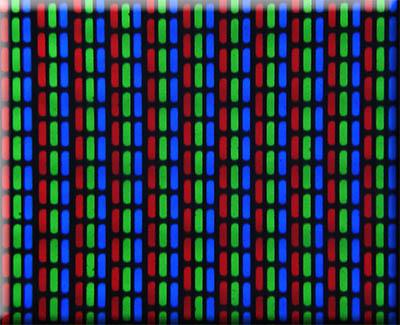
Aperture Grille (Sony Trinitron-style) creates vertical phosphor stripes with fine wire grilles separating red, green, and blue channels. This produces a brighter image with sharper horizontal resolution, characteristic of professional video monitors.
In-Line Shadow Mask represents the traditional delta-gun CRT design with triangular phosphor dot arrangements and a perforated metal mask. This creates the distinctive “slot mask” appearance common in consumer televisions of the 1980s-1990s.
Dot Triad simulates early color CRTs with round phosphor dots arranged in triangular patterns. This vintage configuration produces softer images with characteristic moiré patterns at certain resolutions.
The shadow mask implementation includes customizable strength (visibility), scale (aperture size), and brightness compensation to maintain image luminosity despite the light-blocking mask structure.
Electron Beam Dynamics
The simulation models physical electron beam behavior that defined CRT image quality:
Barrel Distortion reproduces the spherical curvature of CRT glass tubes. The fisheye strength controls the degree of curvature, while the distortion parameter adds secondary aberrations. Modern flat-screen CRTs (late 1990s) had minimal distortion, while early televisions exhibited pronounced curvature.
Scanline Structure simulates the visible horizontal gaps between electron beam sweeps. The implementation includes adjustable scanline count, intensity, and softness to match different display resolutions and beam focus characteristics.
Vertical Interlacing optionally simulates the alternating field display of interlaced video signals. This creates the characteristic flicker and line-crawl of NTSC/PAL broadcasts at 60Hz/50Hz field rates.
Beam Persistence (Phosphor Glow) models the afterglow of phosphor coatings when struck by electrons. Longer persistence creates motion blur beneficial for fast-moving content, while short persistence provides crisp static images.
Signal Path Degradation
Analog broadcast signals suffered multiple forms of interference that CRT TV faithfully reproduces:
Ghosting simulates multi-path signal reception where reflected signals arrive slightly delayed, creating duplicate offset images.
Signal Noise generates static interference from weak broadcast reception or electromagnetic interference, with configurable intensity and movement.
Vertical Hold instability causes the image to scroll vertically when sync signals are corrupted, controlled by the shake strength and speed parameters.
Color Bleeding models chroma signal distortion causing color fringing at sharp luminance transitions, typical of composite video connections.
Parameter Configuration
With ‘Intensity’ you can control the overall strength of the effect [0.0 - 1.0]. If it is 0, the effect will not be active.
Shadow Mask Parameters
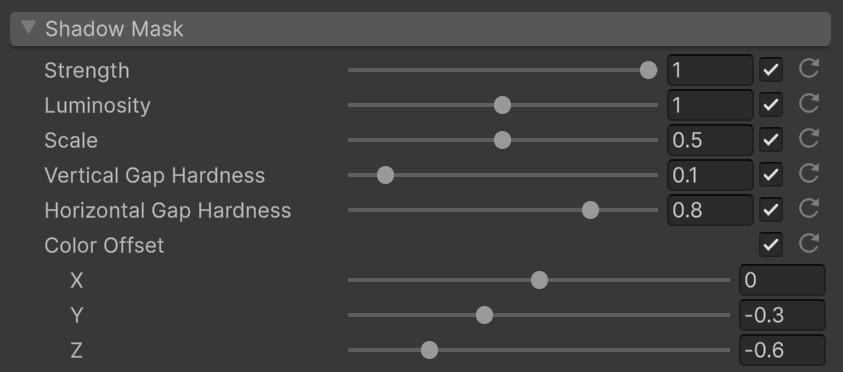
Core parameters defining the physical CRT display shadow mask characteristics.
| Shadowmask Strength | Visibility of RGB phosphor grid |
| Shadowmask Luminosity | Brightness of the shadow mask |
| Shadowmask Scale | Size of shadow mask apertures |
| Vertical Gap Hardness | Vertical gap hardness factor |
| Horizontal Gap Hardness | Horizontal gap hardness factor |
| Color Offset | RGB color offset for phosphor dots |
Fisheye & Distortion Parameters
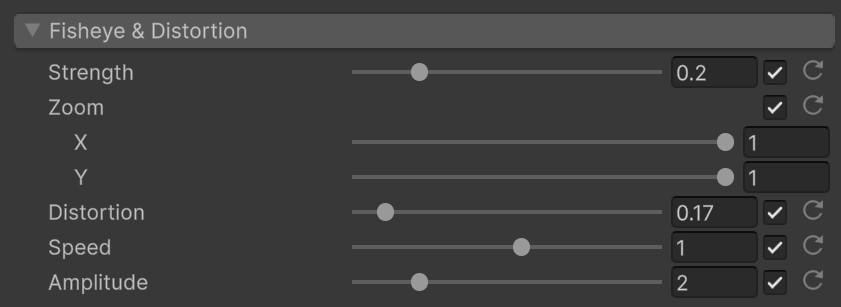
| Fisheye Strength | Fisheye distortion amount |
| Fisheye Zoom | Fisheye zoom factor |
| Distortion | Secondary distortion amount |
| Distortion Speed | Animation speed for distortion |
| Distortion Amplitude | Distortion wave amplitude |
Vignette Parameters
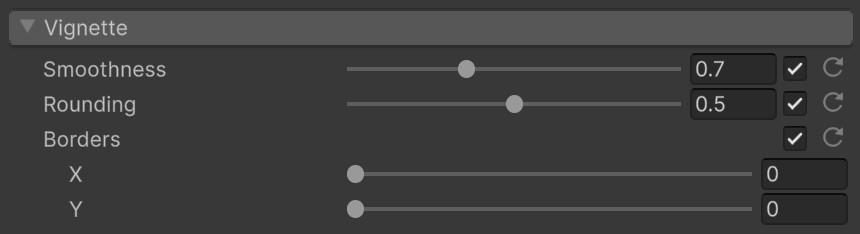
| Vignette Smoothness | Edge darkening falloff rate |
| Vignette Rounding | Rounding of vignette shape |
| Vignette Borders | Horizontal/vertical border size |
Screen Shine Parameters

| Shine Strength | Glass reflection/glare intensity |
| Shine Color | Reflection color tint |
| Shine Position | Reflection center position |
RGB Offset & Color Bleeding Parameters
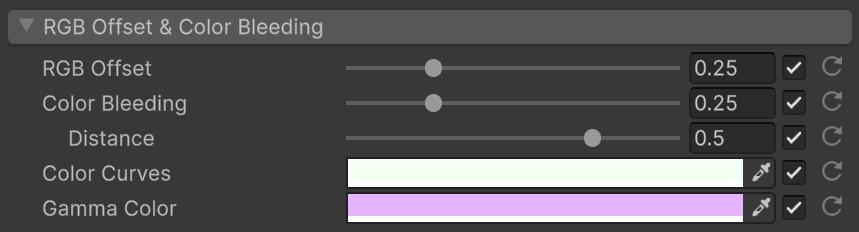
| RGB Offset Strength | Color channel misalignment |
| Color Bleeding Strength | Chroma smear amount |
| Color Bleeding Distance | Distance of color bleeding |
| Color Curves | Color curve adjustment |
| Gamma Color | Gamma color adjustment |
Scan Lines Parameters

| Scanlines | Horizontal line visibility |
| Scanlines Count | Number of scanlines |
| Scanlines Velocity | Animation speed (can be negative) |
Glitch Parameters - Interference

| Interference Strength | Static/snow interference intensity |
| Peak Strength | Peak interference strength |
| Peak Position | Peak position in the image |
Glitch Parameters - Shake & Movement
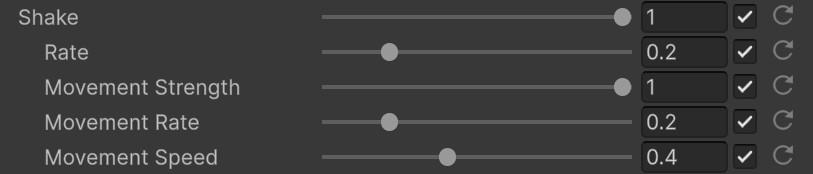
| Shake Strength | Vertical instability amplitude |
| Shake Rate | Shake animation rate |
| Movement Strength | Horizontal displacement strength |
| Movement Rate | Movement animation rate |
| Movement Speed | Movement speed factor |
Glitch Parameters - Noise & Artifacts
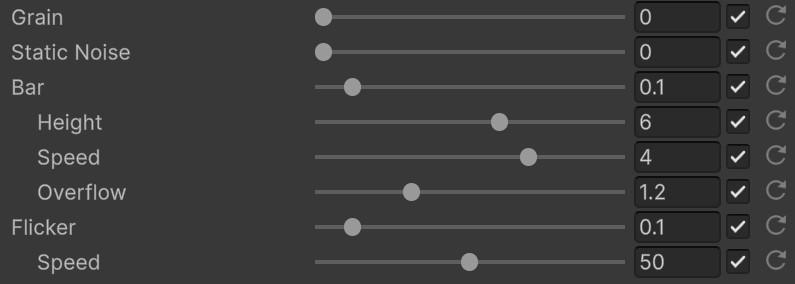
| Grain | Film grain intensity |
| Static Noise | Static noise texture amount |
| Bar Strength | Vertical bar distortion strength |
| Bar Height | Bar height relative to screen |
| Bar Speed | Bar animation speed |
| Bar Overflow | Bar overflow amount |
| Flicker Strength | Brightness pulsation intensity |
| Flicker Speed | Flicker animation rate |
Color Grading
Standard color correction parameters apply to the final output.
| Brightness | Additive luminance offset |
| Contrast | Mid-tone contrast expansion |
| Gamma | Nonlinear tonal mapping (inverted) |
| Hue | Color wheel rotation |
| Saturation | Color intensity relative to luminance |
Runtime Control
using UnityEngine;
using UnityEngine.Rendering;
using FronkonGames.Retro.CRTTV;

// ...

[SerializeField]
private VolumeProfile volumeProfile;

// Access the effect
if (volumeProfile.TryGet(out CRTTVVolume volume))
{
    volume.intensity.value = 1.0f;
    volume.shadowmaskStrength.value = 0.8f;
    volume.shadowmaskScale.value = 1.0f;
    volume.screenCurvature.value = 0.3f;
    volume.barrelDistortion.value = 0.2f;
    volume.scanlines.value = 0.9f;
    volume.interference.value = 0.15f;
    volume.shakeStrength.value = 0.05f;
    volume.rgbOffset.value = 0.3f;
    volume.colorBleeding.value = 0.4f;
    volume.screenShine.value = 0.1f;
}
Performance Characteristics
The effect executes in a single render pass with procedurally generated patterns. Performance cost varies with screen resolution due to scanline generation.
- Pass Count: 1 blit pass.
- Texture Samples: 1 per pixel + procedural generation for mask/scanlines.
- Complexity: O(1) per pixel, with additional cost for curvature and distortion calculations.
Usage Patterns and Presets
1980s Consumer Television
For authentic home TV experience:
- Shadowmask Strength: 0.8-1.0
- Shadowmask Scale: 1.0-1.2
- Screen Curvature: 0.3-0.5
- Scanlines: 0.7-0.9
- Scanline Count: 480-576
- Vignette: 0.3-0.5
- Interference: 0.05-0.15
- Border: true
- Border Color: Vintage beige/grey plastic
Professional Video Monitor
For broadcast/BVM aesthetic:
- Shadowmask Strength: 0.6-0.8
- Shadowmask Scale: 0.8-1.0
- Screen Curvature: 0.1-0.2 (flat Trinitron)
- Scanlines: 0.5-0.7
- Scanline Count: 480-525
- Vignette: 0.2-0.3
- Interference: 0.0-0.05
- Color Bleeding: 0.0-0.1
- Border: false or minimal
- Contrast: 1.1-1.3
Damaged/Abandoned Display
For horror or dystopian aesthetics:
- Shadowmask Strength: 0.9-1.0
- Screen Curvature: 0.4-0.6
- Scanlines: 0.8-1.0
- Interference: 0.3-0.6
- Shake Strength: 0.2-0.5
- Shake Speed: 5.0-20.0
- Flicker: 0.3-0.7
- Flicker Speed: 3.0-10.0
- Ghosting: 0.2-0.4
- RGB Offset: 0.2-0.5
🎧 Lo-Fi
Embrace the beauty of limitation. ‘Lo-Fi’ is a comprehensive toolkit for crafting aesthetic degradation, offering deep control over color palettes, bit-crushing, and dithering. Perfect for creating moody, atmospheric visuals that evoke the spirit of early digital art and experimental indie games.
Requisites
To ensure optimal performance and compatibility, your project must meet the following requirements:
- Unity: 6000.0.58f1 or higher.
- Universal RP: 17.0.3 or higher.
Installation Guide
Step 1: Add Renderer Feature
The effect must be registered in your project’s URP configuration:
- Locate your Universal Renderer Data asset.
- Click Add Renderer Feature and select Fronkon Games > Retro > Lo-Fi.
Step 2: Configure the Volume
To apply the effect to your scene:
- Create a Volume component (Global or Local).
- In the Volume component, create or assign a Volume Profile.
- Click Add Override and select Fronkon Games > Retro > Lo-Fi.
- Enable the ‘Intensity’ parameter (and any others you wish to modify).
Color Palette Architecture
Palette-Based Color Remapping
The centerpiece of Lo-Fi is its sophisticated color palette system that transforms modern 24-bit color into limited, stylized palettes. The system supports multiple palette sources:
Built-in Palettes (+3000) include historically accurate color sets from classic hardware: Game Boy (4 shades), CGA (16 colors), EGA (64 colors), and various artistic palettes. Each palette is stored as a lookup texture for efficient GPU sampling.
Custom Palettes allow you to define your own color sets using Unity gradient assets. The system converts gradients into optimized lookup textures at load time.
Sampling Methods determine how input colors map to palette entries:
- Distance measures Euclidean distance in RGB space for closest color matching.
- Luminance converts colors to grayscale then finds the closest palette match by brightness.
- CIELab uses perceptually uniform color space for more accurate visual matching.
Blend Modes control how palette colors mix with the original image:
- Blend smoothly interpolates between original and palette-matched colors.
- Solid uses pure palette colors only.
- Multiply darkens using palette colors as a modulating factor.
Quantization and Bit-Crushing
Quantization reduces color depth to simulate limited hardware color capabilities:
RGB Quantization independently reduces red, green, and blue channel precision. Setting all to 8 recreates 8-bit color (256 colors), while 2 creates harsh posterized effects.
Luminance Quantization reduces grayscale levels independently of hue, preserving color relationships while limiting tonal range.
HSV Quantization operates in hue-saturation-value space, allowing selective reduction of hue variation while maintaining brightness or saturation.
Pixel Processing System
Block Pixelation
The pixelation system divides the screen into rectangular blocks and samples a single color per block. Key parameters:
Pixel Size controls block dimensions in screen pixels. Larger values create more abstract, chunky aesthetics.
Pixel Rounding applies corner rounding to blocks, creating soft organic shapes rather than hard squares.
Pixel Blend determines how the pixelated result combines with the original image, allowing partial pixelation effects.
Pixel Sobel applies edge detection highlighting to block boundaries, creating embossed 3D-like effects on pixel edges.
Pixel Bevel simulates directional lighting on pixel blocks, creating depth and dimension.
CRT Display Features
Lo-Fi includes optional CRT simulation features:
Scanlines create horizontal dark bands between pixel rows. The intensity, count, and speed parameters control visibility and animation.
Chromatic Aberration simulates lens distortion by offsetting RGB channels, creating vintage optical effects.
Vignette darkens screen corners to simulate CRT light falloff and focus limitations.
Screen Shine adds a reflective overlay simulating glass screen glare.
Parameter Configuration
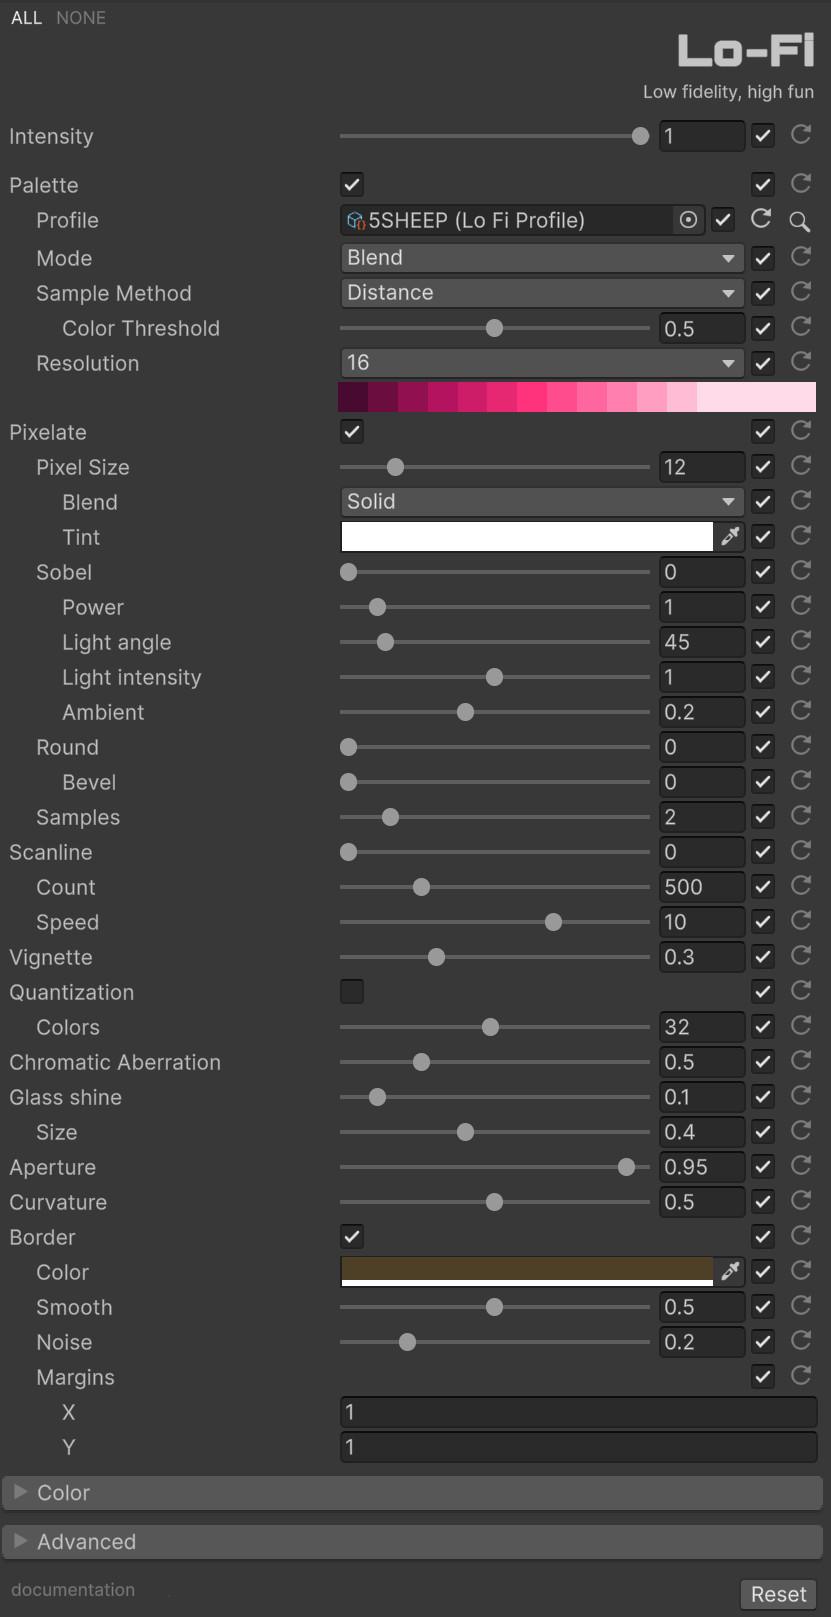
With ‘Intensity’ you can control the overall strength of the effect [0.0 - 1.0]. If it is 0, the effect will not be active.
Palette Parameters
| Palette | Enable palette color remapping |
| Profile | Palette asset to use |
| Mode | Palette color blending method |
| Sample Method | Color matching algorithm |
| Resolution | Palette texture resolution |
| Luminance Pow | Contrast between brightness areas (Luminance mode) |
| Range | Min/Max luminance for remapping (Luminance mode) |
| Invert | Reverse palette order (Luminance mode) |
| Color Threshold | Maximum allowed color deviation (other modes) |
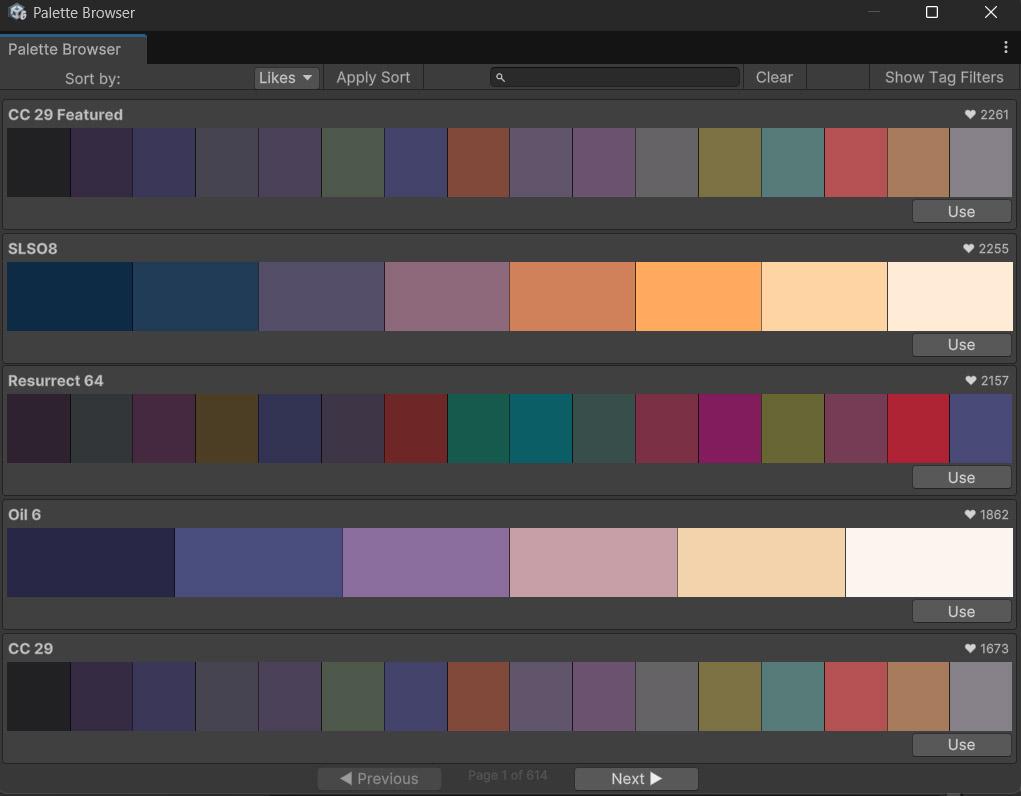
Click on the magnifying glass icon to access the palette search tool and find the colors you are looking for.
Pixelation Parameters
| Pixelate | Enable block pixelation |
| Pixel Size | Size of pixel blocks |
| Pixel Blend | Blending with original |
| Pixel Tint | Color overlay on pixels |
| Pixel Sobel | Edge detection on pixels |
| Pixel Sobel Power | Sobel edge intensity |
| Pixel Sobel Angle | Light direction for Sobel |
| Pixel Sobel Light | Light brightness |
| Pixel Sobel Ambient | Base lighting level |
| Pixel Round | Corner rounding amount |
| Pixel Bevel | 3D bevel effect intensity |
| Pixel Samples | Anti-aliasing sample count |
Scanline Parameters
| Scanline | Horizontal line visibility |
| Scanline Count | Number of scanlines |
| Scanline Speed | Animation speed |
Display Parameters
| Vignette | Corner darkening |
| Quantization | Enable color depth reduction |
| Colors | Maximum number of quantized colors |
| Chromatic Aberration | RGB channel separation |
| Shine | Glass reflection |
| Shine Size | Reflection spread |
| Aperture | Screen edge mask |
| Curvature | Screen curvature |
| Border | Show monitor bezel |
| Border Color | Bezel color |
| Border Smooth | Edge softness |
| Border Noise | Bezel texture |
| Border Margins | Bezel width/height |
Color Grading
Standard color correction parameters apply to the final output.
| Brightness | Additive luminance offset |
| Contrast | Mid-tone contrast expansion |
| Gamma | Nonlinear tonal mapping (inverted) |
| Hue | Color wheel rotation |
| Saturation | Color intensity relative to luminance |
Runtime Control
using UnityEngine;
using UnityEngine.Rendering;
using FronkonGames.Retro.LoFi;

// ...

[SerializeField]
private VolumeProfile volumeProfile;

// Access the effect
if (volumeProfile.TryGet(out LoFiVolume volume))
{
    volume.intensity.value = 1.0f;
    volume.palette.value = true;
    volume.mode.value = LoFi.BlendModes.Solid;
    volume.sampleMethod.value = LoFi.SampleMethod.Luminance;
    resolution.value = LoFi.PaletteResolutions._16;
    volume.pixelate.value = true;
    volume.pixelSize.value = 8;
    volume.pixelSobel.value = 0.5f;
    volume.pixelBevel.value = 0.3f;
    volume.scanline.value = 0.5f;
    volume.vignette.value = 0.4f;
    volume.chromaticAberration.value = 0.3f;
}
Performance Characteristics
The effect executes in a single render pass. Palette generation is cached when parameters don’t change. Performance cost scales with pixelation block count.
- Pass Count: 1 blit pass.
- Texture Samples: 1 per pixel + palette lookup.
- Complexity: O(1) per pixel, with additional cost for Sobel edge detection.
Usage Patterns and Presets
Game Boy Aesthetic
For authentic 4-shade portable gaming:
- Palette: Game Boy 4-color
- Palette Mode: Solid
- Pixelate: true
- Pixel Size: 4-6
- Pixel Samples: 1 (sharp pixels)
- Scanlines: 0.0 (LCD didn’t have scanlines)
- Contrast: 1.1-1.2
- Saturation: 0.0 (grayscale)
Vaporwave Aesthetic
For 90s digital art vibes:
- Palette: Custom gradient with pinks, cyans, purples
- Mode: Blend
- Pixelate: true
- Pixel Size: 3-5
- Pixel Rounding: 0.2-0.4
- Scanlines: 0.3-0.5
- Chromatic Aberration: 0.4-0.7
- Vignette: 0.4-0.6
Indie Game Crunch
For stylized low-fi game aesthetic:
- Quantization: true
- Colors: 16-32
- Palette: false (use quantization only)
- Pixelate: true
- Pixel Size: 6-10
- Pixel Sobel: 0.3-0.5
- Scanlines: 0.2-0.4
- Vignette: 0.2-0.4
📡 NTSC
Capture the imperfect charm of broadcast television. ‘NTSC’ faithfully emulates the composite signal artifacts of the analog era, including ‘rainbow’ moiré, dot crawl, and signal bleeding. Essential for vaporwave aesthetics and authentic 80s/90s broadcast simulations.
Requisites
To ensure optimal performance and compatibility, your project must meet the following requirements:
- Unity: 6000.0.58f1 or higher.
- Universal RP: 17.0.3 or higher.
Installation Guide
Step 1: Add Renderer Feature
The effect must be registered in your project’s URP configuration:
- Locate your Universal Renderer Data asset.
- Click Add Renderer Feature and select Fronkon Games > Retro > NTSC.
Step 2: Configure the Volume
To apply the effect to your scene:
- Create a Volume component (Global or Local).
- In the Volume component, create or assign a Volume Profile.
- Click Add Override and select Fronkon Games > Retro > NTSC.
- Enable the ‘Intensity’ parameter (and any others you wish to modify).
Composite Signal Simulation
The NTSC Encoding Process
The NTSC (National Television System Committee) standard encodes color information within a luminance signal for backward compatibility with black-and-white televisions. The NTSC effect simulates this complex analog encoding/decoding pipeline that introduced characteristic artifacts:
YIQ Color Space is the foundation of NTSC encoding. The input RGB image is converted to Y (luminance/brightness), I (in-phase chrominance), and Q (quadrature chrominance) components. This separation allows independent bandwidth limitation of color information.
Bandwidth Limitation is the source of many NTSC artifacts. The human eye is more sensitive to luminance detail than color detail, so NTSC allocates approximately 4.2MHz bandwidth to luminance (Y) but only 1.5MHz to I and 0.5MHz to Q. The effect simulates these limitations through low-pass filtering with configurable wavelengths.
Quadrature Amplitude Modulation (QAM) encodes I and Q chrominance signals onto a 3.58MHz color subcarrier. The AM carrier signal wavelength parameters control how color information is modulated onto the luminance signal.
Colorburst Signal provides phase reference for decoding. The colorburst wavelength parameters define the subcarrier reference signal that receivers use to correctly demodulate color information.
Artifact Generation
The NTSC encoding process inevitably creates visual artifacts:
Rainbow Artifacts (Cross-Color) occur when high-frequency luminance detail is mistaken for chrominance information during decoding. This creates colored “rainbows” along sharp edges like text or striped patterns. Controlled by the NTSC Scale and colorburst wavelength parameters.
Dot Crawl appears as moving checkerboard patterns along vertical color transitions, caused by incomplete separation of luminance and chrominance during decoding. Adjusted through the Y/I/Q lowpass wavelengths.
Color Bleeding results from limited chrominance bandwidth, causing color to smear horizontally at sharp transitions. Higher I and Q lowpass wavelengths reduce bleeding but may introduce other artifacts.
Phase Alternation (PAL-specific, but simulated here) reverses the phase of the color subcarrier on alternate lines to cancel phase errors. Setting this to PI (3.14159) enables PAL-style color error correction.
Signal Noise and Degradation
Analog broadcast signals were susceptible to various noise sources:
Static/Noise simulates random RF interference creating the characteristic “snow” on weak broadcast signals. The noise strength and window bias parameters control visibility and distribution.
Window Bias offsets the sinc filter window shape, creating asymmetric artifacts where smearing occurs more to one side than the other, simulating receiver misalignment.
Decoding Errors result from imperfect signal separation. The decode lowpass wavelength controls final filtering that affects how cleanly luminance and chrominance are separated.
Parameter Configuration
With ‘Intensity’ you can control the overall strength of the effect [0.0 - 1.0]. If it is 0, the effect will not be active.
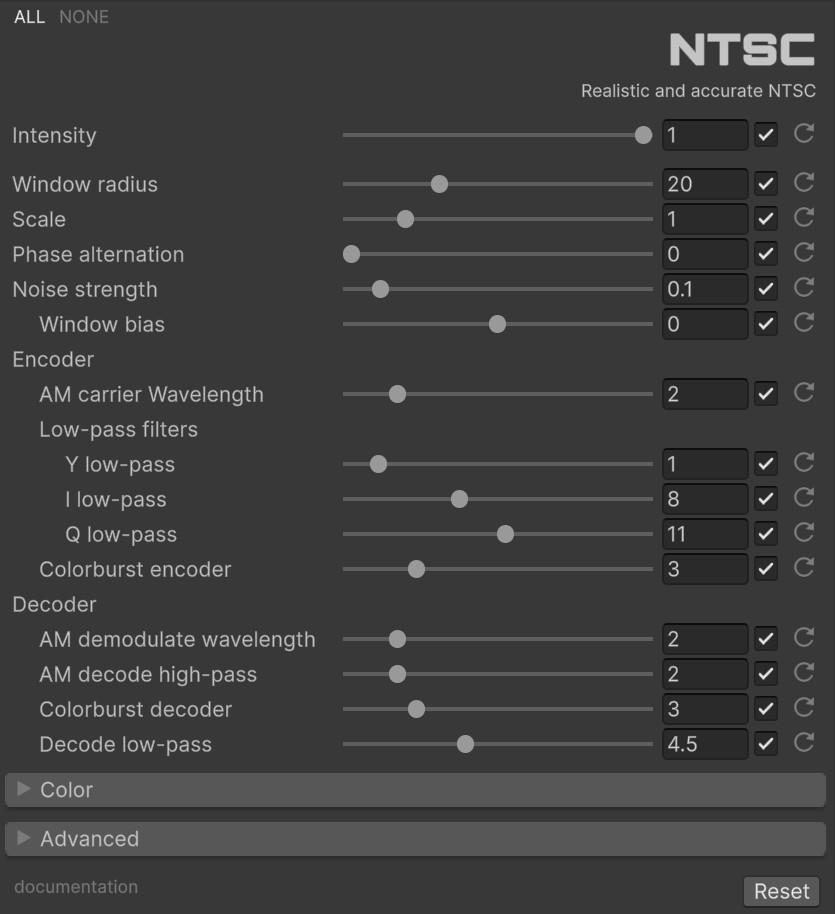
Signal Parameters
Core NTSC signal configuration parameters.
| Window radius | Sinc filter sample window size |
| Scale | Overall artifact scaling factor |
| Phase alternation | PAL-style phase reversal (0 = off, PI = on) |
Noise Parameters
Controls noise and signal degradation simulation.
| Noise strength | Static/snow intensity |
| Window bias | Filter window offset (creates asymmetric artifacts) |
Encoder
Controls how the signal is encoded for broadcast transmission.
| AM carrier Wavelength | Color subcarrier modulation wavelength |
| Y low-pass | Luminance bandwidth limit |
| I low-pass | I chrominance bandwidth (higher = more color smear) |
| Q low-pass | Q chrominance bandwidth (higher = more color smear) |
| Colorburst encoder | Encoder color reference signal |
Decoder
Controls how the signal is received and decoded.
| AM demodulate wavelength | Color demodulation wavelength |
| AM decode high-pass | High-pass filtering in decoder |
| Colorburst decoder | Decoder color reference signal |
| Decode low-pass | Final signal filtering |
Color Grading
Standard color correction parameters apply to the final output.
| Brightness | Additive luminance offset |
| Contrast | Mid-tone contrast expansion |
| Gamma | Nonlinear tonal mapping (inverted) |
| Hue | Color wheel rotation |
| Saturation | Color intensity relative to luminance |
Runtime Control
using UnityEngine;
using UnityEngine.Rendering;
using FronkonGames.Retro.NTSC;

// ...

[SerializeField]
private VolumeProfile volumeProfile;

// Access the effect
if (volumeProfile.TryGet(out NTSCVolume volume))
{
    volume.intensity.value = 1.0f;
    volume.ntscNoiseStrength.value = 0.2f;
    volume.yLowPassWavelength.value = 1.5f;
    volume.iLowPassWavelength.value = 6.0f;
    volume.qLowPassWavelength.value = 9.0f;
    volume.ntscScale.value = 1.2f;
    volume.ntscPhaseAlternation.value = Mathf.PI; // Enable PAL-style
    volume.decodeLowPassWavelength.value = 3.5f;
}
Performance Characteristics
The effect uses a multi-pass implementation (Encode -> Decode) with sinc-based convolution filters. Performance scales with the window radius parameter.
- Pass Count: Multi-pass effect (Encode -> Decode).
- Texture Samples: Multiple samples per pixel for convolution filters.
- Complexity: Scales with Window Radius and screen resolution.
Usage Patterns and Presets
Authentic 1980s Broadcast
For genuine VHS/broadcast aesthetic:
- NTSC Scale: 1.0-1.5
- Window Radius: 20-30
- Y LowPass: 1.0-2.0
- I LowPass: 8.0-12.0
- Q LowPass: 10.0-15.0
- Noise Strength: 0.1-0.2
- Colorbleed: 0.3-0.5 (simulate composite connection)
- Saturation: 1.1-1.3 (NTSC had vibrant colors)
Weak Signal / Static
For broken broadcast reception:
- NTSC Scale: 0.8-1.2
- Noise Strength: 0.4-0.8
- Window Bias: -0.3 to 0.3
- Y LowPass: 2.0-4.0 (more blur)
- I/Q LowPass: 15.0-20.0 (heavy color smear)
- Contrast: 0.8-1.0
- Decode LowPass: 2.0-3.0
Vaporwave Aesthetic
For stylized retro digital art:
- NTSC Scale: 1.5-2.5 (exaggerated artifacts)
- Y LowPass: 0.5-1.0 (sharper luminance)
- I/Q LowPass: 5.0-8.0 (controlled bleeding)
- Phase Alternation: 3.14159
- Noise Strength: 0.05-0.15
- Hue: 0.9-0.95 (slight magenta shift common to vaporwave)
- Saturation: 1.2-1.5
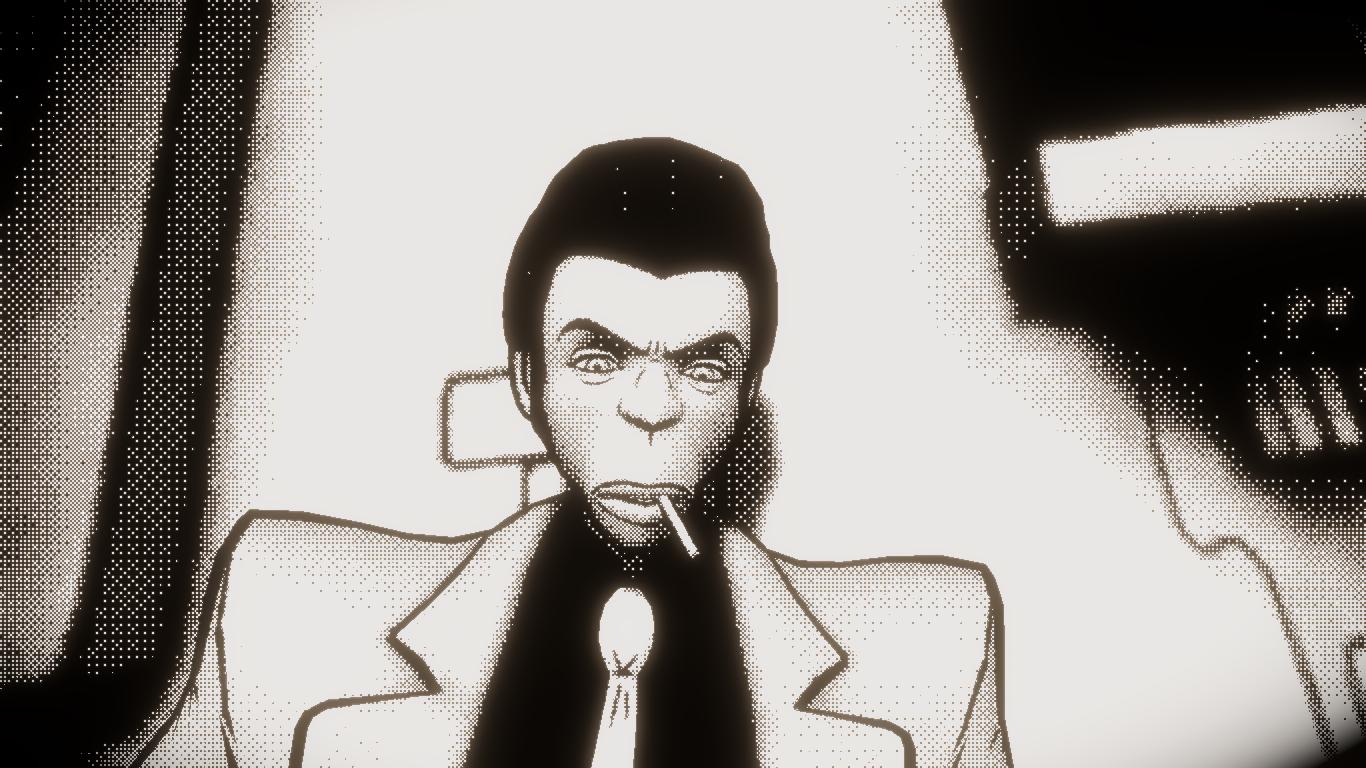
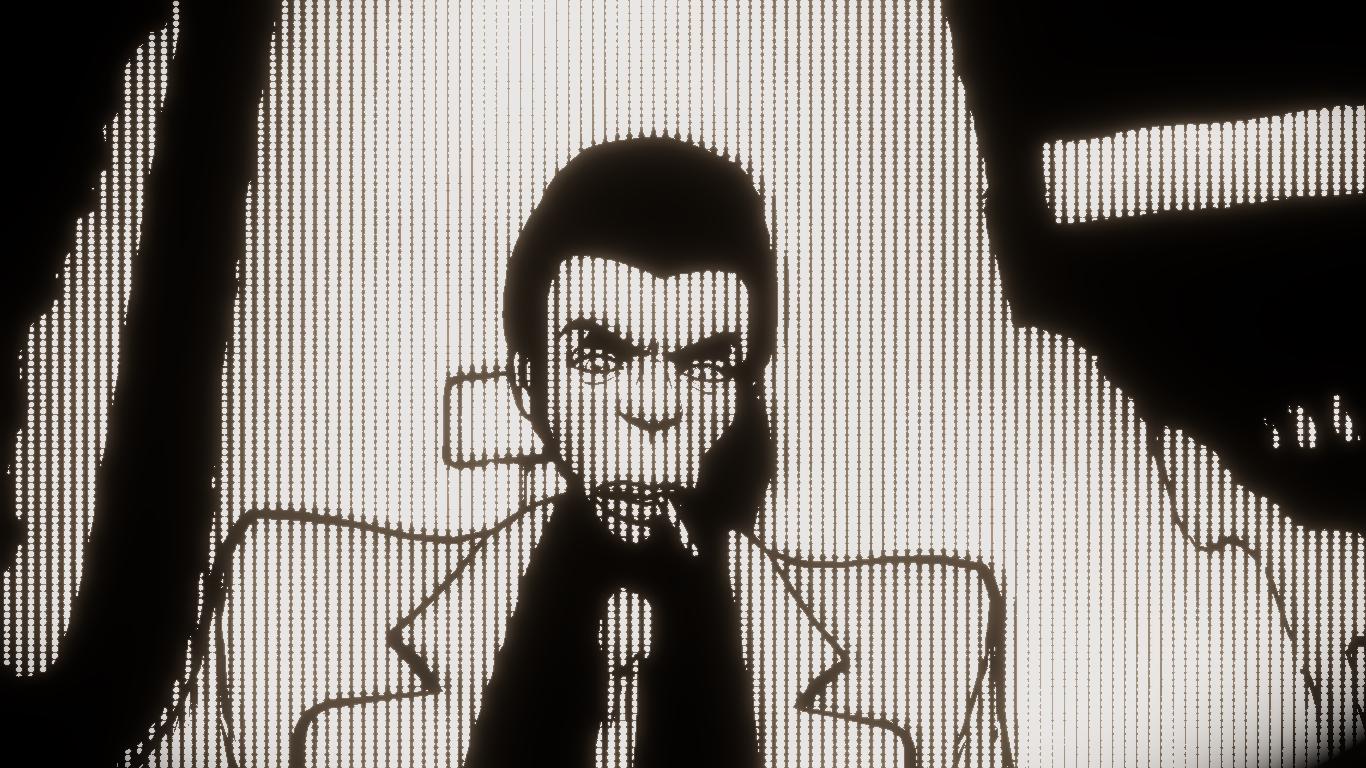
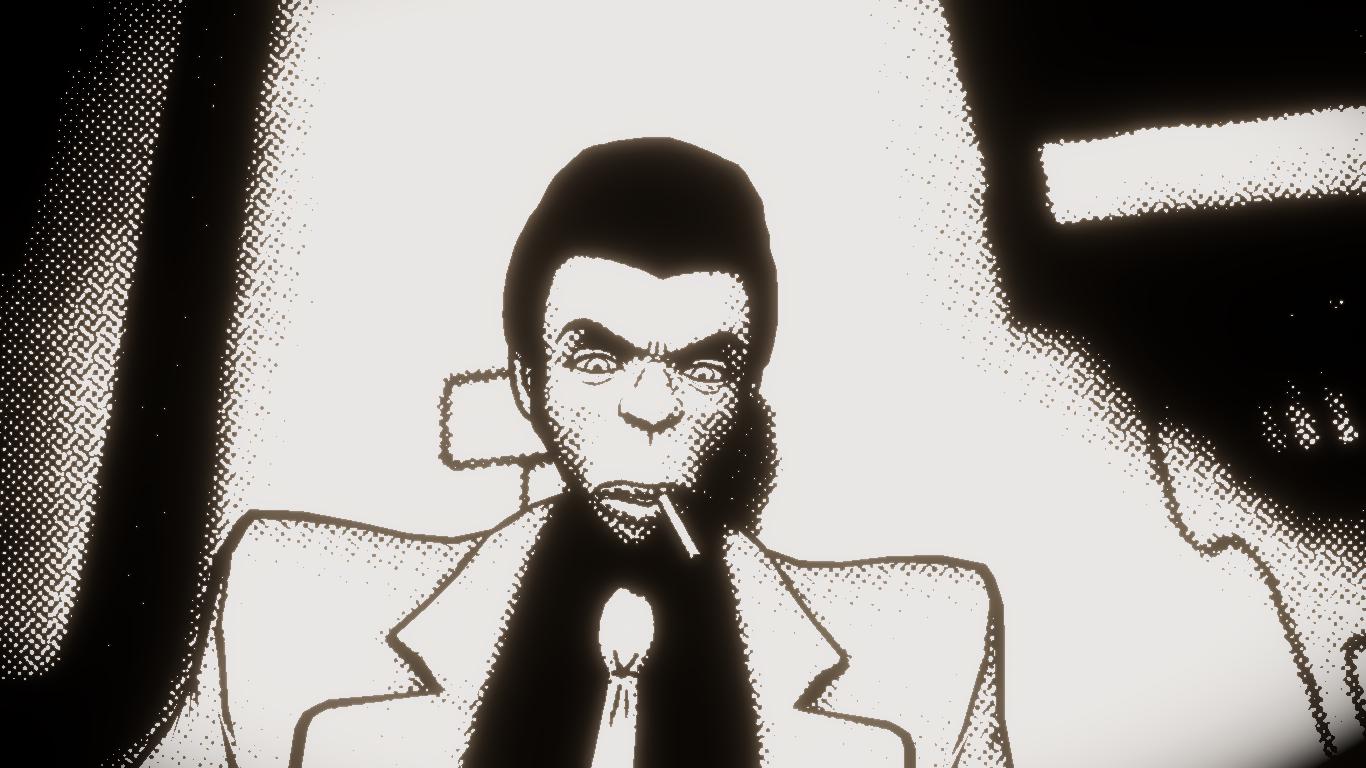
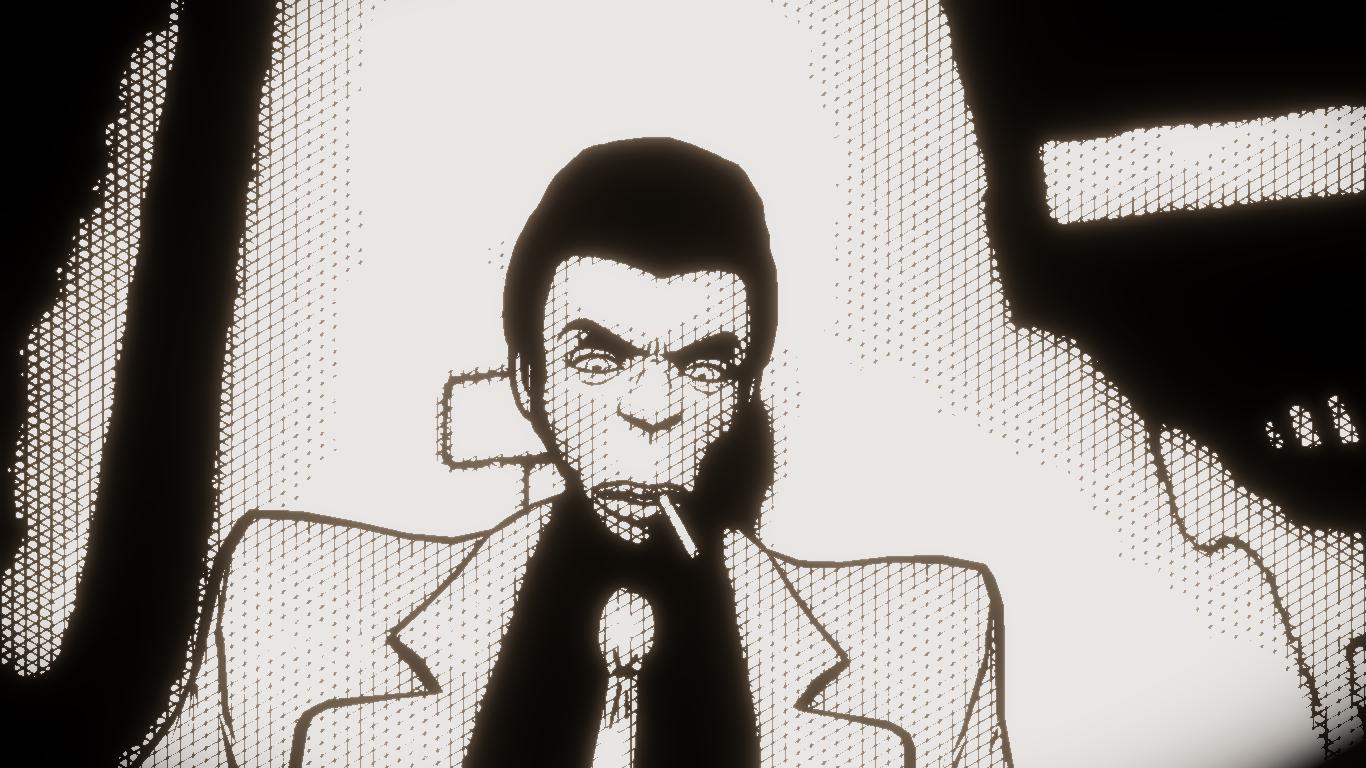
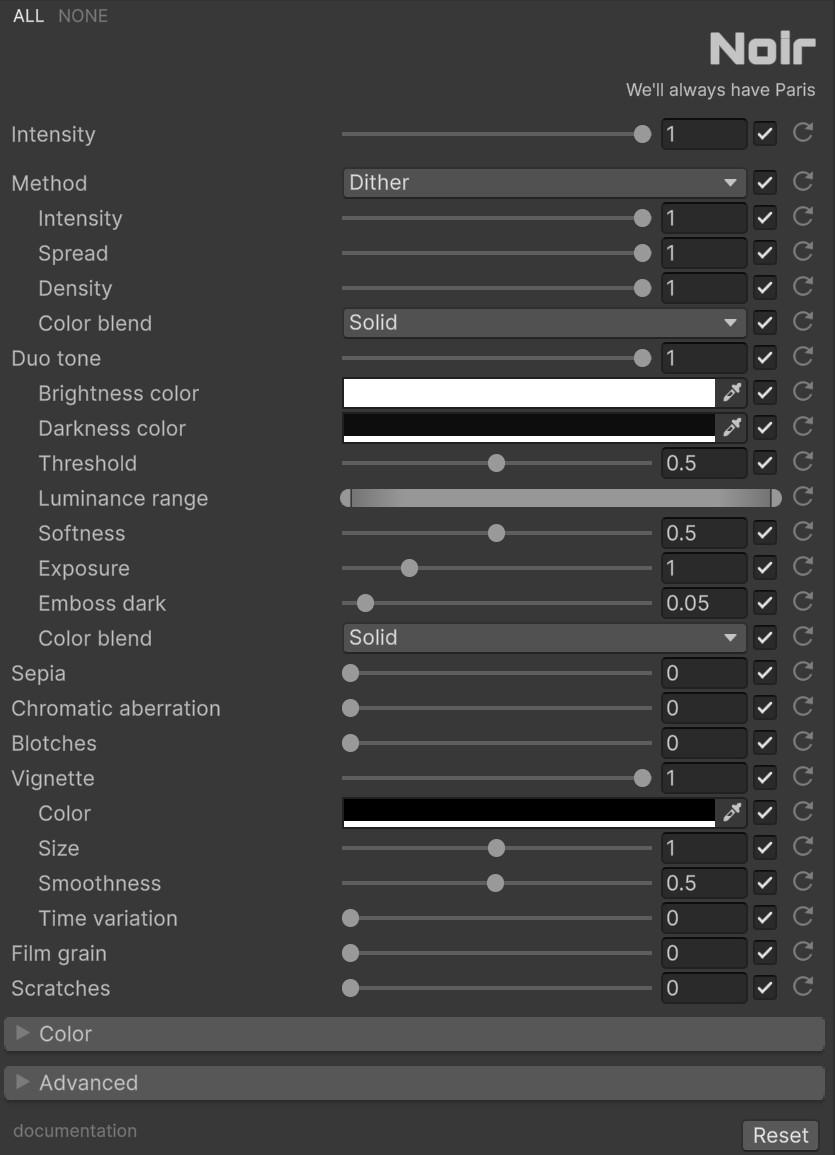
🕵️ Noir
Paint your world in shadow and light. ‘Noir’ provides a sophisticated suite of monochrome rendering techniques, from high-contrast ink styles to subtle halftones and dithering. Create dramatic, mysterious atmospheres worthy of a classic detective thriller.
Requisites
To ensure optimal performance and compatibility, your project must meet the following requirements:
- Unity: 6000.0.58f1 or higher.
- Universal RP: 17.0.3 or higher.
Installation Guide
Step 1: Add Renderer Feature
The effect must be registered in your project’s URP configuration:
- Locate your Universal Renderer Data asset.
- Click Add Renderer Feature and select Fronkon Games > Retro > Noir.
Step 2: Configure the Volume
To apply the effect to your scene:
- Create a Volume component (Global or Local).
- In the Volume component, create or assign a Volume Profile.
- Click Add Override and select Fronkon Games > Retro > Noir.
- Enable the ‘Intensity’ parameter (and any others you wish to modify).
Monochrome Rendering Systems
Pattern-Based Dithering Methods
Noir implements multiple artistic dithering algorithms for converting continuous-tone images to limited-color representations:
Bayer Dithering uses ordered threshold matrices to create regular dot patterns that simulate intermediate tones. The 4x4 Bayer matrix produces characteristic cross-hatch patterns. Parameters control dither spread (range of values that produce dots) and density (overall pattern intensity).
Dot Screen simulates traditional printing halftones by converting luminance values into dots of varying size. This creates the distinctive newspaper/magazine aesthetic. The luminance gain parameter boosts brightness to ensure dots remain visible in shadow areas.
Halftone creates angled line patterns that vary in density based on luminance. The classic comic book aesthetic uses 45-degree angles for maximum visual separation from image content. Size controls dot diameter, threshold sets the luminance point where halftoning begins.
Lines Method produces linear striations reminiscent of woodcut prints or engraving. Granularity controls line thickness variation, while threshold determines where lines begin appearing.
Duo-Tone Color Mapping
The duo-tone system maps luminance to two customizable colors, creating striking limited-palette aesthetics:
Luminance Threshold defines the midpoint between light and dark color mapping. Values below this use the darkness color, above use the brightness color.
Softness controls the transition sharpness between colors. High softness creates smooth gradients; low softness produces hard posterized edges.
Luminance Range (Min/Max) constrains which luminance values participate in the effect, allowing highlights or shadows to remain unprocessed.
Exposure adjusts overall brightness before tone mapping, effectively shifting which parts of the image map to each color.
Emboss Dark adds subtle 3D relief to the darker color region, enhancing the artistic quality.
Vintage Film Characteristics
Noir includes film artifact simulation for authentic period aesthetics:
Film Grain uses temporal blue noise for organic grain that evolves frame-to-frame without aliasing. Speed controls grain animation rate.
Scratches create linear damage patterns using procedural noise with temporal coherence. Suitable for simulating aged film stock.
Vignette with time variation adds animated corner darkening that simulates uneven lighting or lens breathing.
Blotches creates randomized dirt/dust patterns using noise-driven distribution.
Chromatic Aberration adds lens-style color fringing that enhances the vintage optical feel.
Parameter Configuration
With ‘Intensity’ you can control the overall strength of the effect [0.0 - 1.0]. If it is 0, the effect will not be active.
Monochrome Method Parameters
Select and configure the artistic dithering technique.
| Method | Dithering algorithm type |
| Noir Intensity | Overall effect strength |
| Dither Spread | Threshold range for Bayer dots (Dither method) |
| Dither Density | Overall Bayer pattern intensity (Dither method) |
| Dither Color Blend | How dither mixes with image (Dither method) |
| Dot Screen Grid Size | Dot pattern grid resolution (DotScreen method) |
| Dot Screen Luminance Gain | Brightness boost for dots (DotScreen method) |
| Dot Screen Color Blend | Dot mixing method (DotScreen method) |
| Halftone Size | Halftone dot diameter (Halftone method) |
| Halftone Angle | Pattern rotation angle (Halftone method) |
| Halftone Threshold | Luminance where halftone starts (Halftone method) |
| Halftone Color Blend | Halftone mixing method (Halftone method) |
| Lines Count | Number of line striations (Lines method) |
| Lines Granularity | Line thickness variation (Lines method) |
| Lines Threshold | Luminance for line onset (Lines method) |
| Lines Color Blend | Line mixing method (Lines method) |
Film Artifact Parameters
| Sepia Intensity | Brown vintage tint |
| Chromatic Aberration | RGB channel separation |
| Blotches Intensity | Dust/dirt overlay |
| Blotches Speed | Animation rate |
| Vignette Intensity | Corner darkening |
| Vignette Size | Clear central area size |
| Vignette Color | Vignette tint |
| Vignette Smoothness | Edge falloff rate |
| Vignette Time Variation | Animated vignette |
| Film Grain Intensity | Grain strength |
| Film Grain Speed | Grain animation rate |
| Scratches Intensity | Scratch visibility |
| Scratches Speed | Scratch animation rate |
Duo-Tone Parameters
| Duo Tone Intensity | Duo-tone effect strength |
| Duo Tone Brightness Color | Color for light areas |
| Duo Tone Darkness Color | Color for dark areas |
| Duo Tone Threshold | Light/dark division point |
| Duo Tone Softness | Transition smoothness |
| Luminance Min Range | Minimum luminance to process |
| Luminance Max Range | Maximum luminance to process |
| Duo Tone Exposure | Pre-tone brightness adjustment |
| Duo Tone Emboss Dark | 3D relief on dark color |
| Duo Tone Color Blend | Mixing method |
Color Grading
Standard color correction parameters apply to the final output.
| Brightness | Additive luminance offset |
| Contrast | Mid-tone contrast expansion |
| Gamma | Nonlinear tonal mapping (inverted) |
| Hue | Color wheel rotation |
| Saturation | Color intensity relative to luminance |
Runtime Control
using UnityEngine;
using UnityEngine.Rendering;
using FronkonGames.Retro.Noir;

// ...

[SerializeField]
private VolumeProfile volumeProfile;

// Access the effect
if (volumeProfile.TryGet(out NoirVolume volume))
{
    volume.intensity.value = 1.0f;
    volume.method.value = Noir.NoirMethod.Halftone;
    volume.noirIntensity.value = 1.0f;
    volume.halftoneSize.value = 3.0f;
    volume.halftoneAngle.value = 45.0f;
    volume.duoToneIntensity.value = 0.8f;
    volume.duoToneBrightnessColor.value = Color.white;
    volume.duoToneDarknessColor.value = new Color(0.05f, 0.05f, 0.1f);
    volume.filmGrainIntensity.value = 0.3f;
    volume.vignetteIntensity.value = 0.6f;
    volume.sepiaIntensity.value = 0.2f;
}
Performance Characteristics
The effect executes in a single render pass with procedurally generated patterns.
- Pass Count: 1 blit pass.
- Texture Samples: 1 per pixel + procedural pattern generation.
- Complexity: O(1) per pixel.
Usage Patterns and Presets
Classic Film Noir
For 1940s-50s detective movie aesthetics:
- Method: Halftone
- Halftone Angle: 45.0
- Halftone Size: 2.0-3.0
- Duo Tone Intensity: 0.7-1.0
- Duo Tone Brightness: Light gray/white
- Duo Tone Darkness: Deep blue-black
- Contrast: 1.3-1.6
- Vignette: 0.6-0.9
- Film Grain: 0.3-0.5
- Scratches: 0.1-0.3
Graphic Novel Style
For comic book aesthetics:
- Method: Dither
- Dither Density: 0.8-1.0
- Noir Intensity: 1.0
- Duo Tone Intensity: 0.5-0.8
- Duo Tone Brightness: White
- Duo Tone Darkness: Black or spot color
- Contrast: 1.5-2.0
- Saturation: 0.0
Vintage Photograph
For aged photo appearance:
- Method: Bayer Dither
- Dither Spread: 0.6-0.8
- Sepia Intensity: 0.6-1.0
- Vignette: 0.4-0.6
- Film Grain: 0.4-0.6
- Blotches: 0.2-0.4
- Scratches: 0.1-0.3
- Contrast: 1.0-1.2
- Brightness: -0.1 to 0.1
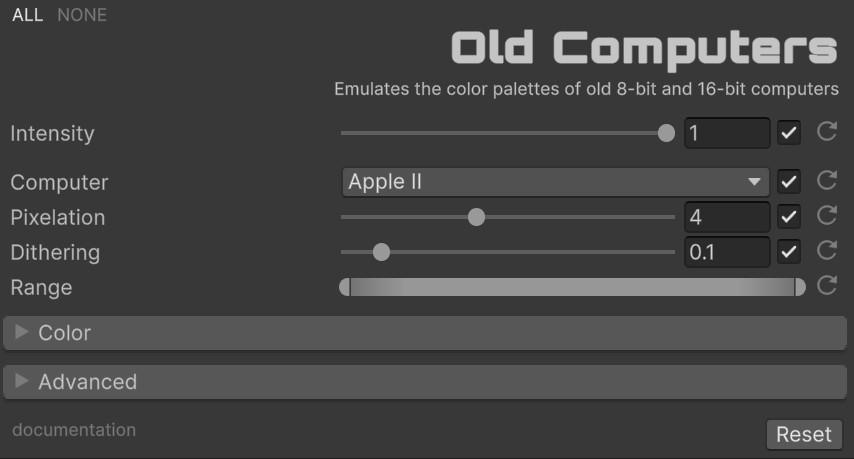
💾 Old Computers
Relive the home computing revolution. ‘Old Computers’ instantly applies the iconic color palettes and resolution constraints of legendary hardware like the C64, Amstrad CPC, and CGA/EGA adapters. It’s a time machine for your rendering pipeline.
Requisites
To ensure optimal performance and compatibility, your project must meet the following requirements:
- Unity: 6000.0.58f1 or higher.
- Universal RP: 17.0.3 or higher.
Installation Guide
Step 1: Add Renderer Feature
The effect must be registered in your project’s URP configuration:
- Locate your Universal Renderer Data asset.
- Click Add Renderer Feature and select Fronkon Games > Retro > Old Computers.
Step 2: Configure the Volume
To apply the effect to your scene:
- Create a Volume component (Global or Local).
- In the Volume component, create or assign a Volume Profile.
- Click Add Override and select Fronkon Games > Retro > Old Computers.
- Enable the ‘Intensity’ parameter (and any others you wish to modify).
Historical Computer Emulation
System-Specific Color Palettes
Old Computers accurately reproduces the color capabilities of classic hardware through faithful palette reproduction:
Commodore 64 implements the VIC-II chip’s 16-color palette derived from the YPbPr color space limitations of 1980s composite video. The palette includes characteristic shades like “C64 Brown” and the distinctive cyan/red vibrant pairings.
CGA (Color Graphics Adapter) recreates IBM’s 1981 4-color palettes with their infamous cyan/magenta/white and red/green/brown alternatives. Composite CGA mode (artifact colors) is available for the “16-color” illusion created on composite monitors.
EGA (Enhanced Graphics Adapter) extends to the 64-color palette (from 16 colors at 4 intensities) that defined DOS gaming’s golden age.
Game Boy implements the 4-shade LCD palette (black, dark gray, light gray, white/transparent) that defined portable gaming in 1989.
Amstrad CPC recreates the Gate Array’s 27-color palette selected from 4096 possible RGB values.
MSX, TRS-80 CoCo, Amiga OCS, Acorn Archimedes each implement their specific hardware color generation quirks and limitations.
Pixelation and Dithering
To complete the retro aesthetic, the effect provides:
Pixelation reduces effective resolution to match the target system’s display resolution. Values represent block size multipliers relative to screen resolution.
Dithering applies ordered Bayer patterns to simulate additional colors through optical blending, as artists did on limited hardware. The strength parameter controls pattern visibility.
Luminance Range mapping ensures the full input image maps to available palette colors by defining minimum and maximum brightness thresholds.
Custom Palette mode allows defining your own 2-16 color palette using individual color parameters when historical accuracy isn’t required.
Parameter Configuration
With ‘Intensity’ you can control the overall strength of the effect [0.0 - 1.0]. If it is 0, the effect will not be active.
System Selection Parameters
Select the target computer system to emulate.
| Computer | Target hardware system |
| CGA Mode | CGA-specific display mode |
| Commodore 64 Mode | C64 display variant |
| MSX Mode | MSX-specific mode |
| EGA Mode | EGA display mode |
| Game Boy Mode | Game Boy variant |
| TRS-80 CoCo Mode | Color Computer mode |
| Amiga OCS Mode | Amiga display mode |
| Acorn Archimedes Mode | Archimedes mode |
Image Processing Parameters
| Pixelation | Block size for resolution reduction |
| Dithering | Bayer pattern strength |
| Range Min | Minimum luminance for mapping |
| Range Max | Maximum luminance for mapping |
Custom Palette Parameters
When Computer is set to Custom or for fine-tuning:
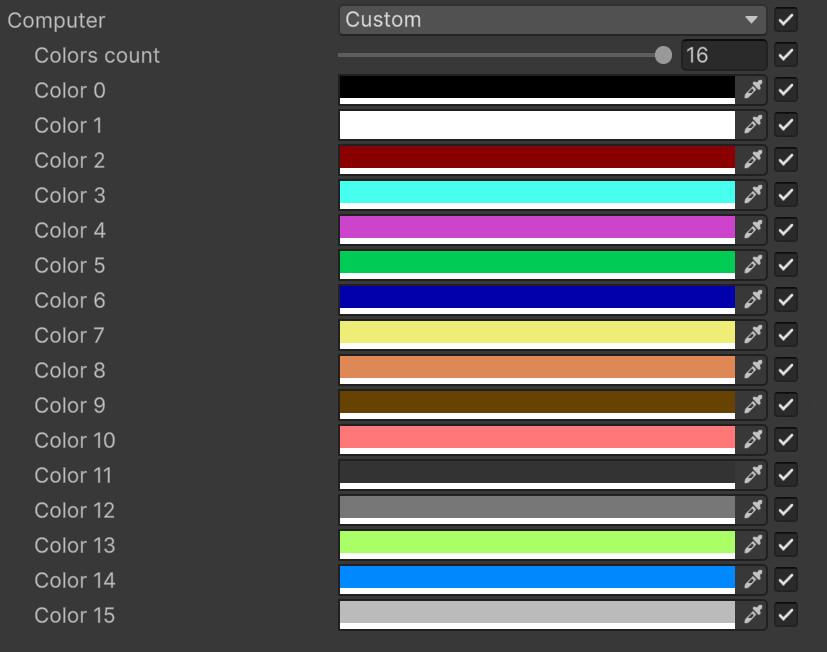
| Custom Colors Count | Number of custom palette entries |
| Palette 0-15 | Individual palette colors |
Color Grading
Standard color correction parameters apply to the final output.
| Brightness | Additive luminance offset |
| Contrast | Mid-tone contrast expansion |
| Gamma | Nonlinear tonal mapping (inverted) |
| Hue | Color wheel rotation |
| Saturation | Color intensity relative to luminance |
Runtime Control
using UnityEngine;
using UnityEngine.Rendering;
using FronkonGames.Retro.OldComputers;

// ...

[SerializeField]
private VolumeProfile volumeProfile;

// Access the effect
if (volumeProfile.TryGet(out OldComputersVolume volume))
{
    volume.intensity.value = 1.0f;
    volume.computer.value = OldComputers.Computers.Commodore64;
    volume.commodore64Mode.value = OldComputers.Commodore64Modes.Default;
    volume.pixelation.value = 3;
    volume.dithering.value = 0.3f;
    volume.rangeMin.value = 0.1f;
    volume.rangeMax.value = 0.9f;
}
Performance Characteristics
The effect executes in a single render pass with palette lookup operations.
- Pass Count: 1 blit pass.
- Texture Samples: 1 per pixel + palette lookup.
- Complexity: O(1) per pixel.
Usage Patterns and Presets
Commodore 64 Gaming
For authentic 1980s home computer aesthetic:
- Computer: Commodore 64
- C64 Mode: Default
- Pixelation: 2-4
- Dithering: 0.2-0.4
- Contrast: 1.1-1.2
- Saturation: 1.0-1.1
DOS Gaming (EGA)
For 16-color adventure/platformer look:
- Computer: EGA
- EGA Mode: Mode4Palette1Low or appropriate palette
- Pixelation: 3-5
- Dithering: 0.3-0.5
- Brightness: 0.05-0.1 (EGA was bright)
- Contrast: 1.0-1.2
Authentic Game Boy
For portable 4-shade aesthetic:
- Computer: Game Boy
- Game Boy Mode: One (original)
- Pixelation: 6-8 (160x144 resolution)
- Dithering: 0.4-0.6
- Saturation: 0.0 (force grayscale)
- Contrast: 1.2-1.4
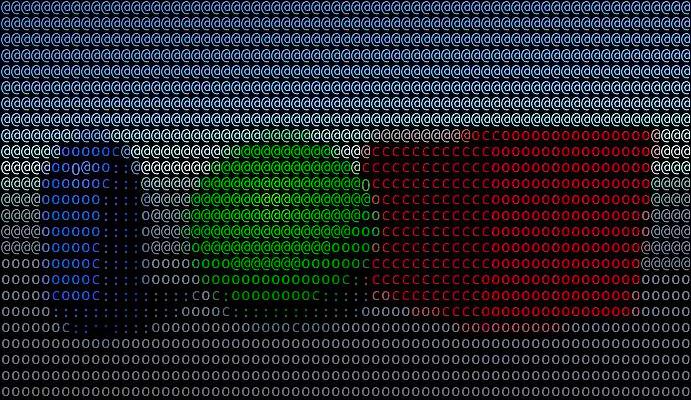
🔤 ASCII
Turn your game into living text. ‘ASCII’ reinvents the classic terminal aesthetic with modern performance, replacing pixels with dynamic character sets. Whether for a hacking minigame or a stylistic full-screen effect, it offers shape-aware sampling for surprising clarity. This is not simple text overlay—it’s an intelligent image reconstruction system that analyzes luminance and shape to select the most appropriate character for each cell.
Requisites
To ensure optimal performance and compatibility, your project must meet the following requirements:
- Unity: 6000.0.58f1 or higher.
- Universal RP: 17.0.3 or higher.
Installation Guide
Step 1: Add Renderer Feature
The effect must be registered in your project’s URP configuration:
- Locate your Universal Renderer Data asset.
- Click Add Renderer Feature and select Fronkon Games > Retro > ASCII.
Step 2: Configure the Volume
To apply the effect to your scene:
- Create a Volume component (Global or Local).
- In the Volume component, create or assign a Volume Profile.
- Click Add Override and select Fronkon Games > Retro > ASCII.
- Enable the ‘Intensity’ parameter (and any others you wish to modify).
Character-Based Image Reconstruction
Character Set Architecture
The effect operates by replacing image regions with text characters from a predefined charset texture atlas:
Charset Texture Atlas is a specially organized texture containing all available characters in a grid layout. The shader uses this as a lookup table, selecting characters based on computed cell properties. Each character occupies a uniform UV space within the atlas.
Character Selection Modes determine how the shader chooses which character represents each image cell:
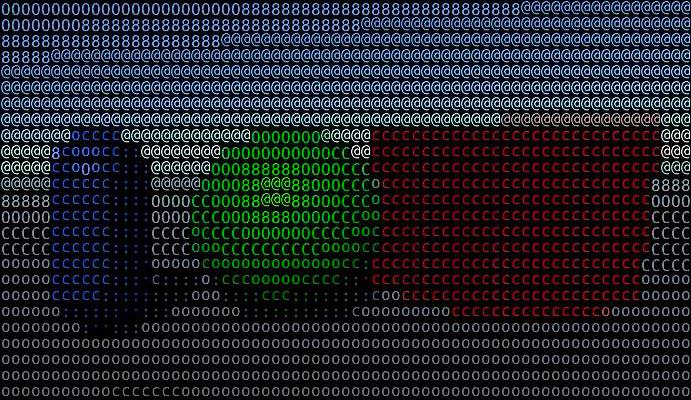
- Luminance Mode: Simple brightness matching. The shader computes average cell luminance and selects characters with similar inherent brightness. Fast and effective for general use.

- Shape-Aware Mode: Analyzes cell structure including edge detection and contrast gradients to select characters that best match local image features. Produces more detailed reconstructions at higher computational cost.
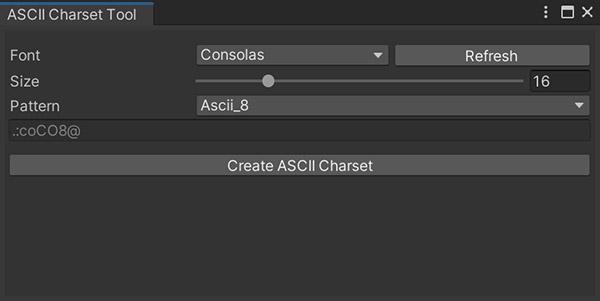
To create one use the ‘ASCII Charset Tool’ (or menu Window > Fronkon Games > Retro > ASCII > ASCII Charset Tool). With this tool you can create the necessary file to set it to ‘Charset’.
Grid-Based Processing System
Grid Resolution is determined by the Zoom parameter, which controls how many character cells fit on screen. Higher zoom values = larger characters = lower effective resolution.
Cell Processing occurs in three stages:
- Sample Phase: The shader samples the source image within each grid cell boundary.
- Analyze Phase: Computes cell properties (average color, luminance, edge presence, contrast).
- Select Phase: Chooses appropriate character index based on selection mode criteria.
- Render Phase: Samples the character from the charset atlas and applies color/background tints.
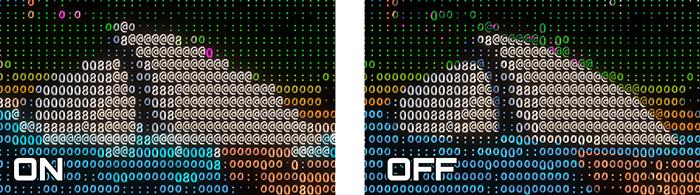
Edge Enhancement and Detail Preservation
Edge Detection analyzes neighboring cells to identify discontinuities, applying sharper character transitions at edges to preserve important visual features.
Super Sampling performs multi-point sampling within each cell for more accurate average color computation, reducing aliasing and producing smoother color transitions.
Boost amplifies character contrast, making characters “pop” against their backgrounds for improved legibility and visual impact.
Color and Background Control
Font Color applies a global tint to all characters, allowing unified color theming.
Block Color applies per-cell color variation based on computed cell properties, creating subtle depth and variation within the text mosaic.
Background sets the global background color behind all characters.
Parameter Configuration

With ‘Intensity’ you can control the overall strength of the effect [0.0 - 1.0]. If it is 0, the effect will not be active.
Character Set Parameters
| Charset | Character atlas texture |
| Selection Mode | Character selection algorithm |
| Shape Weight | Weight of shape matching vs luminance (ShapeAware mode) |
Enhancement Parameters
Advanced options for detail preservation and quality.
| Edge Detection | Enable edge-aware character selection |
| Edge Sensitivity | Edge detection threshold (when Edge Detection enabled) |
| Edge Contrast | Edge sharpness enhancement (when Edge Detection enabled) |
| Super Sampling | Enable multi-point cell sampling |
| Super Sampling Level | Quality level (when Super Sampling enabled) |
Grid and Display Parameters
Configure the character grid and visual presentation.
| Zoom | Character size scaling |
| Boost | Character contrast amplification |
| Block Color | Enable per-cell color variation |
| Text Color Blend | Font color blending method |
| Text Color | Global character tint |
| Background Color Blend | Background color blending method |
| Background Color | Global background color |
Color Grading
Standard color correction parameters apply to the final output.
| Brightness | Additive luminance offset |
| Contrast | Mid-tone contrast expansion |
| Gamma | Nonlinear tonal mapping (inverted) |
| Hue | Color wheel rotation |
| Saturation | Color intensity relative to luminance |
Runtime Control
using UnityEngine;
using UnityEngine.Rendering;
using FronkonGames.Retro.ASCII;

// ...

[SerializeField]
private VolumeProfile volumeProfile;

// Access the effect
if (volumeProfile.TryGet(out ASCIIVolume volume))
{
    volume.intensity.value = 1.0f;
    volume.selectionMode.value = ASCII.CharacterSelectionMode.ShapeAware;
    volume.zoom.value = 1.5f;
    volume.boost.value = 1.2f;
    volume.edgeDetection.value = true;
    volume.superSampling.value = true;
    volume.fontColor.value = new Color(0.2f, 1.0f, 0.2f); // Matrix green
    volume.background.value = Color.black;
}
Performance Characteristics
The effect executes in a single pass with variable computational cost based on mode selection.
- Pass Count: 1 blit pass.
- Texture Samples: 1 per cell (Luminance) or 4-9 per cell (ShapeAware/SuperSampling).
- Complexity: Luminance mode is O(1), ShapeAware is O(n) based on edge complexity.
- Performance Note: Enable Edge Detection and Super Sampling only when visual quality demands justify the cost.
Usage Patterns and Presets
Hacking/Terminal Interface
For authentic computer terminal aesthetic:
- Selection Mode: Luminance (faster for UI)
- Zoom: 0.8-1.2
- Boost: 1.2-1.5
- Font Color: Green (0.2, 1.0, 0.2) or Amber (1.0, 0.7, 0.0)
- Background: Near-black
- Edge Detection: Off
- Super Sampling: Off
- Contrast: 1.2-1.4
Artistic Shape-Aware Rendering
For detailed image reconstruction with character art:
- Selection Mode: ShapeAware
- Zoom: 1.0-2.0
- Boost: 1.0-1.3
- Font Color: White or scene-tinted
- Block Color: Slight tint for depth
- Edge Detection: On
- Super Sampling: On
- Contrast: 1.0-1.2
Matrix-Style Digital Rain
For cascading code aesthetic (combine with animation):
- Selection Mode: Luminance
- Zoom: 0.5-1.0
- Boost: 1.5-2.0
- Font Color: Bright green with alpha variation
- Background: Black
- Brightness: -0.1 to 0.1
- Saturation: 0.0-0.2 (reduce color noise)
🌈 Spectrum
A tribute to the 8-bit legend. ‘Spectrum’ accurately recreates the unique ‘color clash’ attribute limitations and vivid palette of the ZX Spectrum, delivering a distinctively crisp and colorful retro look that screams 1982. This effect is a faithful hardware emulation that replicates the distinctive color constraints that defined a generation of British computing.
Requisites
To ensure optimal performance and compatibility, your project must meet the following requirements:
- Unity: 6000.0.58f1 or higher.
- Universal RP: 17.0.3 or higher.
Installation Guide
Step 1: Add Renderer Feature
The effect must be registered in your project’s URP configuration:
- Locate your Universal Renderer Data asset.
- Click Add Renderer Feature and select Fronkon Games > Retro > Spectrum.
Step 2: Configure the Volume
To apply the effect to your scene:
- Create a Volume component (Global or Local).
- In the Volume component, create or assign a Volume Profile.
- Click Add Override and select Fronkon Games > Retro > Spectrum.
- Enable the ‘Intensity’ parameter (and any others you wish to modify).
ZX Spectrum Hardware Emulation
Attribute-Based Color System
The ZX Spectrum (1982) used a unique and restrictive color system that created its distinctive look:
Attribute Blocks divided the 256×192 pixel display into 8×8 pixel attribute cells. Each cell could display only two colors simultaneously—one foreground (ink) and one background (paper). This limitation created the famous “attribute clash” or “color clash” where objects of different colors approaching each other would cause color artifacts.
Color Palette consisted of 15 colors (8 standard + 7 bright variants). The effect replicates these specific RGB values:
- Black, Blue, Red, Magenta, Green, Cyan, Yellow, White (standard)
- Bright Blue, Bright Red, Bright Magenta, Bright Green, Bright Cyan, Bright Yellow, Bright White
Brightness Attribute provided two intensity levels per cell. Setting the brightness bit affected all pixels in the 8×8 cell, doubling the effective palette to 15 displayable colors (black was the same in both modes).
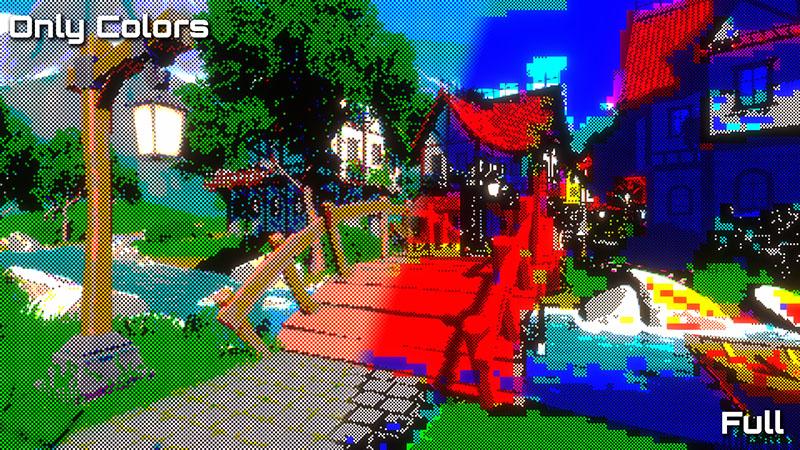
Simulation Modes allow choosing the authenticity level:
- Simple: Basic color palette matching without attribute clash simulation. Uses Spectrum colors but allows unlimited color transitions.
- Full: Complete attribute clash simulation including 8×8 cell color constraints, reproducing the authentic visual artifacts of the original hardware.
Pixel Resolution and Layout
Native Resolution of 256×192 pixels creates the characteristic blocky appearance when scaled to modern displays.
Pixel Size parameter controls how many screen pixels correspond to one Spectrum pixel. Values of 2-4 produce authentic-looking results on 1080p+ displays.
Dithering applies ordered Bayer patterns to soften the harsh color banding between attribute cells, simulating how artists worked around color limitations using stippling techniques.
Color Attribute Calibration
Brightness Full controls the intensity multiplier applied when a cell has the “bright” attribute bit set. This typically doubles the RGB values of bright colors.
Brightness Half sets the intensity for normal (non-bright) color attributes, usually at 0.85× of the full value, representing the standard intensity colors.
These parameters allow fine-tuning the contrast between bright and normal color cells, matching the particular display characteristics of 1980s CRT monitors used with the Spectrum.
Parameter Configuration
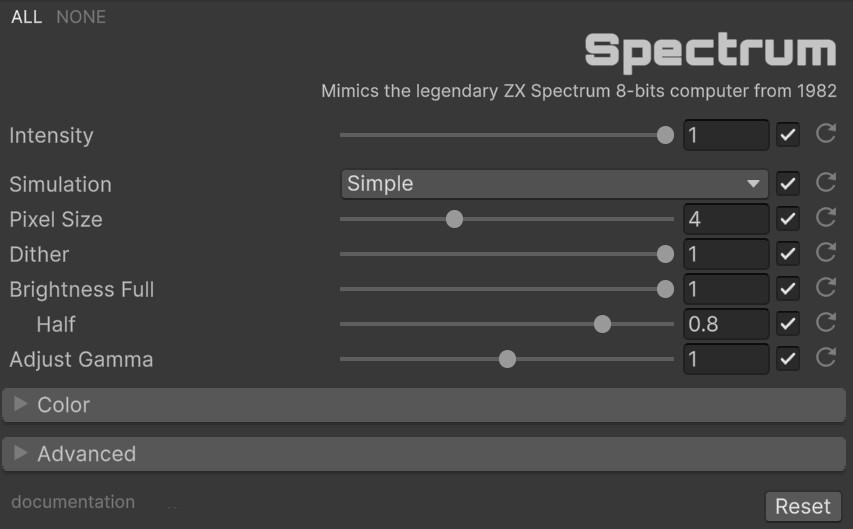
With ‘Intensity’ you can control the overall strength of the effect [0.0 - 1.0]. If it is 0, the effect will not be active.
Simulation and Resolution Parameters
Control the authenticity level and display resolution.
| Simulation | Attribute clash simulation level |
| Pixel Size | Spectrum pixel to screen pixel ratio |
| Dither | Bayer pattern strength for color transitions |
| Brightness Full | Multiplier for “bright” color attribute |
| Brightness Half | Multiplier for normal color attribute |
| Adjust Gamma | Output gamma correction |
Color Grading
Standard color correction parameters apply to the final output.
| Brightness | Additive luminance offset |
| Contrast | Mid-tone contrast expansion |
| Gamma | Nonlinear tonal mapping (inverted) |
| Hue | Color wheel rotation |
| Saturation | Color intensity relative to luminance |
Runtime Control
using UnityEngine;
using UnityEngine.Rendering;
using FronkonGames.Retro.Spectrum;

// ...

[SerializeField]
private VolumeProfile volumeProfile;

// Access the effect
if (volumeProfile.TryGet(out SpectrumVolume volume))
{
    volume.intensity.value = 1.0f;
    volume.simulation.value = Spectrum.Simulation.Full;
    volume.pixelSize.value = 2;
    volume.brightnessFull.value = 1.0f;
    volume.brightnessHalf.value = 0.85f;
    volume.dither.value = 0.2f;
}
Performance Characteristics
The effect executes in a single render pass with attribute lookup operations.
- Pass Count: 1 blit pass.
- Texture Samples: 1 per pixel + color attribute logic.
- Complexity: O(1) per pixel. Full simulation has minimal overhead compared to simple mode.
Usage Patterns and Presets
Authentic ZX Spectrum
For true 1982 hardware emulation:
- Simulation: Full
- Pixel Size: 2-4
- Brightness Full: 1.0
- Brightness Half: 0.85
- Dither: 0.0-0.1 (subtle)
- Contrast: 1.0-1.1
- Saturation: 1.0-1.1
Spectrum-Inspired Color Palette
For modern games with Spectrum colors but without restrictions:
- Simulation: Simple
- Pixel Size: 1 (native resolution)
- Dither: 0.0
- Saturation: 1.1-1.2 (Spectrum colors were vivid)
- Contrast: 1.0-1.2
Softened Retro Aesthetic
For approachable Spectrum-inspired look:
- Simulation: Full
- Pixel Size: 3-4
- Dither: 0.3-0.5
- Brightness Full: 0.9-1.0
- Brightness Half: 0.8-0.9
- Contrast: 0.9-1.0
- Gamma: 1.1-1.2 (slightly brighter)
🖥️ LCD
Pixel-perfect portability. ‘LCD’ simulates the physical grid, pixel ghosting, and sub-pixel structure of early handhelds and digital watches. With adjustable backlight bleed and dead pixels, it adds a tactile layer of realism to any diegetic interface. This effect goes beyond simple pixelation—it models the actual LCD panel hardware at a microscopic level.
Requisites
To ensure optimal performance and compatibility, your project must meet the following requirements:
- Unity: 6000.0.58f1 or higher.
- Universal RP: 17.0.3 or higher.
Installation Guide
Step 1: Add Renderer Feature
The effect must be registered in your project’s URP configuration:
- Locate your Universal Renderer Data asset.
- Click Add Renderer Feature and select Fronkon Games > Retro > LCD.
Step 2: Configure the Volume
To apply the effect to your scene:
- Create a Volume component (Global or Local).
- In the Volume component, create or assign a Volume Profile.
- Click Add Override and select Fronkon Games > Retro > LCD.
- Enable the ‘Intensity’ parameter (and any others you wish to modify).
Physical LCD Panel Simulation
LCD Grid Architecture
The effect simulates how liquid crystal displays are physically constructed, creating authentic panel appearance:
Pixel Grid Structure divides the display into individual cell compartments separated by dark grid lines. Grid Intensity controls the visibility of these cell boundaries (0 = seamless display, 1 = pronounced black grid). Grid Size adjusts the thickness and spacing of grid lines relative to pixel size.
Grid Color allows tinting the grid lines, simulating different panel types—yellowish grids for passive-matrix displays, darker grids for active-matrix TFT panels.
Bevel Effect adds a 3D appearance to grid intersections, creating the impression of physical depth where cell boundaries meet. This simulates the raised bezel structure around individual LCD cells in early panels.
Subpixel Structure
Modern LCD screens are composed of RGB subpixels, and this effect models that microscopic level:
Subpixel Layout supports both RGB (Red-Green-Blue) and BGR (Blue-Green-Red) arrangements, matching different panel manufacturers. This affects how fine details and color fringing appear.
Subpixel Rendering modulates the color output based on subpixel position, creating characteristic color fringing at high-contrast edges—visible as faint red/cyan edges on vertical lines.
Pixel Gap simulates the inactive black matrix between subpixels, creating authentic “screen door” appearance at close viewing distances.
Display Imperfections and Damage
Real LCD panels suffer from manufacturing defects and aging:
Dead Pixels simulates stuck or dead subpixels—individual RGB elements that remain permanently on or off. Creates scattered bright or dark dots across the display surface.
Backlight Bleed replicates uneven illumination in LCD panels where light leaks around panel edges, creating bright patches particularly visible in dark scenes. Bleed Intensity controls the severity of this effect.
Ghosting creates motion blur trails where previous frames persist, simulating slow LCD response times common in early panels. The Ghosting parameter controls persistence amount.
Jitter adds subtle UV coordinate instability, simulating loose ribbon cables or electrical interference causing the image to “dance” slightly.
Desync creates scanline offset effects where portions of the image shift horizontally, mimicking timing synchronization issues in analog LCD interfaces.
Parameter Configuration
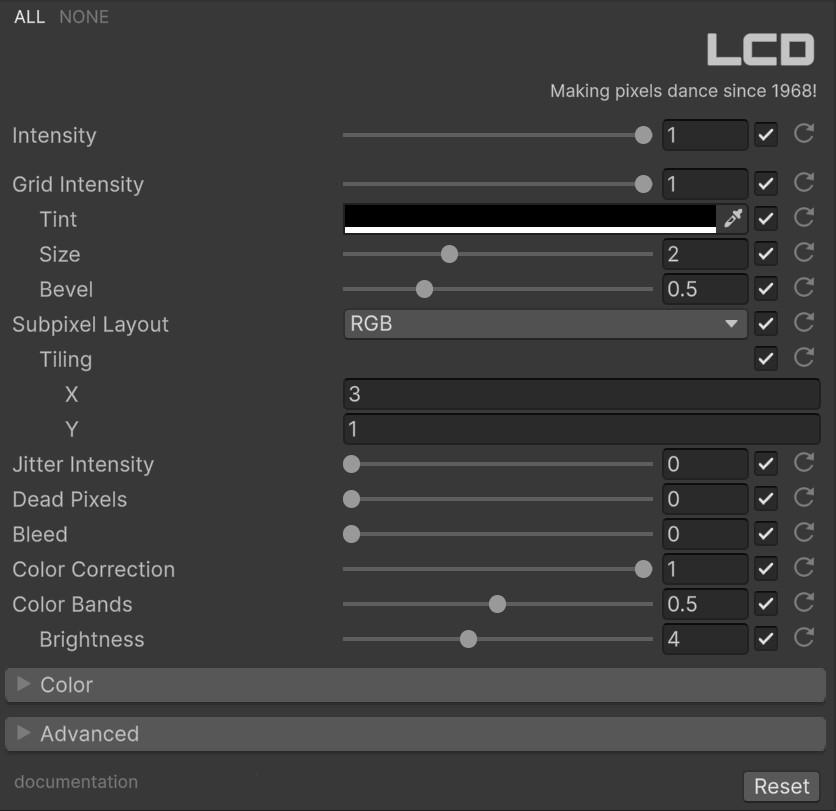
With ‘Intensity’ you can control the overall strength of the effect [0.0 - 1.0]. If it is 0, the effect will not be active.
Grid Structure Parameters
| Grid Intensity | Visibility of cell grid lines |
| Grid Color | Color of grid lines |
| Grid Size | Grid line thickness/spacing |
| Grid Bevel | 3D depth at grid intersections |
Subpixel Parameters
| Subpixel Layout | Subpixel color arrangement |
| Tiling Factor | Subpixel tiling multiplier |
Noise and Artifacts Parameters
| Jitter Intensity | UV coordinate instability |
| Dead Subpixel Density | Stuck/dead subpixel simulation |
| Dead Subpixel Seed | Random seed for dead pixels |
| Dead Subpixel Color | Tint for dead subpixels |
| Bleed Intensity | Backlight bleed amount |
| Bleed Focus | Bleed effect sharpness |
| Bleed Color | Bleed light tint |
| Color Correction Intensity | Subpixel color correction strength |
| Color Bands Intensity | Color banding simulation |
| Color Bands Brightness | Brightness of color bands |
Color Grading
Standard color correction parameters apply to the final output.
| Brightness | Additive luminance offset |
| Contrast | Mid-tone contrast expansion |
| Gamma | Nonlinear tonal mapping (inverted) |
| Hue | Color wheel rotation |
| Saturation | Color intensity relative to luminance |
Runtime Control
using UnityEngine;
using UnityEngine.Rendering;
using FronkonGames.Retro.LCD;

// ...

[SerializeField]
private VolumeProfile volumeProfile;

// Access the effect
if (volumeProfile.TryGet(out LCDVolume volume))
{
    volume.intensity.value = 1.0f;
    volume.gridIntensity.value = 0.7f;
    volume.gridSize.value = 2.0f;
    volume.gridColor.value = new Color(0.1f, 0.1f, 0.1f);
    volume.subpixelLayout.value = LCD.SubpixelLayout.RGB;
    volume.bleedIntensity.value = 0.3f;
    volume.ghosting.value = 0.2f;
    volume.deadPixels.value = 0.05f;
}
Performance Characteristics
The effect executes in a single render pass with procedural subpixel calculations.
- Pass Count: 1 blit pass.
- Texture Samples: 1 per pixel + procedural subpixel generation.
- Complexity: O(1) per pixel with minimal overhead for grid calculations.
Usage Patterns and Presets
Early Handheld Gaming (Game Gear, Lynx)
For 1990s portable console aesthetic:
- Grid Intensity: 0.6-0.8
- Grid Size: 1.5-2.5
- Grid Color: Dark blue-gray
- Bevel: 0.1-0.2
- Subpixel Layout: RGB
- Pixel Gap: 0.1-0.2
- Bleed Intensity: 0.2-0.4
- Ghosting: 0.1-0.3
- Contrast: 1.1-1.3
- Saturation: 0.9-1.0 (slightly muted)
Damaged/Defective Display
For horror or industrial sci-fi diegetic screens:
- Grid Intensity: 0.4-0.6
- Dead Pixels: 0.1-0.3
- Jitter: 0.2-0.4
- Desync: 0.1-0.2
- Bleed Intensity: 0.3-0.5
- Ghosting: 0.3-0.5
- Brightness: -0.1 to 0.0 (dim)
Clean Digital Watch Interface
For sharp, tiny LCD aesthetic:
- Grid Intensity: 0.8-0.95
- Grid Size: 0.5-1.0
- Grid Color: Near-black
- Bevel: 0.0 (flat)
- Pixel Gap: 0.3-0.5
- Bleed: 0.0
- Ghosting: 0.0
- Contrast: 1.3-1.5 (high contrast)
- Saturation: 0.0 (monochrome simulation)
📷 Vintage Filters
Instant nostalgia at your fingertips. ‘Vintage Filters’ brings a curated collection of cinematic color grading presets inspired by classic instant film and modern social apps. Add warmth, fade, and character to your scenes with a single click. This effect provides professional-grade color grading through a library of pre-configured filter pipelines that emulate iconic photographic looks.
Requisites
To ensure optimal performance and compatibility, your project must meet the following requirements:
- Unity: 6000.0.58f1 or higher.
- Universal RP: 17.0.3 or higher.
Installation Guide
Step 1: Add Renderer Feature
The effect must be registered in your project’s URP configuration:
- Locate your Universal Renderer Data asset.
- Click Add Renderer Feature and select Fronkon Games > Retro > Vintage Filters.
Step 2: Configure the Volume
To apply the effect to your scene:
- Create a Volume component (Global or Local).
- In the Volume component, create or assign a Volume Profile.
- Click Add Override and select Fronkon Games > Retro > Vintage Filters.
- Enable the ‘Intensity’ parameter (and any others you wish to modify).
Cinematic Color Grading System
Filter Preset Architecture
Vintage Filters implements a library of curated color grading presets, each representing a distinct photographic or cinematic aesthetic:
1977 recreates the warm, faded aesthetic of vintage color film from the late 1970s, with characteristic yellow-orange color cast and reduced blue channel response.
Apollo simulates NASA mission photography with high contrast, slightly desaturated colors, and emphasis on clarity—perfect for sci-fi and documentary aesthetics.
Gotham creates the blue-tinted, high-contrast look popularized by modern urban photography and graphic novels.
Hudson reproduces the warm-toned, slightly faded Instagram-inspired aesthetic with enhanced highlights and subtle vignette.
Kelvin applies extreme warming with strong orange/yellow cast, simulating tungsten lighting and “golden hour” photography.
Noir creates dramatic high-contrast monochrome with deep blacks and bright highlights, inspired by classic film noir cinematography.
Toaster simulates the warm, brown-tinted look of early mobile phone cameras with light leak simulation and color fringing.
X-Pro (Cross-Processing) recreates the chemical cross-processing technique where slide film is developed in negative chemistry, creating characteristic color shifts—particularly strong magenta/green channel inversion.
Dynamic Parameter System
Each filter exposes filter-specific parameters that adjust the characteristics of that particular look:
Warmth Controls adjust the color temperature balance—positive values shift toward orange/red, negative toward blue/cyan.
Contrast and Levels modify the tone curve shape, controlling shadow depth, mid-tone brightness, and highlight rolloff.
Overlay and Blend parameters control how filter textures or light leak overlays integrate with the base image.
Fade and Haze introduce atmospheric diffusion and reduced contrast typical of aged film stock or lens fogging.
Filter Pipeline
The effect applies color grading through a multi-stage process:
- Color Space Conversion: RGB to working color space (usually HSV or YUV)
- Curve Application: Tone curve adjustments (shadow/mid/highlight)
- Color Matrix: Channel mixing and color balance
- Overlay Application: Light leaks, vignette, grain textures
- Final Grade: Brightness, contrast, saturation adjustments
Parameter Configuration
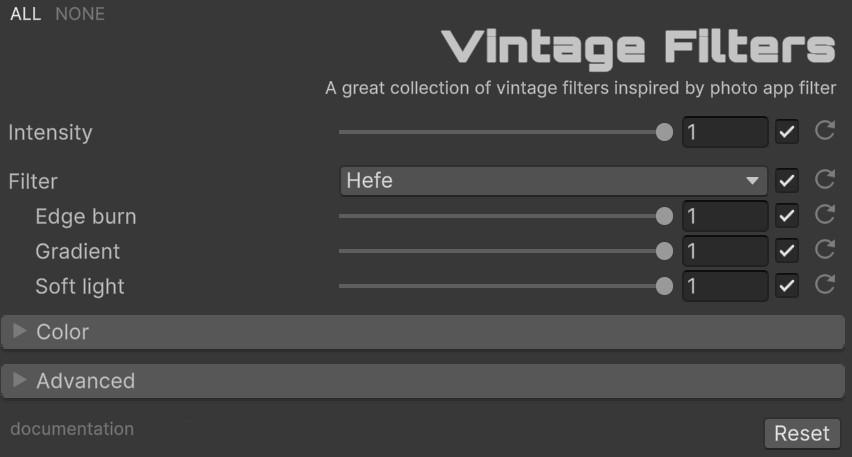
With ‘Intensity’ you can control the overall strength of the effect [0.0 - 1.0]. If it is 0, the effect will not be active.
Filter Selection
Choose the base photographic aesthetic.
| Filter | Color grading preset |
Filter-Specific Parameters
Each filter exposes unique parameters that appear conditionally based on the selected filter:
| Filter | Parameters |
|---|---|
| Amaro | Overlay |
| Hefe | Edge burn, Gradient, Soft light |
| Hudson | Overlay |
| Rise | Overlay |
| Sierra | Overlay |
| Toaster | Overlay warm |
| Sepia | Intensity |
| Kodachrome | Enhancement, Warmth |
| Polaroid | Overexposure, Softness |
| Cross Process | Color shift, Contrast boost |
| Bleach Bypass | Desaturation, Contrast |
| Vintage 80s | Neon intensity, Color pop |
| Film Grain | Intensity, Size |
| Technicolor | Saturation, Color balance |
| Daguerreotype | Contrast, Silvering |
| Cyanotype | Blue intensity |
| Western | Warmth, Dust |
| Night Vision | Gain, Noise |
| Infrared | Foliage, Bloom |
Color Grading
Standard color correction parameters apply after the filter processing.
| Brightness | Additive luminance offset |
| Contrast | Mid-tone contrast expansion |
| Gamma | Nonlinear tonal mapping (inverted) |
| Hue | Color wheel rotation |
| Saturation | Color intensity relative to luminance |
Runtime Control
using UnityEngine;
using UnityEngine.Rendering;
using FronkonGames.Retro.VintageFilters;

// ...

[SerializeField]
private VolumeProfile volumeProfile;

// Access the effect
if (volumeProfile.TryGet(out VintageFiltersVolume volume))
{
    volume.intensity.value = 1.0f;
    volume.filter.value = VintageFilters.Filters.Toaster;
    // Filter-specific parameters
    volume.toasterOverlayWarm.value = 0.5f;
    volume.toasterContrast.value = 1.2f;
    volume.toasterFade.value = 0.3f;
}
Performance Characteristics
The effect executes in a single render pass with color matrix operations and LUT-based grading.
- Pass Count: 1 blit pass.
- Texture Samples: 1 per pixel + optional LUT/overlay textures.
- Complexity: O(1) per pixel regardless of filter complexity.
Usage Patterns and Presets
Warm Summer Photography (Hudson)
For golden-hour, travel photography aesthetic:
- Filter: Hudson
- Intensity: 0.8-1.0
- Hudson Warmth: 0.3-0.5
- Hudson Contrast: 1.1-1.3
- Hudson Overlay: 0.2-0.4
- Saturation: 1.1-1.3
Urban Drama (Gotham)
For high-contrast, moody cityscapes:
- Filter: Gotham
- Intensity: 0.9-1.0
- Gotham Contrast: 1.3-1.5
- Gotham Vignette: 0.4-0.6
- Brightness: -0.1 to 0.0
- Saturation: 0.7-0.9
Classic Film Emulation (X-Pro)
For chemical cross-processing look:
- Filter: X-Pro
- Intensity: 0.8-1.0
- X-Pro Contrast: 1.2-1.4
- X-Pro Fade: 0.1-0.2
- Saturation: 1.1-1.3 (colors shift dramatically)
Vintage Documentary (Apollo)
For NASA/mission photography aesthetic:
- Filter: Apollo
- Intensity: 0.7-0.9
- Apollo Contrast: 1.2-1.4
- Apollo Clarity: 0.3-0.5
- Saturation: 0.8-1.0
- Sharpness: High
🎮 Handheld 8-Bit
Pocket-sized nostalgia. ‘Handheld 8-Bit’ captures the iconic green-tinted, four-shade aesthetic of the world’s most famous portable console: Game Boy. Perfect for flashbacks, minigames, or giving your entire project that beloved dot-matrix feel. This effect authentically replicates the 4-shade monochrome LCD display that defined portable gaming in the late 1980s and early 1990s.
Requisites
To ensure optimal performance and compatibility, your project must meet the following requirements:
- Unity: 6000.0.58f1 or higher.
- Universal RP: 17.0.3 or higher.
Installation Guide
Step 1: Add Renderer Feature
The effect must be registered in your project’s URP configuration:
- Locate your Universal Renderer Data asset.
- Click Add Renderer Feature and select Fronkon Games > Retro > Handheld 8-Bit.
Step 2: Configure the Volume
To apply the effect to your scene:
- Create a Volume component (Global or Local).
- In the Volume component, create or assign a Volume Profile.
- Click Add Override and select Fronkon Games > Retro > Handheld 8-Bit.
- Enable the ‘Intensity’ parameter (and any others you wish to modify).
Classic LCD Hardware Simulation
The 4-Shade Display System
The original handheld console (1989) used a passive-matrix LCD display with unique characteristics that this effect faithfully reproduces:
Four Gray Shades - The display could only show four colors (or rather, shades):
- Black: Fully activated pixels
- Dark Gray: Medium activation
- Light Gray: Low activation
- White/Transparent: No activation
The Palette parameters allow customizing these four shades. The default is the iconic “Pee-yellow” phosphor look (0x9bbc0f background, 0x8bac0f light, 0x306230 dark, 0x0f380f black), but you can create custom looks like the Game Boy Pocket (silver), Game Boy Light (backlit), or modern IPS mod aesthetics.
Luminance Threshold determines how input image brightness maps to the four output shades. The effect samples input luminance and quantizes it into four discrete levels based on configurable thresholds.
Physical LCD Characteristics
Pixel Grid Structure mimics the dot-matrix layout where each “pixel” is actually a small liquid crystal cell. Pixel Size controls how large each LCD dot appears, while Pixel Distance defines the gap between cells—simulating the visible grid lines on early LCD panels.
Grid Color sets the color of the inactive space between pixels. For authentic Game Boy, this is slightly greenish-yellow. For Pocket versions, it’s more silver/gray.
Luminosity simulates the backlight strength or reflectivity of the panel. Higher values create brighter, more visible output—important since original units had no backlight and relied on ambient light reflecting off a rear reflector.
Shadow Size creates a subtle drop shadow effect behind pixels, simulating the slight parallax gap between the LCD glass and the reflective backing layer beneath it.
Color Grading for Monochrome Aesthetic
The effect includes specific color grading parameters that work together with the palette system. Since the original hardware was monochrome (effectively), the color grading allows stylistic adjustments:
Brightness and Contrast work together with Threshold to determine how aggressively the image quantizes into the four shades.
Gamma at 0.9 (default) creates the slightly elevated black point typical of LCD displays with imperfect contrast ratios.
Saturation can be reduced to 0 for pure grayscale, or left at higher values for stylized “what if it was in color” looks.
Parameter Configuration
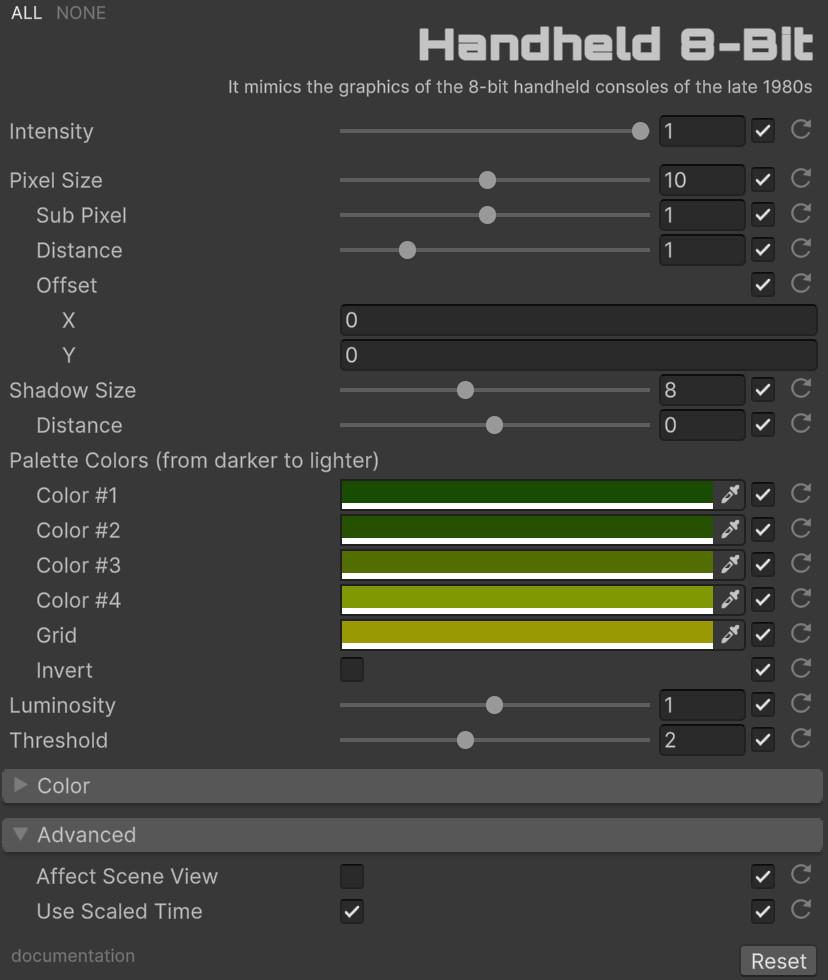
With ‘Intensity’ you can control the overall strength of the effect [0.0 - 1.0]. If it is 0, the effect will not be active.
Display Structure Parameters
Control the physical LCD grid and pixel layout.
| Pixel Size | LCD dot physical size |
| Subpixel Size | Size of individual RGB subpixels |
| Pixel Distance | Gap between LCD cells |
| Pixel Offset | Subpixel arrangement offset |
| Shadow Size | Drop shadow behind pixels |
| Shadow Distance | Shadow offset distance |
4-Shade Palette Parameters
Define the four luminance levels that create the monochrome look.
| Color 1 | Darkest shade (black equivalent) |
| Color 2 | Dark gray shade |
| Color 3 | Light gray shade |
| Color 4 | Lightest shade (white equivalent) |
| Grid Color | Color of inactive grid |
| Invert | Invert the palette order |
| Luminosity | Backlight/reflectivity boost |
| Threshold | Luminance quantization threshold |
Color Grading
Standard color correction parameters apply before the palette quantization.
| Brightness | Additive luminance offset |
| Contrast | Mid-tone contrast expansion |
| Gamma | Nonlinear tonal mapping (inverted) |
| Hue | Color wheel rotation |
| Saturation | Color intensity relative to luminance |
Runtime Control
using UnityEngine;
using UnityEngine.Rendering;
using FronkonGames.Retro.Handheld8Bit;

// ...

[SerializeField]
private VolumeProfile volumeProfile;

// Access the effect
if (volumeProfile.TryGet(out Handheld8BitVolume volume))
{
    volume.intensity.value = 1.0f;
    volume.pixelSize.value = 6.0f;
    volume.pixelDistance.value = 0.15f;
    volume.gridColor.value = new Color(0.61f, 0.74f, 0.06f); // Classic Game Boy green
    volume.luminosity.value = 1.3f;
    volume.threshold.value = 0.25f;
    // Set the four-shade palette
    volume.color0.value = new Color(0.06f, 0.22f, 0.06f);  // Black
    volume.color1.value = new Color(0.19f, 0.38f, 0.19f);  // Dark gray
    volume.color2.value = new Color(0.55f, 0.67f, 0.06f);  // Light gray
    volume.color3.value = new Color(0.61f, 0.74f, 0.06f);  // White/background
}
Performance Characteristics
The effect executes in a single render pass with palette quantization.
- Pass Count: 1 blit pass.
- Texture Samples: 1 per pixel.
- Complexity: O(1) per pixel with efficient threshold branching.
Usage Patterns and Presets
Original Game Boy (1989)
For the classic “Pee-yellow” aesthetic:
- Pixel Size: 4-6
- Pixel Distance: 0.1-0.2
- Grid Color: #9bbc0f
- Luminosity: 1.0-1.2 (no backlight)
- Threshold: 0.333
- Color 0: #0f380f (black)
- Color 1: #306230 (dark gray)
- Color 2: #8bac0f (light gray)
- Color 3: #9bbc0f (white/background)
- Contrast: 1.2-1.4
- Gamma: 0.9
- Saturation: 0.0-0.2
Game Boy Pocket (1996)
For the sleek silver redesign:
- Grid Color: #c0c0c0 (silver)
- Color 0: #000000
- Color 1: #606060
- Color 2: #a0a0a0
- Color 3: #c0c0c0
- Contrast: 1.3-1.5 (higher contrast screen)
- Saturation: 0.0
Modern “IPS Mod” Style
For backlit, vibrant reinterpretation:
- Luminosity: 2.0-3.0
- Grid Color: Pure black
- Custom palette with more saturated greens
- Brightness: 0.1-0.2
- Contrast: 1.2-1.3
Monochrome Dreams
For dramatic black and white aesthetic:
- Threshold: 0.5
- Color 0: #000000 (black)
- Color 1: #404040 (near black)
- Color 2: #c0c0c0 (light gray)
- Color 3: #ffffff (white)
- Saturation: 0.0
- Contrast: 1.5-2.0
F.A.Q.
Effect Not appearing
If the effect doesn’t appear in your scene:
- Verify Renderer Feature: Check that the renderer feature is added to your Universal Renderer Data asset.
- Check Volume Profile: Ensure a Volume component exists in your scene with the effect override enabled.
- Confirm Intensity: Verify that the Intensity parameter is set to a value greater than 0.0 and enabled.
- Camera Settings: Check that your camera has Post Processing enabled in the Camera component.
How to make the effect also affect the UI?
In order for the UI not to be affected by the effect, you should set the ‘Render Mode’ of your canvas from ‘Screen Space - Overlay’ to ‘Screen Space - Camera’ and dragging your camera with to ‘Render Camera’.
Note that when you make this change, the coordinates of your UI will be in camera space, so you will have to change them.
When Bloom is added, its intensity is too low or the effect stops working.
Bloom’s URP Unity effect is not compatible with postprocessing effects based on ScriptableRendererFeature (like this one).
You will have to add your own one based on ScriptableRendererFeature or you can use this one at no cost ;)
Can I use it in a material?
Yes! Any effect can easily be used on a material. Just follow these steps:
- In the ‘Project’ window, open the ‘Create’ menu with the right mouse button and select ‘Create > Render Texture’.
- Create a new camera and in ‘Output Texture’ select the Render Texture previously created. Remember to activate ‘Post Processing’ and select in ‘Renderer’ where you have the effect added.
- In the material you want to use, select in ‘Base Map’ the Render Texture.
Support
Do you have any problem or any suggestions? Send me an email to fronkongames@gmail.com and I’ll be happy to help you.
Remember that if you want to inform me of an error, it would help me if you sent to me the log file.
If you are happy with this asset, consider write a review in the store
❤️ thanks! ❤️
If you are happy with this asset, consider write a review in the store
❤️ thanks! ❤️